GEO S12 HARDWARE SETUP PROCEDURE
System Manual GEOS12 LS18 Page 45 / 95
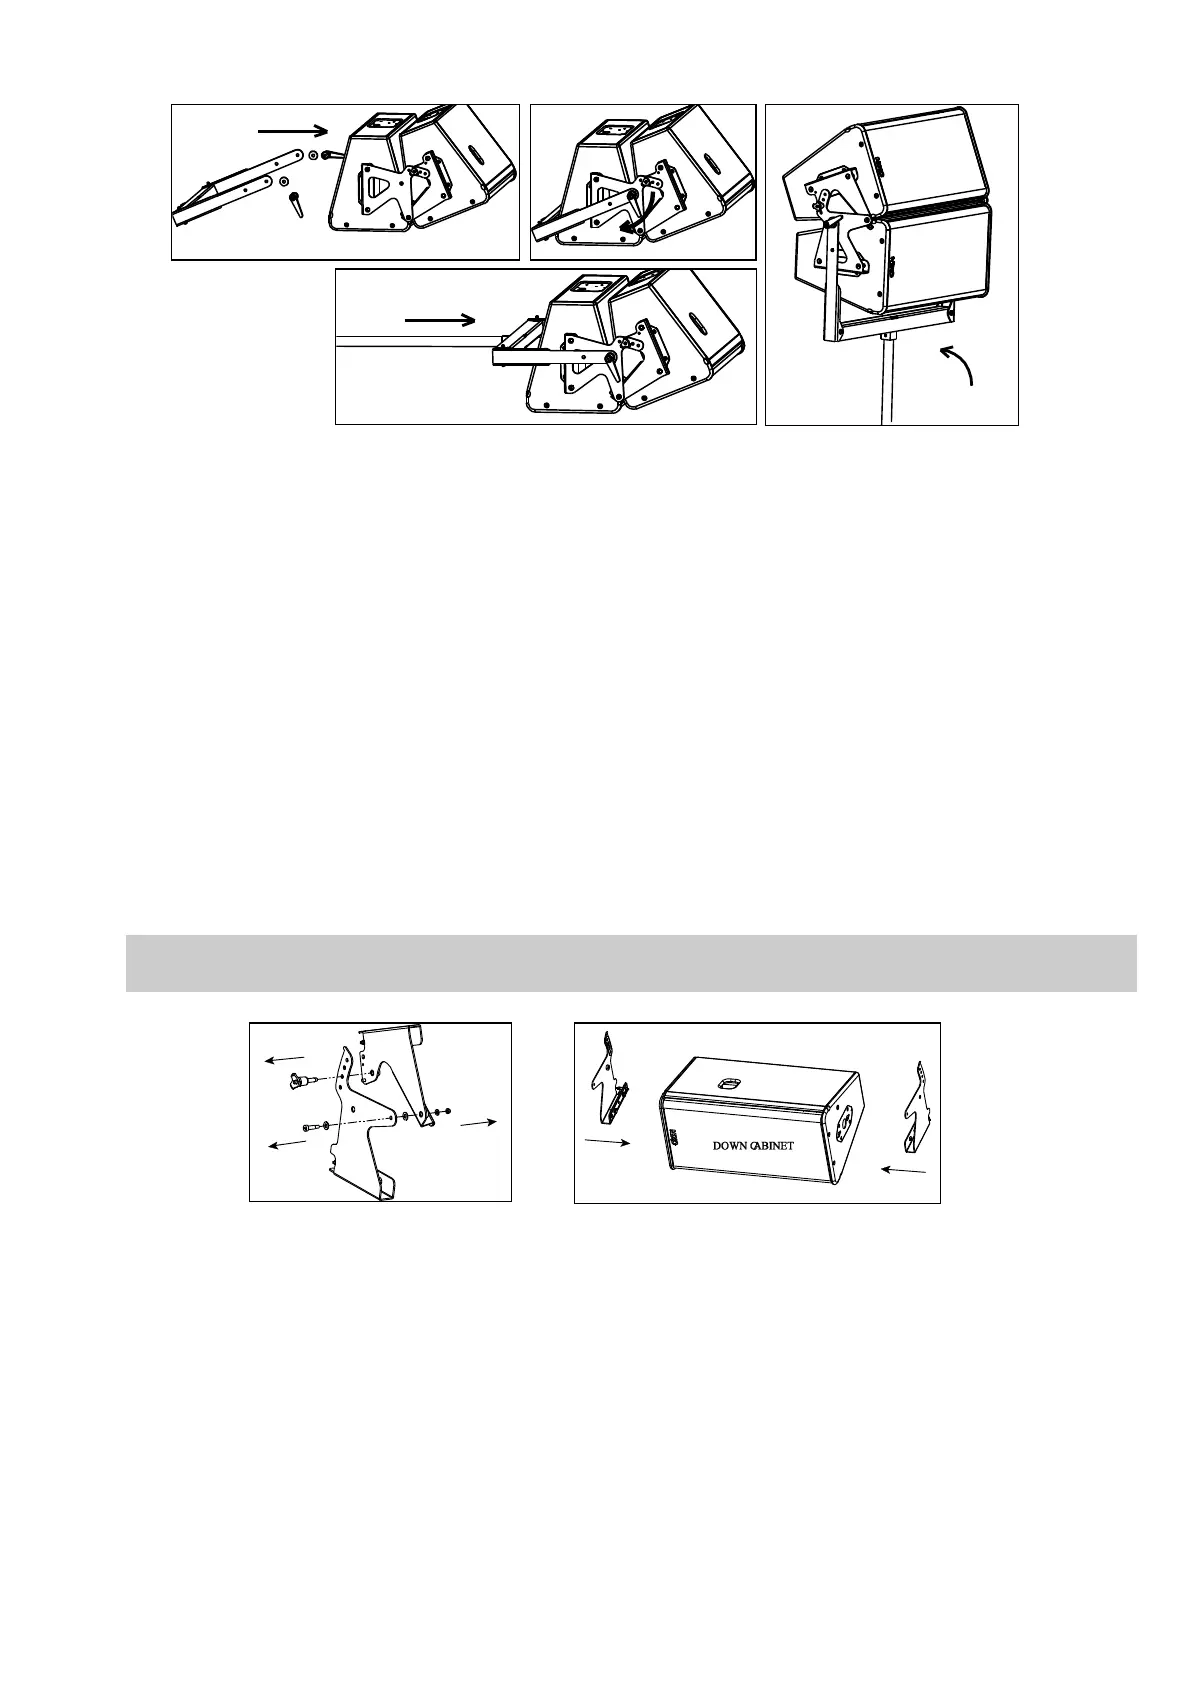
Alternative Procedure (“Walder” procedure)
Below described procedure required 2 additional 8x20 quick release pins (VXT-BL820)
- Split the GPT-PSBRK side plates by removing screws and bolt
- Slide GPT-PSBRK lower half-plates into lower GEO S12 connecting plate oblong holes
- Lock safety pins into lower GEO S12 connecting plate
- Position “U” bracket over these lower half plates, align centre holes
- Insert adjustment handles, adjust vertical angle and tight the handles to prevent GEO S12 from rotating around “U” bracket
- Lift assembly on Wind Up stand or on LS18 with PLSTD pole stand
- Slide GPT-PSBRK upper half-plates into upper GEO S12 connecting plate oblong holes
- Lock safety pins into upper GEO S12 connecting plate
- Lift upper GEO S12 on top of lower one, and connect them together by inserting 8x20 quick release pins in articulation
holes
- Adjust inter-cabinet angle and lock to required angle value with quick release pins
IMPORTANT
Ensure that safety pins are properly locked into GEO S12 connecting panels.
 Loading...