1-6 | ni.com
Chapter 1 Getting Started with the cDAQ Chassis
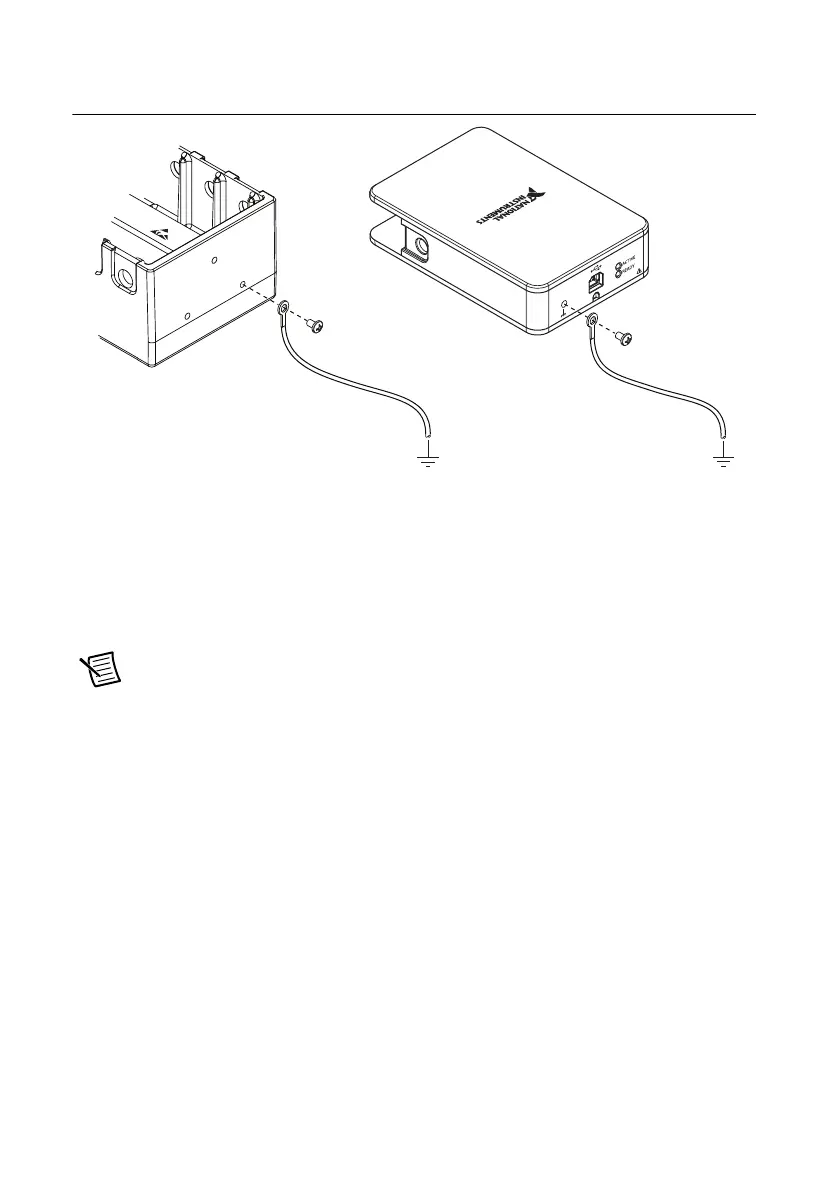
Figure 1-4. Ring Lug Attached to Ground Terminal
5. Make sure that no signals are connected to the C Series I/O module.
6. Align the C Series I/O module with the cDAQ chassis slot.
7. Squeeze both C Series I/O module latches, insert the I/O module into the module slot, and
press until both latches lock the module in place.
8. Wire the C Series I/O module as indicated in the C Series module documentation.
Note Connect I/O cable shields to the chassis grounding screw, shown in
Figure 1-4, unless otherwise specified in the C Series module documentation. Refer
to the Chassis Grounding Screw section for more information about making this
connection.
9. Connect the cDAQ chassis with the USB cable to any available USB port on your
computer. If you are using a locking USB cable, use the jackscrew to securely attach the
cable to the chassis.
10.
(NI cDAQ-9174/9178) Connect the supplied power source to the cDAQ chassis. The
NI cDAQ-9174/9178 chassis requires an external power supply that meets the
specifications listed in the specifications document for your cDAQ chassis.
11. Double-click the Measurement & Automation icon on the desktop to open MAX.
12. Expand Devices and Interfaces and verify that your chassis is listed there. If your chassis
does not appear, press <F5> to refresh the view in MAX. If your chassis is still not
recognized, refer to ni.com/support/daqmx for troubleshooting information.
13. Self-test your chassis in MAX by expanding Devices and Interfaces, right-clicking
NI cDAQ-<model number>, and selecting Self-Test. Self-test performs a brief test to
determine successful chassis installation. When the self-test finishes, a message indicates