3s
3s
1. Entrare in programmazione primo livello (premendo P1 e P2 per almeno 3 secondi)
2. Selezionare la funzione premendo P1 fino a portare il Led lampeggiante sul punto desiderato
3. Entrare nel secondo livello tenendo premuto il tasto P2 per almeno 3 secondi
3s oppure 60s,
oppure
1. Premere P1 per almeno 3 secondi, oppure attendere 1 minuto,
oppure spegnere alimentazione
4.2.1) Programmazione primo livello: funzioni
Nel primo livello è possibile attivare o disattivare le funzioni.
Nel primo livello il Led OK è sempre acceso, i Led INGRESSI
accesi indicano le funzioni attive, i Led spenti indicano le funzioni
disattive.
Il Led lampeggiate indica la funzione selezionata, se il lampeggio
è breve la funzione è disattiva, se il lampeggio è lungo la
funzione è attiva.
29
I
3s
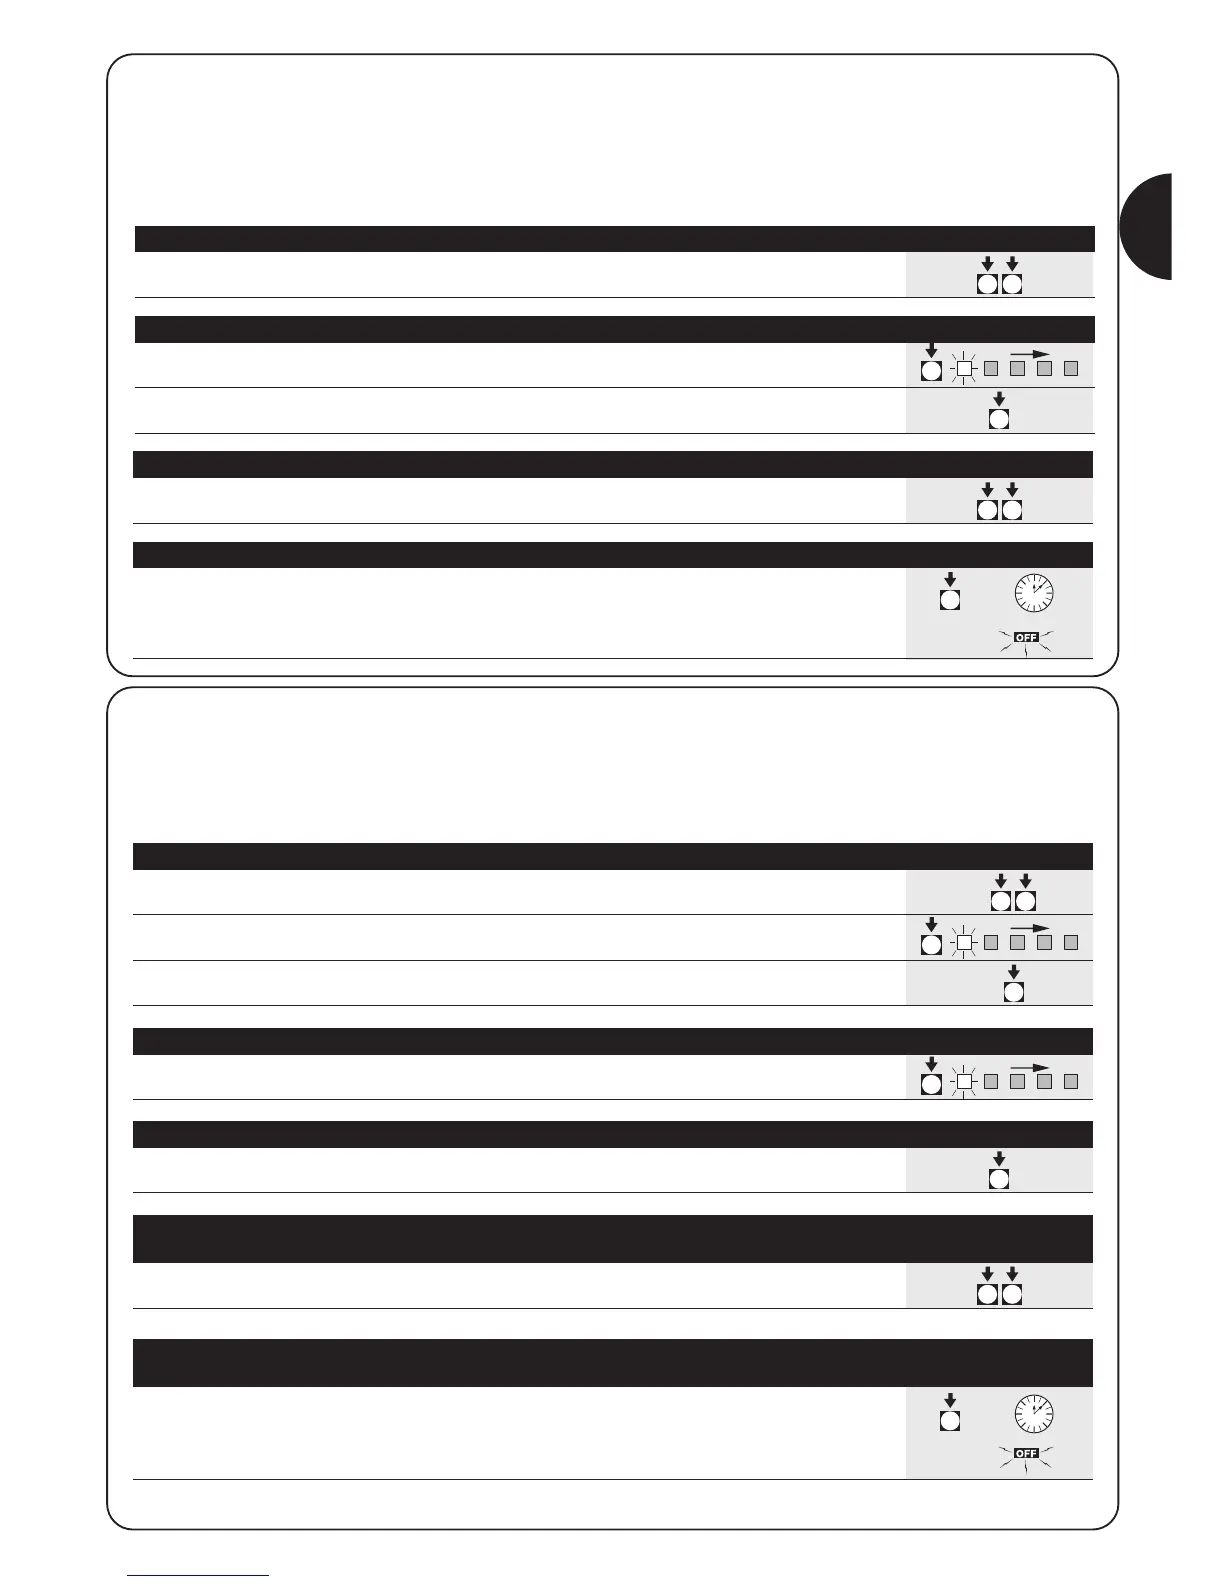
Tabella “B1” Per entrare nella programmazione primo livello: Esempio
1. Tenere premuti i tasti P1 e P2 per almeno 3 secondi
Un lampeggio veloce di tutti i Led indica che si è entrati in programmazione
3s
1. Premere ripetutamente P1 fino a portare il Led lampeggiante sulla la funzione desiderata
2. Premere P2 per attivare o disattivare la funzione.Se il lampeggiante è breve
la funzione è disattivata,se il lampeggio è lungo la funzione è attiva
Tabella “B3” Per uscire dal primo livello confermando le modifiche: Esempio
1. Tenere premuti i tasti P1 e P2 per almeno 3 secondi
Tabella “B4” Per uscire dal primo livello annullando le modifiche: Esempio
1. Premere P1 per almeno 3 secondi, oppure attendere 1 minuto,
oppure spegnere alimentazione
4.2.2) Programmazione secondo livello: parametri
Nel secondo livello è possibile scegliere il parametro relativo alla
funzione. Il secondo livello si raggiunge solo passando per il primo
livello.
Nel secondo livello il Led OK lampeggia velocemente mentre i
Led INGRESSI indicano il parametro selezionato.
Tabella “C1” Per entrare nella programmazione secondo livello: Esempio
Tabella “C2” Per scegliere il parametro: Esempio
1. Premere ripetutamente P2 fino a portare il Led sul parametro desiderato
Tabella “C3” Per tornare al primo livello: Esempio
1. Premere P1
3s
Tabella “C4” Per uscire dal primo livello confermando le modifiche: Esempio
(anche quelle del secondo livello)
1. Tenere premuti i tasti P1 e P2 per almeno 3 secondi