42
OpenSPR 1-Channel Operation Manual V4.1.01
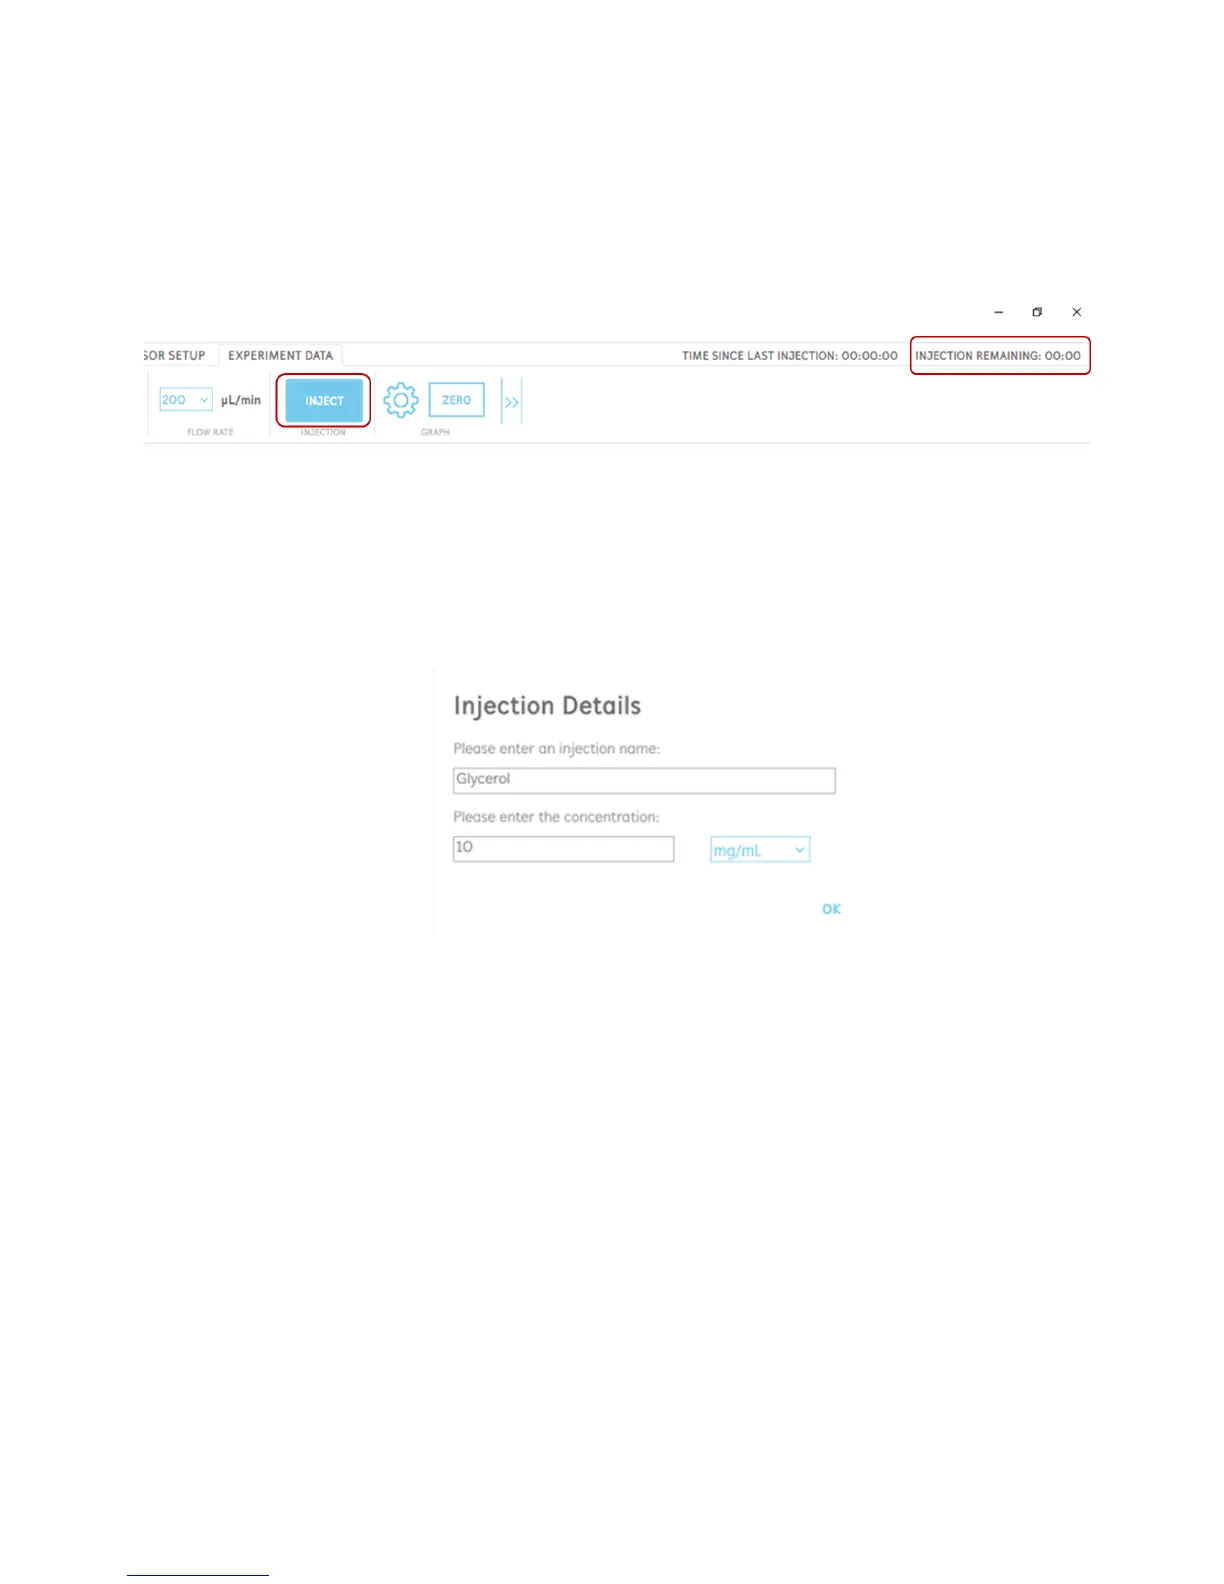
4. Click “Inject” in the software to introduce your sample over the sensor [Figure 2.51]. At
this time, the OpenSPR will automatically introduce your sample loaded into the sample
loop into the running buffer flow to be exposed over the sensor. Other instrument
functions will be disabled in the software during this time until the injection is complete.
The time remaining in the injection will be shown in the upper right corner of the software
for the user to reference.
Figure 2.51 Click the inject button to introduce your sample over the sensor. The time remaining in the injection is shown above
the menu bar.
5. When an injection is made, an Injection Details box will appear [Figure 2.52]. In this box,
the user can input the sample name as well as the concentration. It is highly
recommended to fill in these details as it will be used to identify the injection in the data
analysis.
Figure 2.52 Injection details box to fill in sample name and concentration.
Clicking “Ok” will log the injection, and the injection will be labelled appropriately on the
graph. Injections will also be labelled with 2 lines; a solid line when the injection begins,
and then a dotted line when the injection is complete [Figure 2.53]. After the injection is
complete, the sample will be replaced with running buffer.