4
2 INSTALLATION
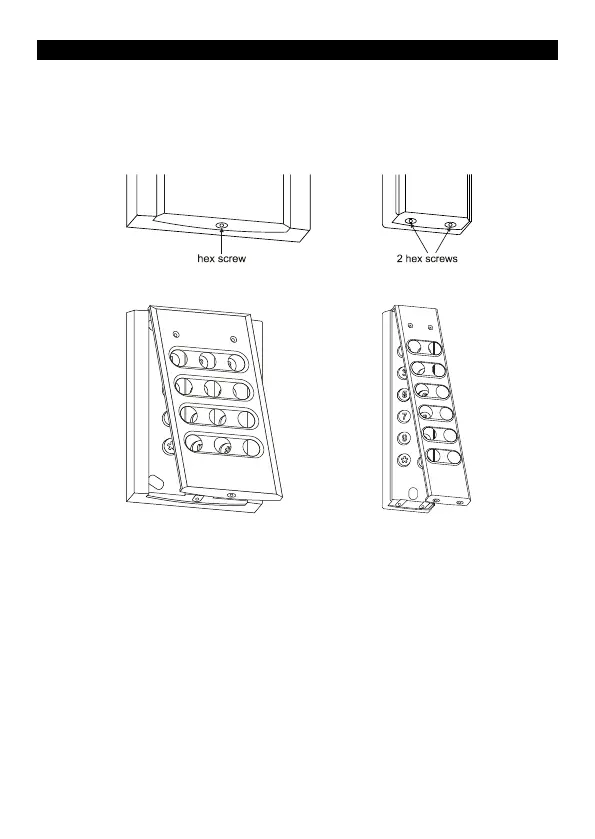
2.1 MOUNTING
1. Use the supplied template to mark the location of the cable exit and
mounting screws. Drill out all points as necessary.
2. Using the supplied key remove the hex Allen screw(s) at the bottom
of the keypad that secure the fascia to the chassis.
3. Swing the fascia up from the bottom and it will unhook at the top
allowing access to the mounting screw holes.
4. Attach the supplied cable by plugging in the connector (you may
need to use a screw driver to push the connector around the edges
to ensure it is in firmly). Note that it is designed to be inserted in one
way only; however use of excessive force could allow it to be
inserted wrongly so check the guide locators match before inserting.
5. Slide the rubber boot down the cable and press the first flange into
the hole and leaving the second flange on the outside of the keypad.
Make sure that it sits neatly in all places to ensure a correct seal.
6. Mount the keypad and reverse steps 2 & 3 to reattach the fascia to
the keypad chassis.