Chapter 4 Assembly
98
When using the TI-N6, TI-ND6, or TI-ND6-E nosepiece
The Protection Plate (for the Nosepiece) included with the Ti-E or Ti-E/B microscope covers the gap between
the nosepiece (TI-N6, TI-ND6, or TI-ND6-E) and the FL turret (TI-FLC, TI-FLC-E, or TI-FLC-E/HQ), so as to
prevent injury caused by your hands and fingers getting caught.
When using an FL turret, attach the Protection Plate (for the Nosepiece) before attaching the nosepiece, as
described below.
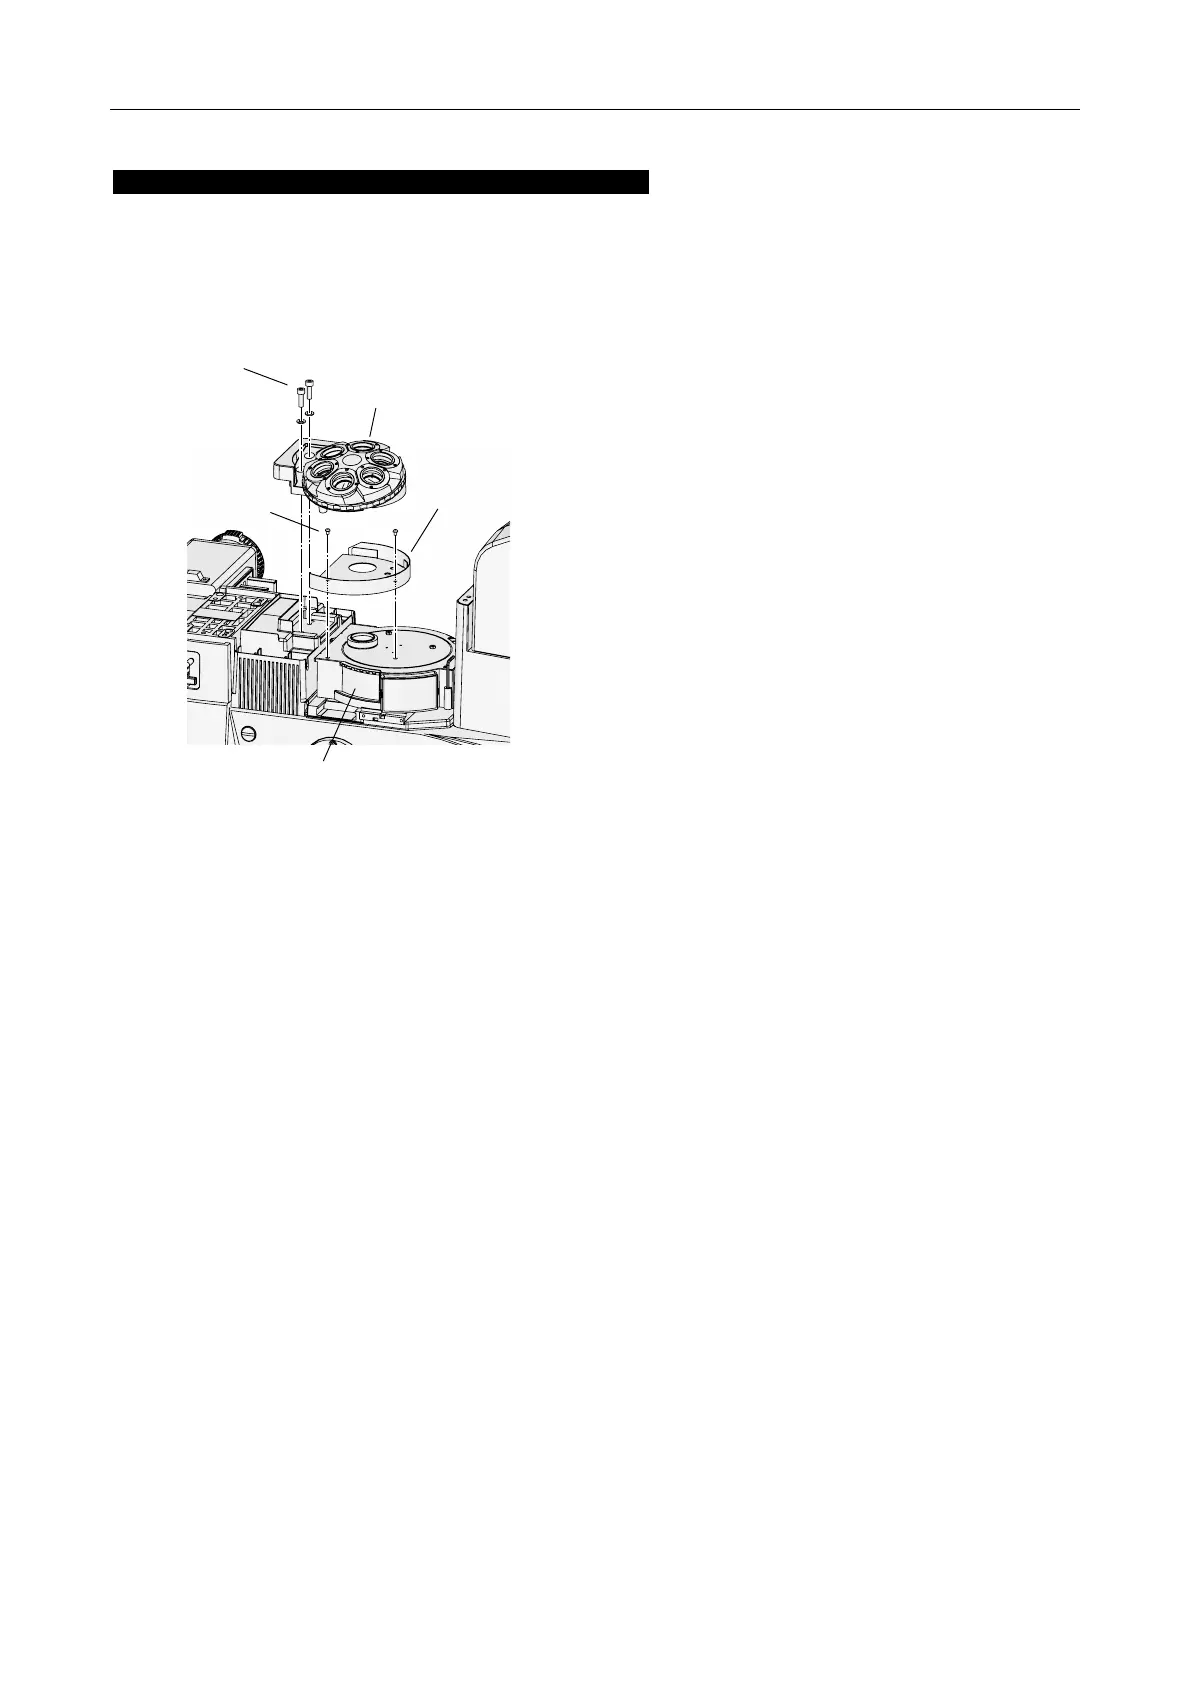
Figure 4-17 Protection Plate (for the Nosepiece)
attachment
1. Using a 2 mm hex screwdriver, remove two of
four M3 hex socket head screws from the top
of the filter turret (TI-FLC, TI-FLC-E, or
TI-FLC-E/HQ), as shown in the figure at left.
2. Attach the Protection Plate (for the
Nosepiece) onto the top of the FL turret.
Insert and tighten the two M3 hex socket
head screws that were removed in step 1.
3. Attach the nosepiece (TI-N6, TI-ND6, or
TI-ND6-E) to the Ti-E or Ti-E/B microscope
body, and secure with the 4 mm hex
screwdriver.
For details on attaching the nosepiece, refer to
“(2) Attaching a manual nosepiece”.
When using motorized nosepieces other than the
PFS Motorized Nosepiece, refer to “Motorized
Units for Ti Series Instructions.”
Hexagonal socket
head screws and
washers (M5, x2)
Nosepiece
FL turret
Protection Plate
(for the Nosepiece)
Hexagonal socket
head screws (M3, x2)