Chapter 4 Assembly
103
7
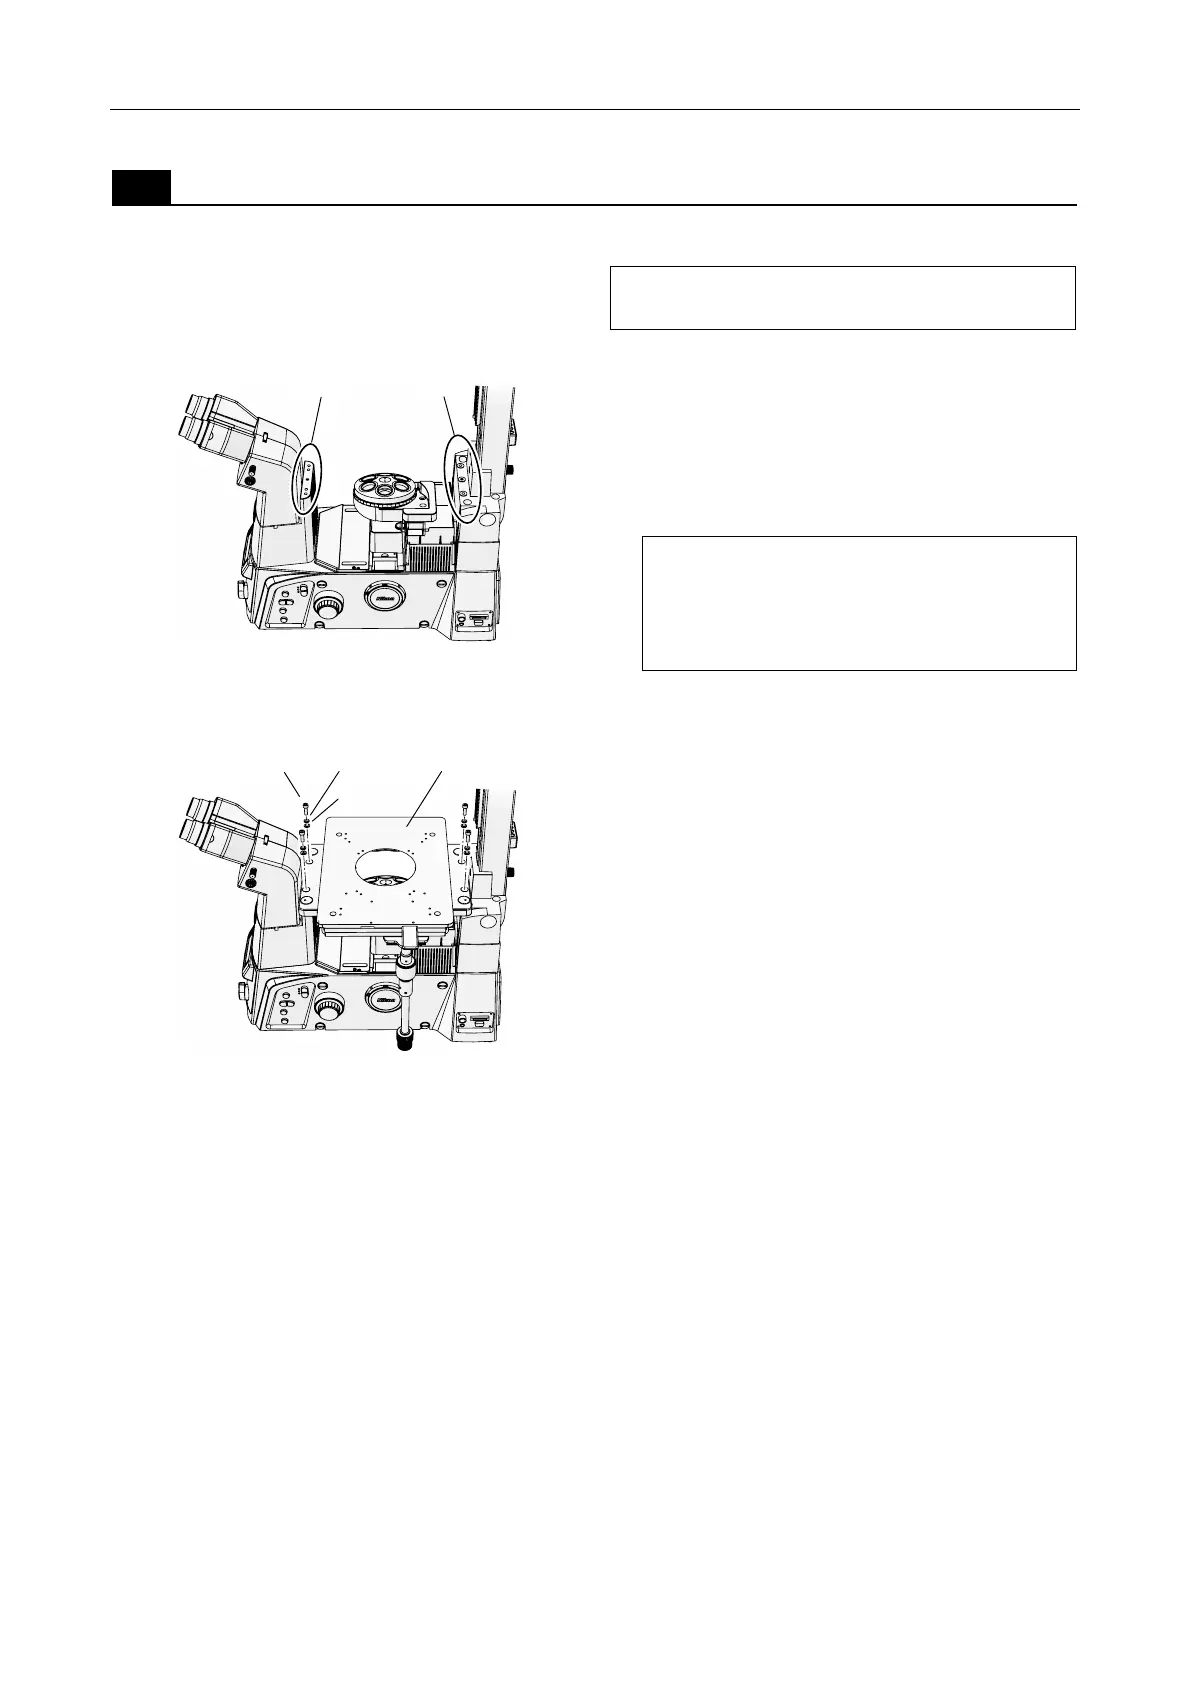
Attaching the stage
Attach the stage to the microscope base.
If objectives are attached to the nosepiece,
remove them before attaching the stage.
Figure 4-28 Stage mounts
1. Place the stage onto the mounts at the base
of the eyepiece base unit and at the base of
the dia pillar illuminator.
Positioning pins are provided on the mount at the
base of the dia pillar illuminator. Align the holes
on the bottom of the stage to these pins.
Stages with a stage movement knob are
typically attached with the knob positioned in
the far right. However, they can also be
rotated by 180 degrees and be attached with
the knob in the near left.
Figure 4-29 Stage attachment
2. Secure the stage by tightening the four M5
hex socket head screws provided with the
stage.
Be sure to use spring washers and washers with
the hex socket head screws.
Mount Mount
Hexagonal socket
head bolts (M5, x4)
Washer
Spring
washe
Stage