
N
nancy90Sep 10, 2025
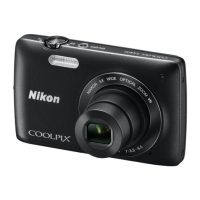
Why is image mode not available on my Nikon s4300?
- SStacy EstesSep 10, 2025
If the image mode is not available on your Nikon Digital Camera, it is because another function that restricts the Image mode option is enabled.
Why is image mode not available on my Nikon s4300?
If the image mode is not available on your Nikon Digital Camera, it is because another function that restricts the Image mode option is enabled.
Why are no indicators displayed on my Nikon s4300 Digital Camera monitor?
If no indicators are displayed on your Nikon Digital Camera monitor, it might be because Auto info is selected for Photo info in Monitor settings in the setup menu.
Why isn't the AF-assist illuminator lighting up on my Nikon s4300 Digital Camera?
If the AF-assist illuminator is not lighting up on your Nikon Digital Camera, check if Off is selected for the AF assist option in the setup menu. The AF-assist illuminator may also not light up depending on the position of the focus area or the current scene mode, even when Auto is selected.
Why my Nikon Digital Camera cannot be turned on?
Your Nikon Digital Camera might not be turning on because the battery is exhausted. Also, the camera cannot be turned on while connected to an electrical outlet via the Charging AC Adapter.
Why is my Nikon Digital Camera not taking pictures?
If your Nikon Digital Camera is not taking pictures, ensure that you are not in playback mode or that setting items or the setup menu are not displayed; if so, press the shutter-release button. Also, check if the battery is exhausted, or if the flash lamp is flashing, wait for the flash to charge.
What to do if Nikon s4300 Digital Camera monitor is hard to read?
If the monitor on your Nikon Digital Camera is hard to read, try adjusting the monitor brightness. Also, the monitor may be dirty, so cleaning it might help.
How to reduce noise in Nikon Digital Camera images?
If you notice randomly spaced bright pixels (“noise”) in your Nikon Digital Camera images, it might be because the shutter speed is too slow or the ISO sensitivity is high due to a dark environment. Try using the flash or specifying a lower ISO sensitivity setting to reduce noise.
Why are my Nikon s4300 Digital Camera photos too dark?
If your Nikon Digital Camera photos are too dark (underexposed), it could be due to the following reasons: The flash mode might be set to Off, the flash window could be blocked, or the subject might be beyond the flash range. You can also adjust exposure compensation, increase ISO sensitivity, or if the subject is backlit, select Backlighting scene mode or set the flash mode setting to Fill flash.
Why does the time zone and date setting screen appear every time I turn on my Nikon s4300 Digital Camera?
If the Time zone and date setting screen appears every time you turn on your Nikon Digital Camera, it means that the clock battery is exhausted, and all settings have been restored to their default values.
Why is there no shutter sound on my Nikon s4300?
If there is no sound when the shutter is released on your Nikon Digital Camera, check if Off is selected for Sound settings>Shutter sound in the setup menu. Note that no sound is heard with some shooting modes and settings, even when On is selected. Also, make sure the speaker is not being blocked.
Provides initial guidance before using the camera, including safety information.
Lists all items included in the camera package for verification.
Explains the purpose and structure of the manual, including symbols and conventions used.
Defines symbols and conventions used throughout the manual for clarity.
Details important information and precautions for using the camera, including online resources and accessory usage.
Warns against illegal copying of copyrighted materials and currency/securities.
Advises on safely erasing data from storage devices to protect privacy.
Highlights critical safety warnings to prevent injury or damage.
Provides detailed precautions for safely handling the camera's battery to prevent damage or injury.
Lists safety precautions for using the AC adapter to prevent fire or electric shock.
Covers safety measures for cables, moving parts, flash, liquid crystal, and operational restrictions.
Contains important safety instructions and FCC compliance statements for users in the USA.
Provides specific warnings and compliance information for users in California, Canada, and Europe.
Details the physical components of the camera, including the camera body and its labeled parts.
Illustrates and labels the external parts of the camera body for identification.
Identifies and labels the buttons, ports, and covers on the camera's back and sides.
Explains how to interact with the camera's touch screen using tapping and dragging gestures.
Details how to use the stylus and provides important notes regarding touch panel operation and care.
Explains the various icons and indicators displayed on the monitor during shooting mode.
Identifies the interactive controls available on the monitor screen in shooting mode for adjusting settings.
Describes the information and indicators shown on the monitor when viewing images in playback mode.
Details the interactive controls on the monitor screen for navigating and managing images in playback mode.
Explains how to switch between the camera's shooting and playback operational modes.
Guides users on accessing and utilizing the camera's menu system while in shooting mode.
Explains how to access and use the camera's menu system for image editing and management in playback mode.
Describes the two-stage operation of the shutter button and how to attach the camera strap.
Outlines the initial steps required before using the camera, including battery and memory card setup.
Provides step-by-step instructions for correctly inserting the camera's battery.
Details how to remove the battery and includes important cautions and notes about battery handling.
Explains the process of charging the camera's battery using the AC adapter and USB cable.
Details how to remove memory cards, their internal memory, and lists approved card types.
Explains how to power on the camera and check battery and exposure indicators.
Guides users through the initial setup of display language, time zone, and date.
Explains how to choose and set the camera's shooting mode from the available options.
Provides guidance on how to hold the camera and frame a subject for optimal composition.
Explains how to use the camera's optical and digital zoom features for framing shots.
Details the process of focusing, locking exposure, and releasing the shutter to capture an image.
Explains how to set fundamental shooting parameters like flash, self-timer, macro, and exposure compensation.
Details the different flash modes available and how to select and use them for various shooting conditions.
Explains how to use the self-timer function for delayed shooting to avoid camera shake or include the photographer.
Details how to use the macro mode for close-up photography of small subjects.
Explains how to use exposure compensation to make images brighter or darker.
Guides on selecting image size and quality combinations for saving photos.
Explains how the camera uses face detection for automatic focusing in specific shooting modes.
Explains how to choose different playback modes to view specific types of images.
Lists and describes functions available in the playback menu, such as delete, slide show, and retouch.
Explains how to connect the camera to TVs, computers, and printers for viewing or printing images.
Provides instructions for installing the ViewNX 2 software package on compatible operating systems.
Details methods for transferring images from the camera to a computer using USB or card readers.
Provides step-by-step instructions for recording video clips with the camera.
Guides users on selecting, playing, controlling volume, and deleting movie files.
Introduces the setup menu and its navigation.
Details settings for welcome screen, time zone, monitor settings, and printing dates.
Covers settings for vibration reduction, motion detection, AF assist, digital zoom, sound, auto-off, and memory formatting.
Details language, video modes, computer charging, blink warning, Eye-Fi, reset, and firmware version.
Guides on how to view the current camera firmware version.
Introduces the reference section, covering shooting, playback, menus, and additional info.
Introduces the various in-camera editing functions available for still images.
Explains how to use the paint tool for drawing and decorating images within the camera.
Explains the quick retouch function to enhance image contrast and saturation.
Describes the D-Lighting feature for improving image brightness and contrast.
Covers various digital filter effects that can be applied to images, such as color options and soft focus.
Details the glamour retouch function for softening skin and enhancing facial features in portraits.
Guides on cropping images to refine composition or focus on specific subjects.
Explains how to connect the camera to a television to view images and movies.
Outlines procedures for direct printing of images to PictBridge-compatible printers without a computer.
Explains the touch shooting functions: touch shutter, subject tracking, and touch AF/AE.
Explains how ISO sensitivity affects image quality and lists available ISO settings and auto modes.
Details continuous shooting options like Single, Continuous, BSS, and Multi-shot 16.
Explains white balance and lists manual settings like Daylight, Incandescent, Fluorescent, Cloudy, and Flash.
Describes how to protect selected images from accidental deletion.
Explains how to copy images between the camera's internal memory and a memory card.
Explains the naming conventions for image, movie, and voice memo files and folder structures.
Provides a troubleshooting guide for common error messages displayed on the camera monitor.
Continues the troubleshooting guide with additional error messages and their corresponding causes and solutions.
Lists further error messages related to image modification, recording, playback, and file issues.
Details troubleshooting steps for various printer-related errors that may occur during direct printing.
Provides advice on how to maintain the camera for optimal performance and longevity.
Offers guidance on cleaning camera parts and proper storage methods.
Introduces the troubleshooting section for resolving common camera issues.
Lists detailed technical specifications of the camera, including sensor, lens, focus, and monitor details.
| Sensor Resolution | 16.0 MP |
|---|---|
| Optical Zoom | 6x |
| Display Size | 3.0 inches |
| Touchscreen | Yes |
| Type | Compact |
| Aperture | f/3.5-6.5 |
| ISO Sensitivity | ISO 80-3200 |
| Movie Recording | HD 720p |
| Storage Media | SD/SDHC/SDXC memory cards |
| Video Resolution | 1280 x 720 |
| Image Stabilization | Lens-shift |
| Battery Type | EN-EL19 |
| Weight | 139 g (4.9 oz) |
| Image Sensor | 1/2.3-inch CCD |
| LCD Monitor | TFT LCD with anti-reflection coating |
| Dimensions | 95.5 x 58.9 x 20.8 mm (3.8 x 2.3 x 0.8 in.) |