4 Installing the component parts and units
31
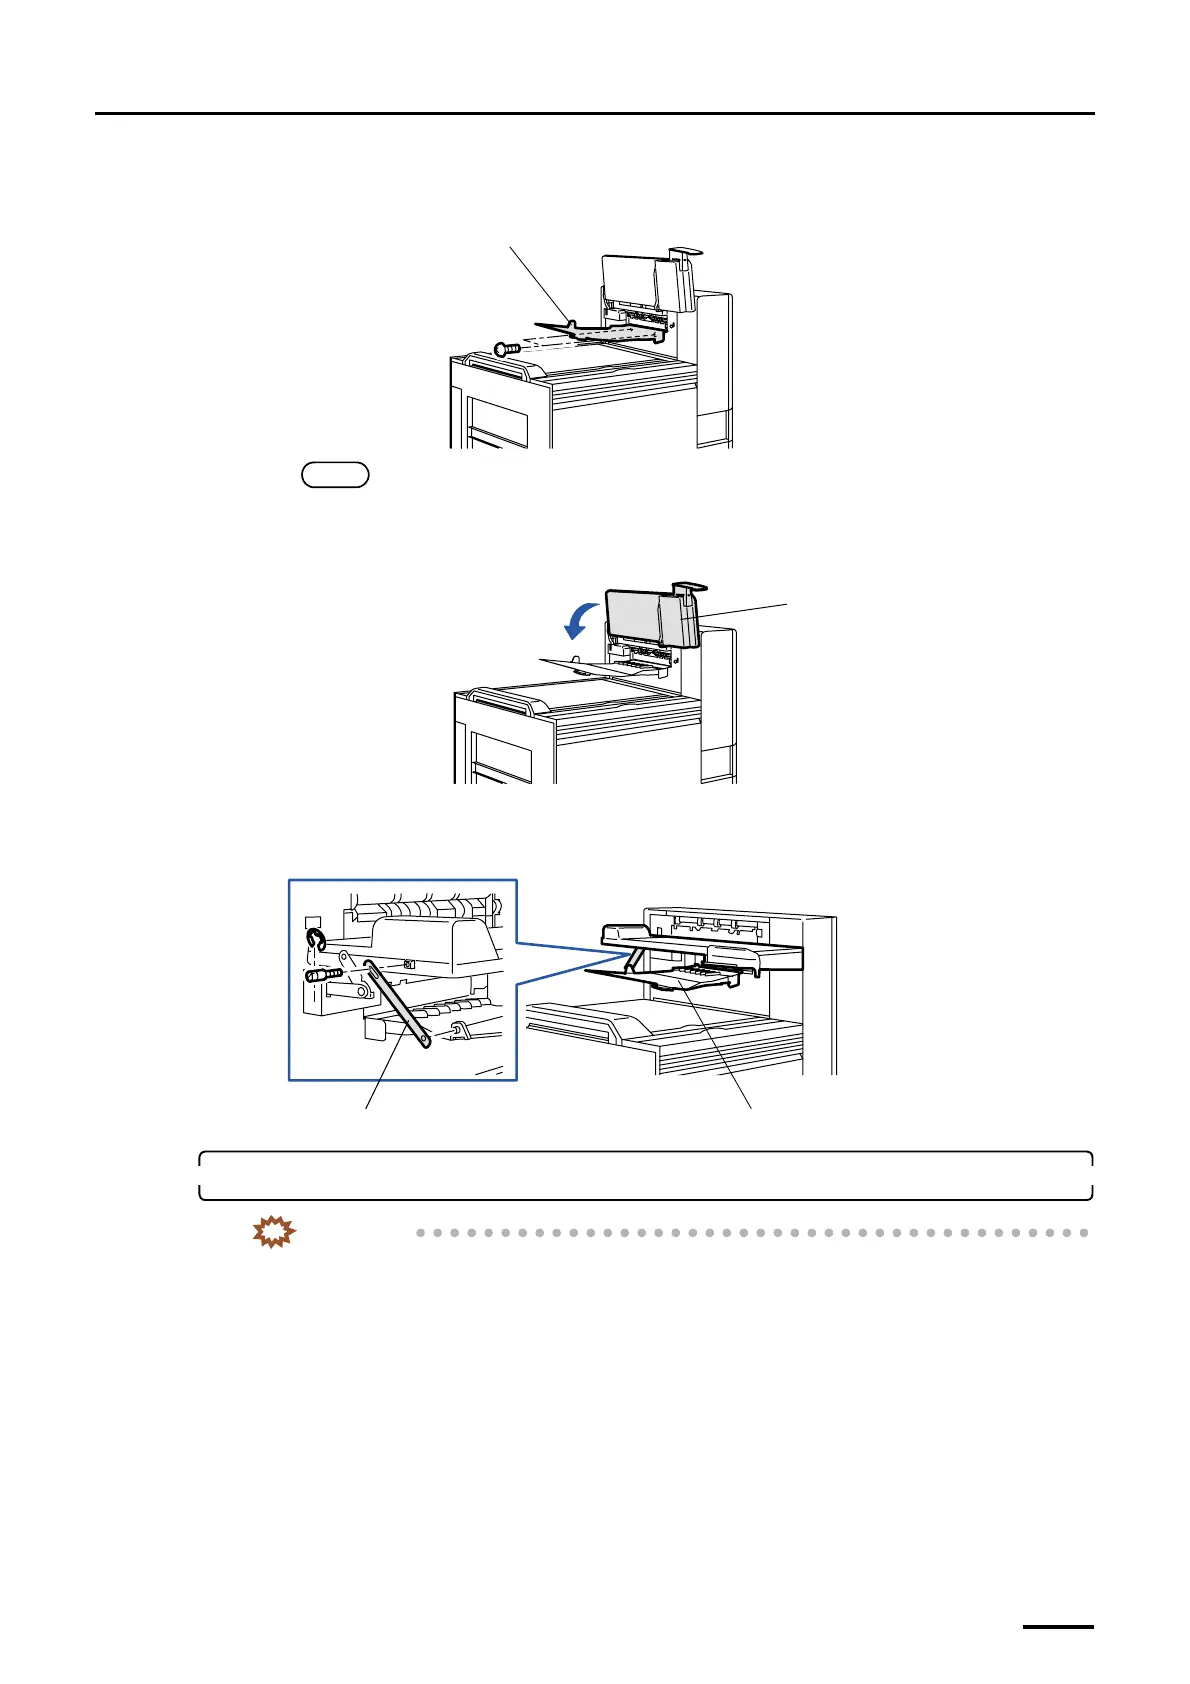
(2) Attach the print receiving tray (large). (two screws)
For the print accumulation tray, do not fix the print receiving tray (large) with the screws.
NOTE
• For the machine that has both of the print accumulation tray and the print receiving tray (large), do not
fix either of them with the screws so that the customer can replace it easily.
(3) Lower the print conveyor unit.
(4) Attach the stay to the print receiving tray (large). (one screw and E-ring each)
The screw and the E-ring are attached to the print conveyor unit.
For the machine with the print accumulation tray, you need not attach the stay for print receiving tray (large).
5. Attach the print sorter unit.
IMPORTANT
• Handle the print sorter unit with care not to drop it over your feet.
Print receiving tray (large)
G068894
Print conveyor unit
G069792
Print receiving tray (large)
Stay
G068965
Distributed by: minilablaser.com