Maintaining and Servicing the NVIDIA DGX-1
www.nvidia.com
NVIDIA DGX-1 DU-08033-001 _v13.1|85
$ sudo python /usr/local/bin/configure_raid_array.py -c -f
2.
After the script has finished recreating the RAID 0 array, reboot the DGX-1 to verify
that /raid is mounted and usable.
Refer to the document Using StorCLI to Recreate the NVIDIA DGX-1 RAID 0 Array for
more information.
5.5.5.Replacing the Power Supplies
Access the power supplies from the front of the DGX-1. You can hot-swap the power
supplies as follows:
1.
If not already removed, remove the bezel by grasping the bezel by the side handles
and then pulling the bezel straight off the front of the DGX-1.
CAUTION: Be careful not to accidentally press the power button that is on the
right edge of the DGX-1 when removing or installing the bezel.
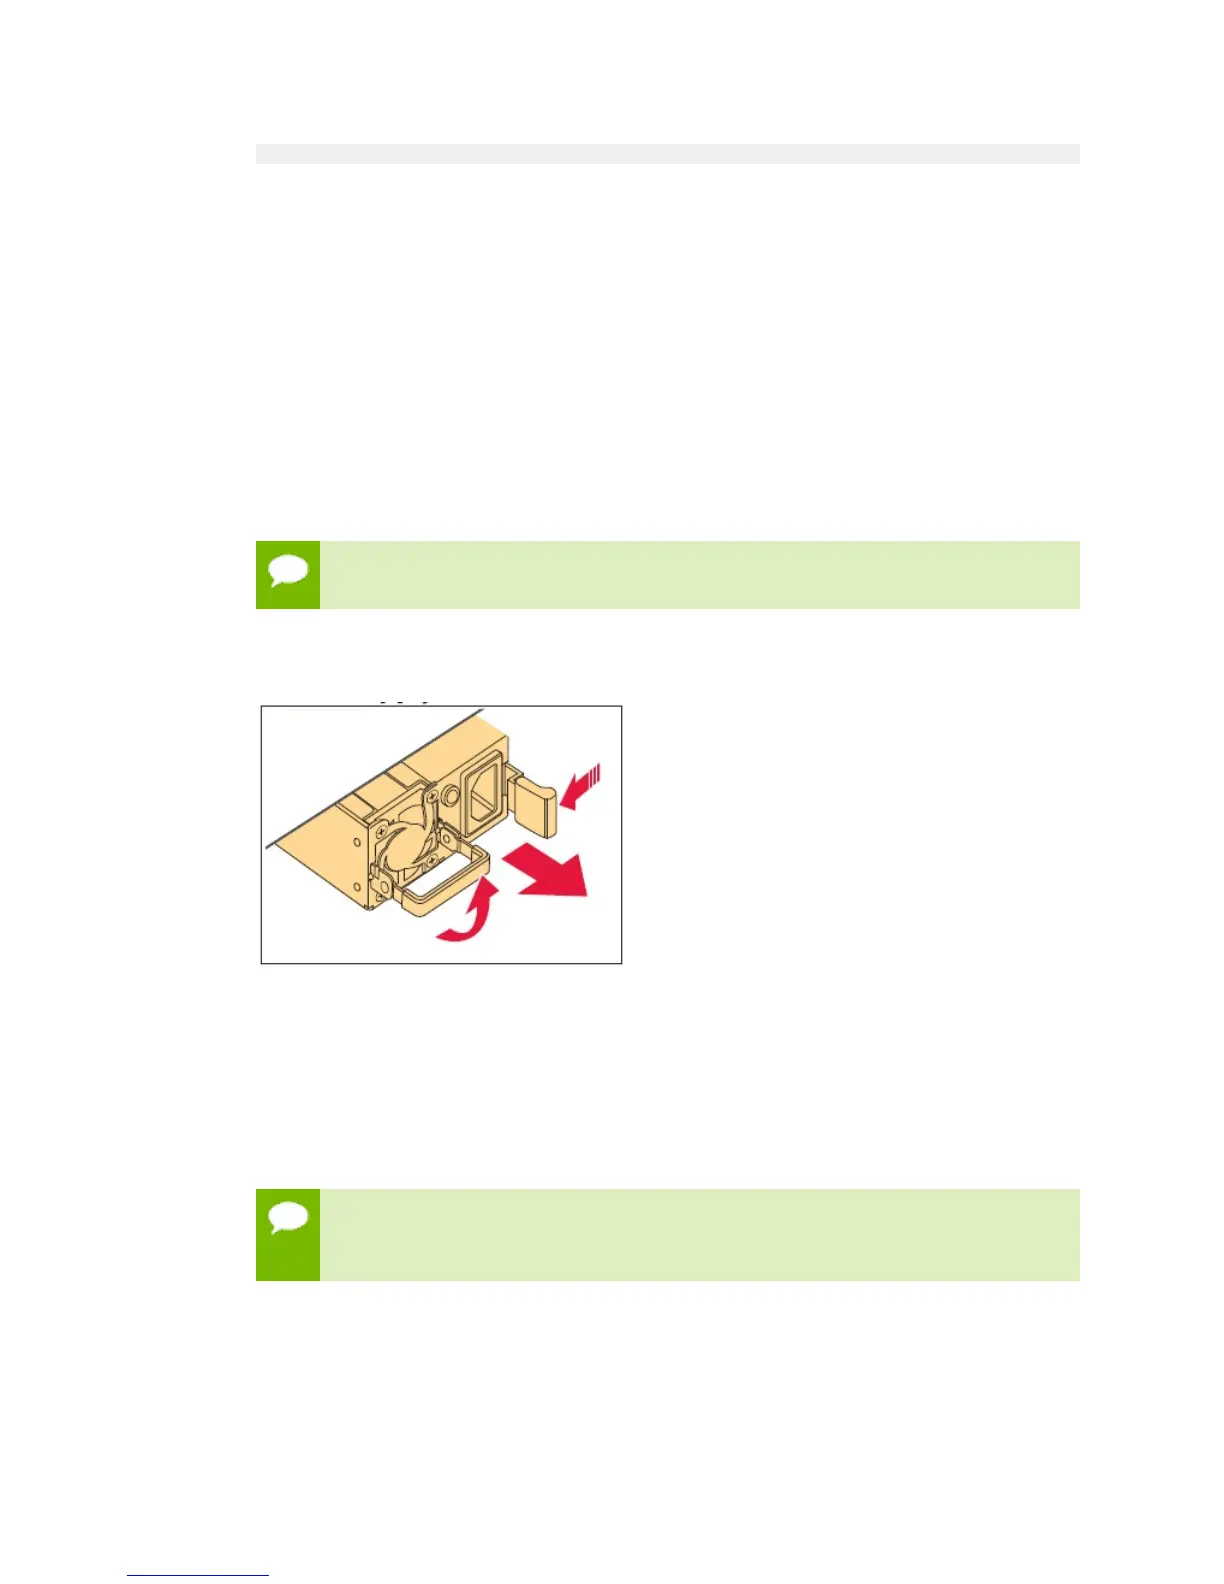
2.
Unplug the power cord from the power connector on the fan assembly.
3.
Flip the power supply handle out.
4.
Push the green release lever to the left and simultaneously use the power supply
handle to pull out the power supply.
5.
Slide the replacement power supply into the bay and push until seated.
6.
Flip the power supply handle up against the power supply.
7.
Reconnect the power cord.
IMPORTANT: Make sure that the end of the power cord cable tie is not
inserted into the power supply fan. The cable tie can interfere with normal
operation of the fan, resulting in failure of the power supply.
8.
Reattach the bezel.
With the bezel positioned so that the NVIDIA logo is visible from the front and is on
the left-hand side, line up the pins near the corners of the DGX-1 with the holes in