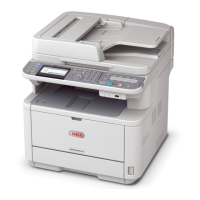
-162-
9. Settings for Auto Delivery and
Transmission Data Save Functions
(for MB491/ES4191 MFP Only)
This chapter explains how to configure settings for auto delivery and transmission data save functions.
This machine has the auto delivery and transmission data save functions. These functions can be used
for faxes, Internet faxes, and e-mails. You can configure the settings for these functions using the web
browser utility for the machine.
Even when connected using a wireless LAN, the displayed MAC address becomes the MAC address of the wired LAN.
The default administrator password of the machine is "aaaaaa".
Internet Explorer 8 is used here as an example. The details may differ depending on the browser you are using.
For details on the web browser utility, refer to "Webpage" P. 103.
Forwarding Received Data As Digital Data (Auto
Delivery)
This chapter explains the auto delivery function and how to configure settings for it.
The auto delivery function forwards received data automatically to specified destinations. You can
specify up to five e-mail addresses and one network folder as destinations.
You can use this function for received faxes, Internet faxes, and files attached to e-mails. The data is
forwarded as a PDF or TIFF file depending on the file format of the received data.
You can register up to 100 sets of forwarding destinations for the auto delivery function.
When the fax reception mode is set to [Forward Mode], the data is not automatically delivered by this function.
The received fax is delivered as a PDF file.
If the received file attached to an e-mail is other than a PDF, JPEG, or TIFF file, it is not forwarded.
The body text of received e-mails cannot be forwarded.
The size of data that this function can handle is limited.
If an SD memory card's capacity is insufficient to store a received Internet fax or file attached to an e-mail, auto delivery is not
carried out.
Configuration for the Auto
Delivery Function
You need to configure the server settings in advance. For
details on how to configure the server settings, refer to the
User’s Manual Basic.
If specifying a network folder, register a profile beforehand.
For details on how to register a profile, refer to the User’s
Manual Basic.
1 Launch your web browser.
2 Enter "http://machine's IP address" in
the address bar and press the <Enter>
key.
Reference
For the machine's IP address, please refer to the
User’s Manual Basic.