-33-
Scanning
3
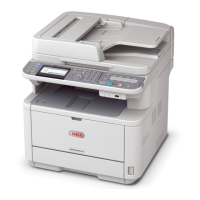
3. Scanning
This chapter explains your machine's useful Scan functions.
Advanced Operations for Scanning to E-mail
This section explains useful operations for scanning to e-mail. This function also applies to both the Scan
To Internet Fax and the Scan To FaxServer.
The following procedures are explained under the assumption that [Continue Scan] is disabled. For the basic procedures when
[Continue Scan] is enabled, refer to the User's Manual Basic.
To enter the [Admin Setup] menu, the administrator password is necessary. The default password is "aaaaaa".
Setting Sender and Reply to
Addresses (From/Reply to)
You can set the e-mail address from which e-
mails are sent and the address to which
responses are sent.
1 Press the <SETTING> key.
2 Press the to select the [Admin
Setup] and then press .
3 Enter the administrator password.
4 Select [Enter] and then press .
5 Press the to select [Scanner Setup]
and then press .
6 Press the to select [E-mail Setup]
and then press .
7 Press the to select [From/Reply to]
and then press .
8 Press the to select [From] or [Reply
to] and then press .
9 Enter e-mail addresses.
When [Reply to] is selected in step 8, select a
method to enter a destination and specify a
destination. Proceed to step 11.
10 Select [Enter] and then press .
11 Press the until the top screen appears.
Memo
Select an e-mail address from the address book.
Creating Templates
You can record up to five templates with various
subject lines and body text.
Registering a Subject
1
Press the <SETTING> key.
2 Press the to select the [Admin
Setup] and then press .
3 Enter the administrator password.
4 Select [Enter] and then press .
5 Press the to select [Scanner Setup]
and then press .
6 Press the to select [E-mail Setup]
and then press .
7 Press the to select [Template] and
then press .
8 Check that [Edit Subject] is selected
and then press .
9 Press the to select a number and then
press .
10 Enter the subject up to 80 characters.
11 Select [Enter] and then press .
12 Press the until the top screen appears.
OK
OK
OK
OK
OK
OK
OK
OK
OK
OK
OK
OK