USEFUL FUNCTIONS
- 189 -
3
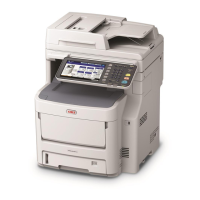
Press the corresponding button(s) for the
desired search category and enter the
search string. Finally, press [SEARCH].
Pressing each button displays an on-screen keyboard.
Enter a search string using the keyboard and digital keys,
and then press [OK] to set the entry.
• The contacts are searched for based on the entered
search string(s).
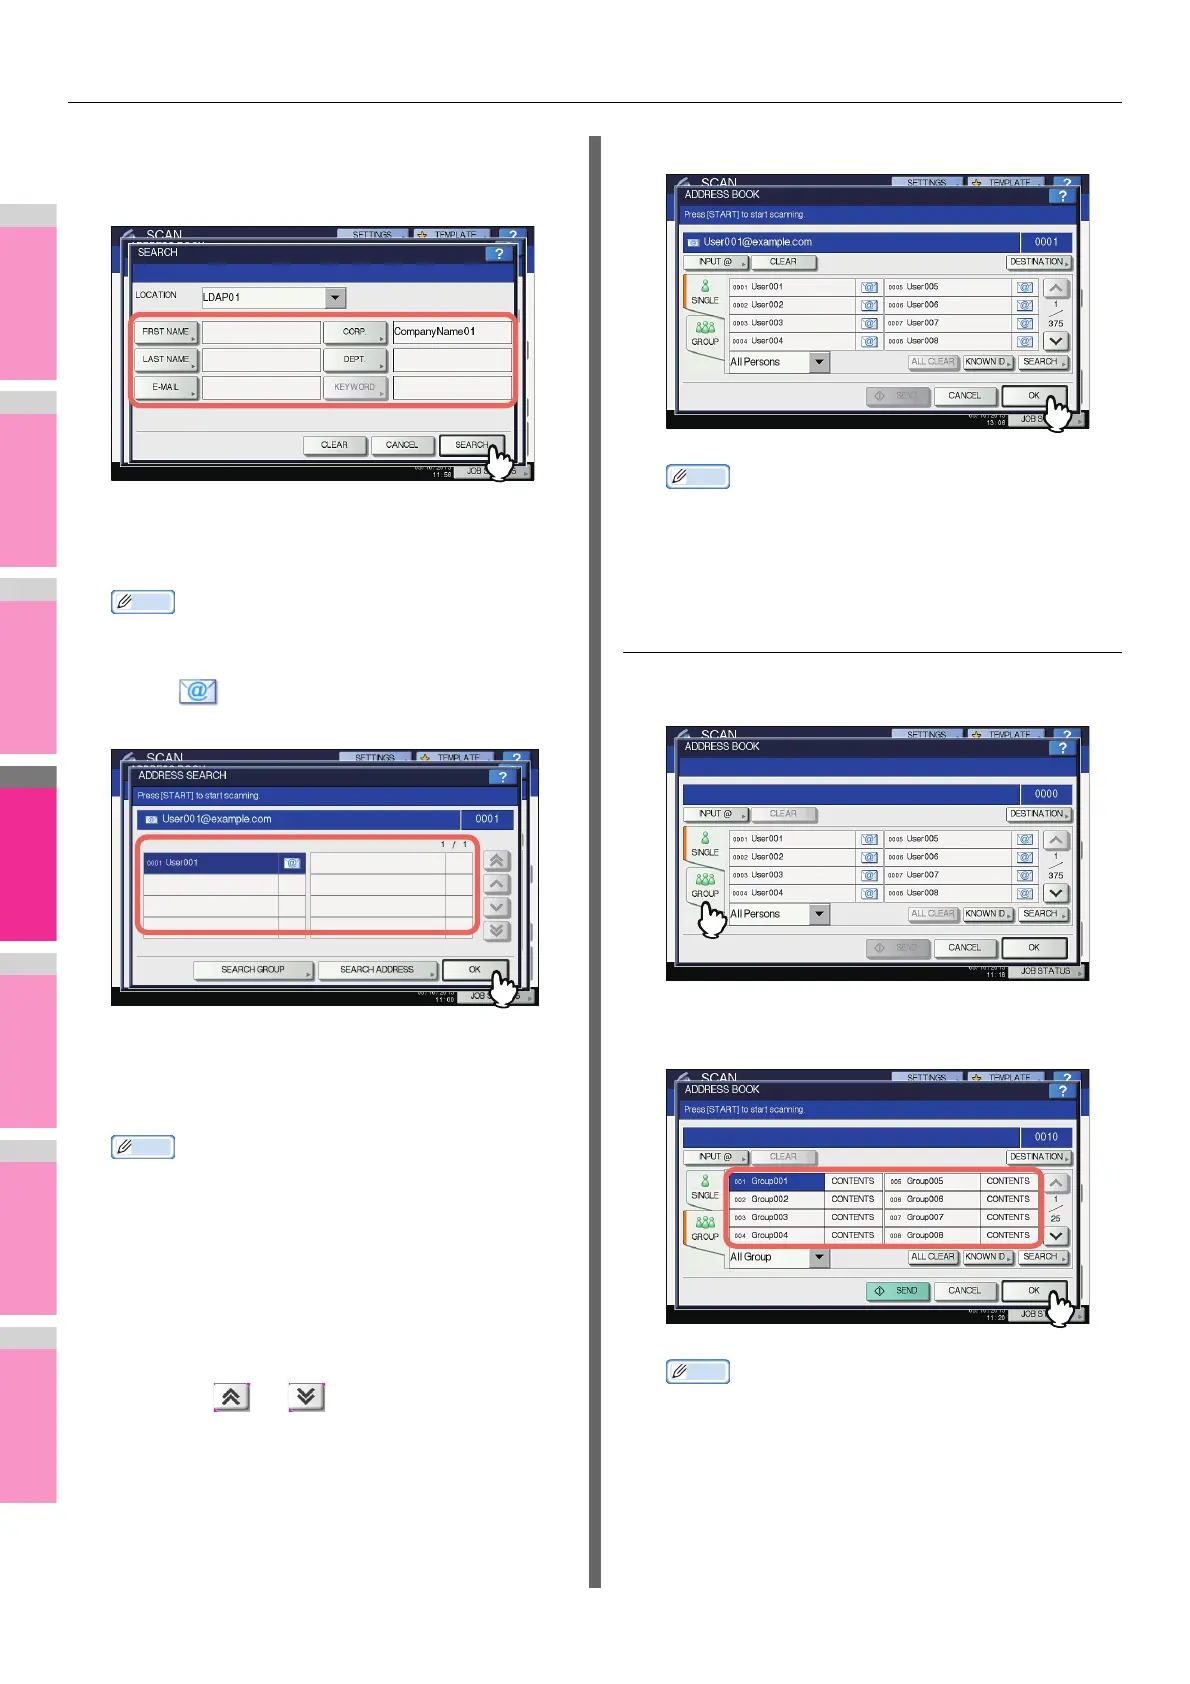
4
Press for the desired contacts and
then press [OK].
• For Scan to E-mail, proceed to step 5.
• For Internet faxing, the e-mail addresses are specified.
To specify additional e-mail addresses, repeat the
above steps.
• If you selected a wrong contact, press the wrong
contact again to be unselected, or press the [RESET]
button to restart the operation.
Basic Guide
P.198 "Sending Internet Faxes"
• For Scan to E-mail, pressing [SEARCH ADDRESS] or
[SEARCH GROUP] allows you to continue searching
for individual contacts or groups with other search
strings.
• Pressing or allows you to skip 5 pages
5
Press [OK].
• If you want to view or delete the specified e-mail
addresses, press [DESTINATION].
P.192 "Viewing/Deleting specified e-mail
addresses"
Selecting groups
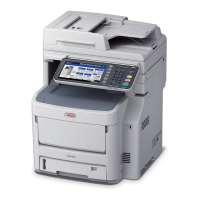
1
Press [GROUP] to display the [GROUP] tab.
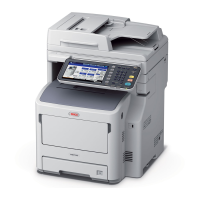
2
Select the desired group(s). For Scan to E-
mail, press [OK] at the end.
• To view e-mail addresses registered in a group, press
[CONTENTS].
• Before pressing [OK], you can specify additional e-mail
addresses.
• If you want to view or delete the specified e-mail
addresses, press [DESTINATION].
P.192 "Viewing/Deleting specified e-mail
addresses"