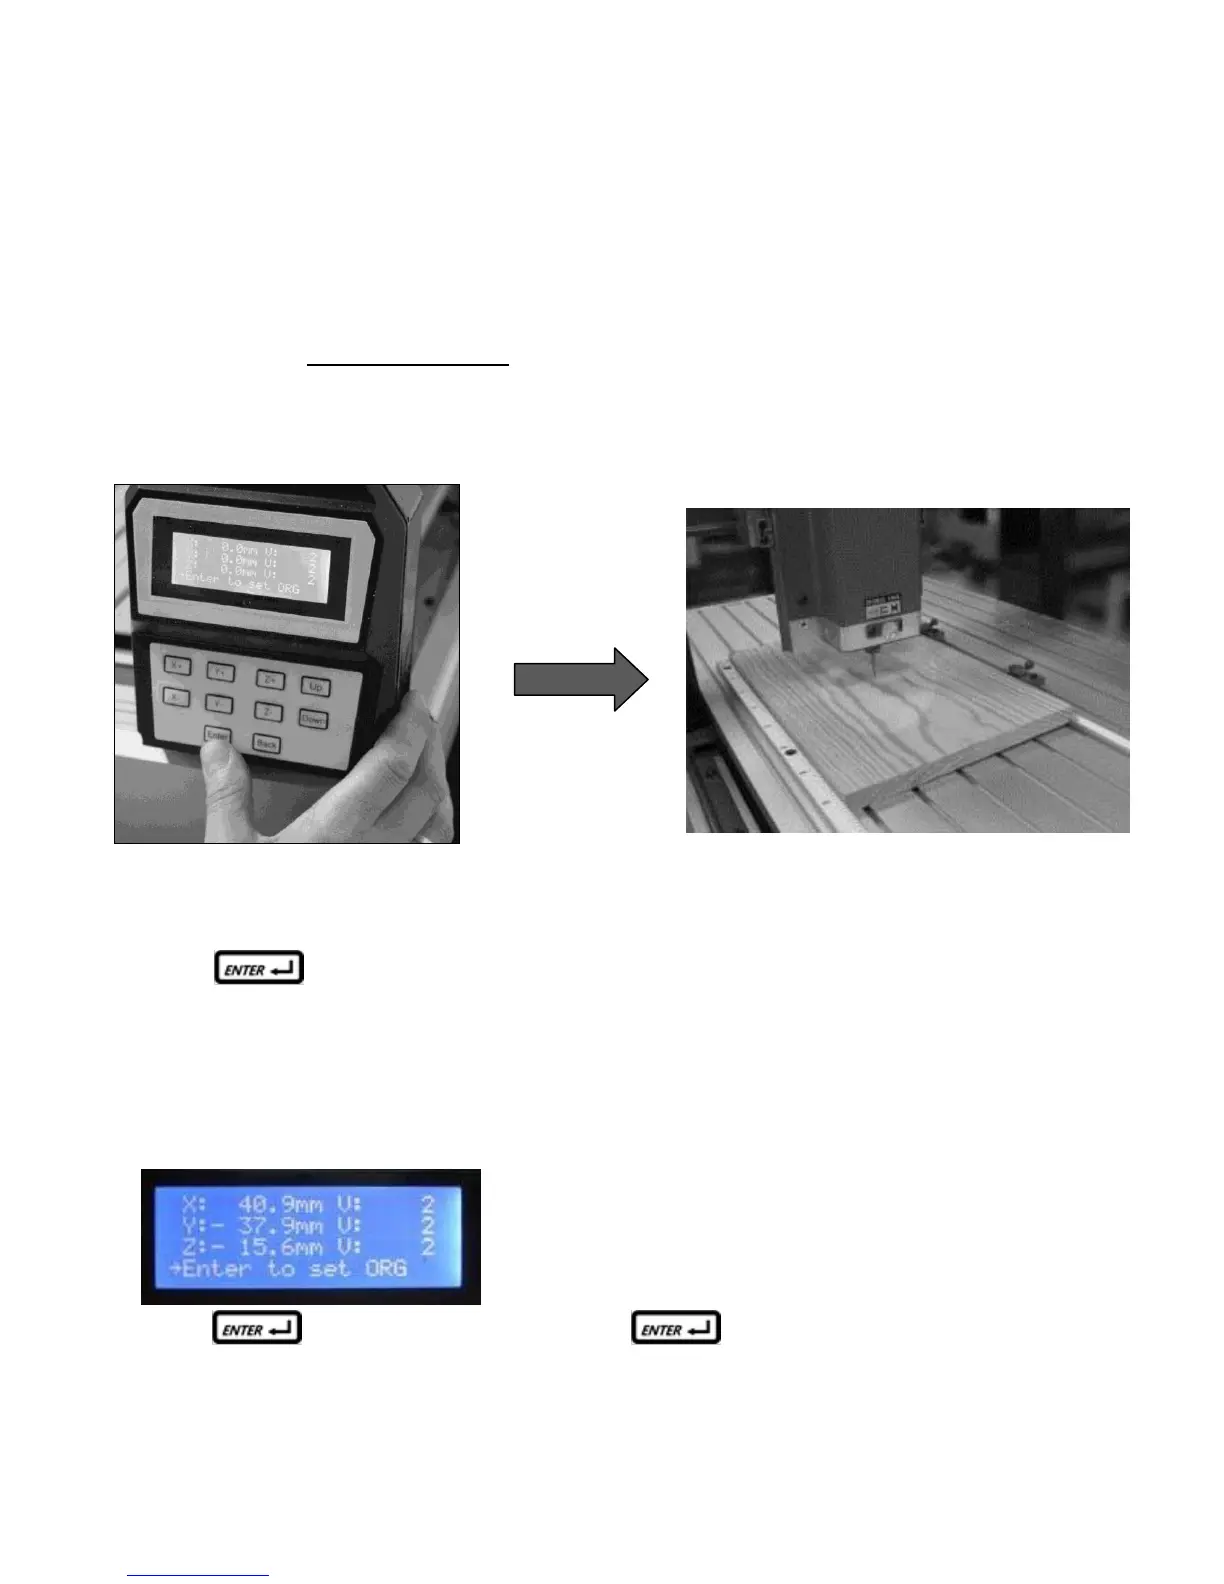
Using the control panel (cont.)
7. Once in ‘Manual Jog Mode’ it is time to move the spindle to the ‘Origin Point’. This is the point that corre-
sponds with the selected ‘XY origin position’ chosen in i-Picture. In this example we will use the ‘center’ posi-
tion as the origin point. Again, make sure that the Y dimension of your carving is between the minimum and
maximum of the ruler on the fence. Use the X,Y and Z plus and minus keys to move the spindle to the center of
your work piece. Note that for the Z axis, move the spindle so that the tip of the cutting tool just touches the
work piece surface.
Press to continue
8. Once the spindle is in position move the cursor using the arrow buttons on the keypad to ‘Enter to set ORG’
as shown:
Press to set the carving origin point and again to continue.