EVIS
Video
System
OES
System
~~
yv'b
i
v
[Mounting
the
camera]
Check
the
indicator
being
illuminated
alternately.
CD
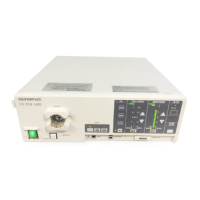
Connect the videoscope and the
EVIS
Video System Center by following their respective
instruction manuals.
Q)
Use the mode selector to select the
EVIS
Video System to be used with.
@ The light control will display 'AUTO' automatically.
@)
Test
to
see if the light coming from the light guide fiber at the distal end of the scope
becomes stronger,
in
relation to the distance between the scope and a viewed object. Also
check to see that the light from the fiber varies
when
the CINEfTV value
is
adjusted between
1 and 5 {with the distance
to
the viewed object held constant}.
CD
Connect the videoscope and turn
on
the lamp.
Q)
Press the Transilliumination Switch, and confirm that the light becomes brighter, and then
returns
to
the original leve! approximately nine seconds later.
*
With
EVIS 200 system,
monitor
images
will
become
over-exposed in black and
white.
*
When
pressing the
Transillumination
Switch
under
transillumination,
the
light
returns
to
the
origianl
level.
CD
Attach
an
unloaded camera to the scope eyepiece by following the instruction
with
the
scope and camera.
@ Test the operation of the
~
exposure control switch
(a
'peep' should be heard), and then
set it to 'AUTO'.
*
When
the
mode
switch
is
set
to
1~6~1
or
~
, a
flashing
will
be seen in
the
SC16-101
10R
camera
viewfinder,
and
photography
will
be impossible.
When
using a camera,
the
mode
switch
must
be set
to~.
Increase
the
distance
gradually.
~
5-60mm
[Inspection
of
the
brightness!
The
illumination
light
gets
brighter
and
is
automatically
reset.
[Transmitted
illumination]
z
(fJ
"
m
g
o
z
o
"
m
Z
o
o
(fJ
CO
o
"
n
(fJ
-<
(fJ
-4
m
;;;: