11
DP20
5
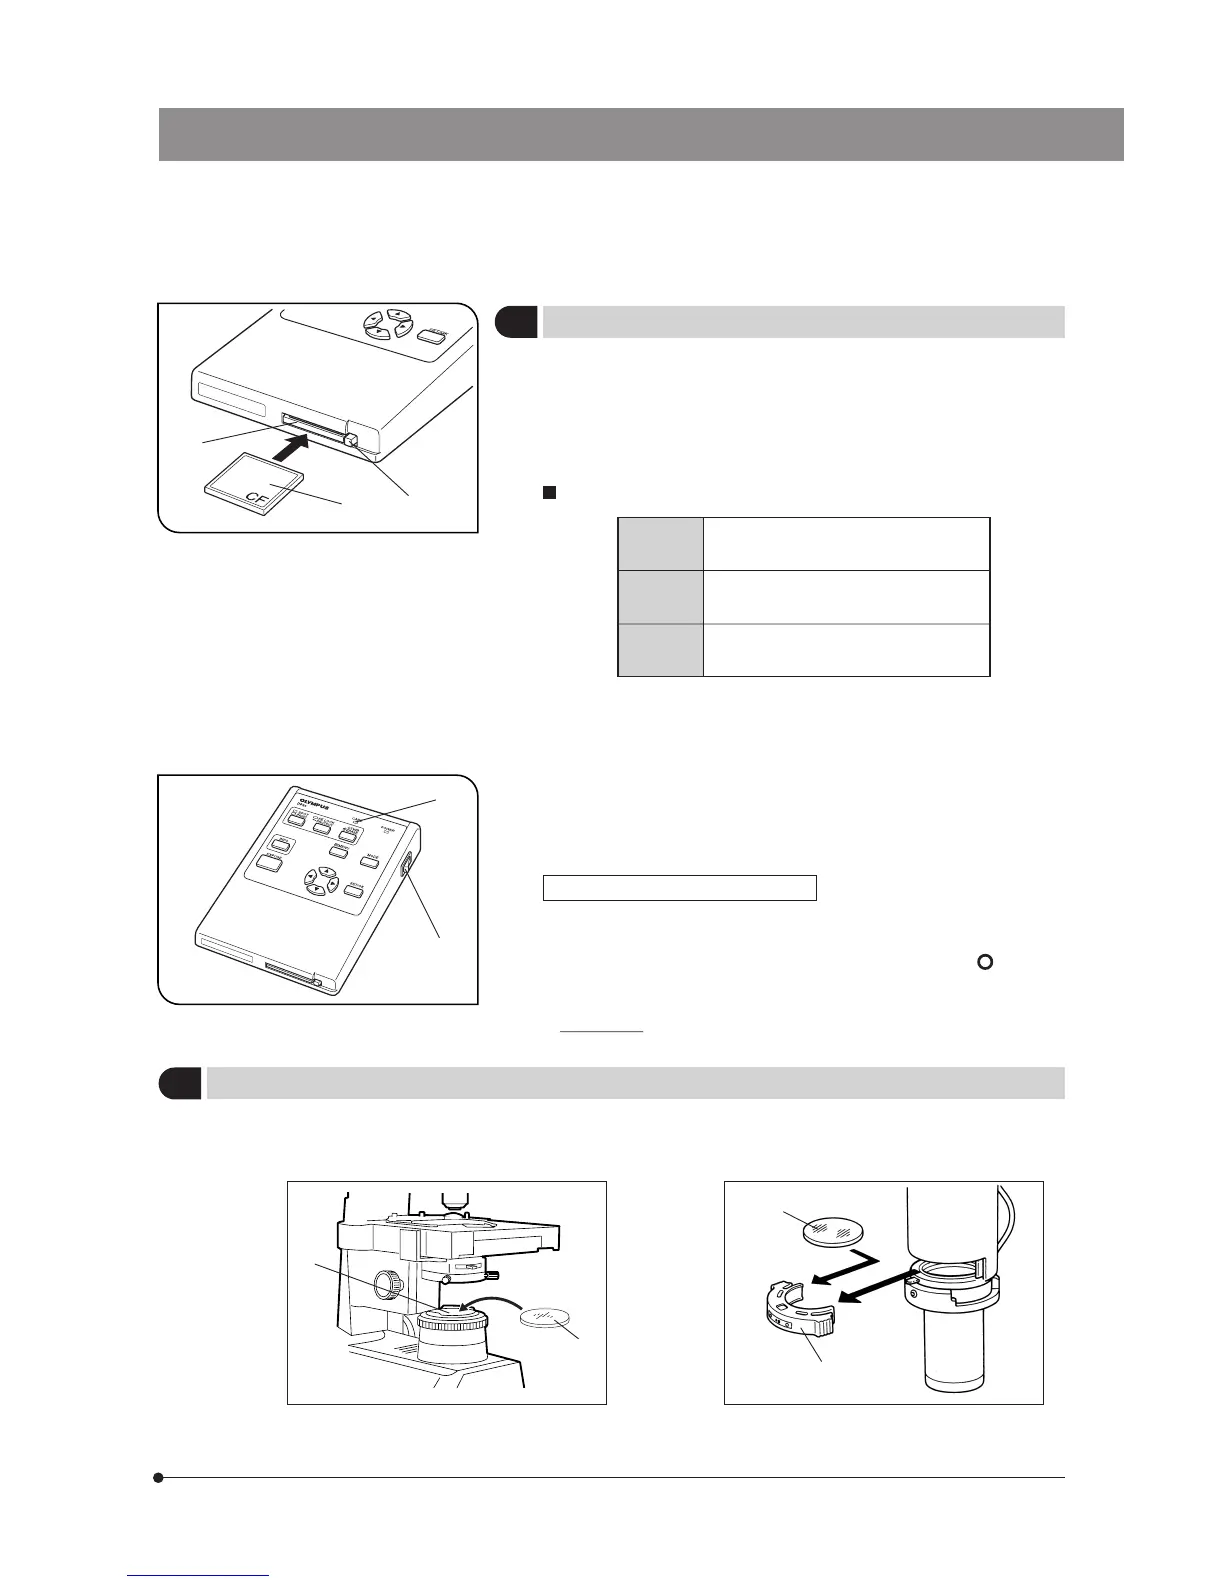
Inserting the Compact Flush (CF Card)
(Fig. 7)
#Only the Compact Flush (CF card) of Type I (thickness 3.3 mm) can
be used.
Do not attempt to insert a CF card Type II or Microdrive (thickness
5 mm).
}To ensure performance, it is recommended to use a CF card with a
capacity up to 4 GB manufactured by SanDisk or Lexar.
Applicable CF cards (with which Olympus has confirmed operation)
SanDisk SDCFB Series: Max. 4G bytes.
Ultra II Series: Max. 4G bytes.
Lexar Entry Series: Max. 256M bytes.
Professional Series: Max. 4G bytes.
Buffalo Standard type: Max. 512M bytes.
High 100x-speed type: 1G bytes.
1. With the label @ facing up, insert the connector end of a CF card into the
CF card slot ² of the control box as far as it will go.
2. To remove the CF card, push the eject button ³ so that a button pops
out.
3. Press the eject button ³ again. When the CF card comes out, pick it
with a finger and pull it out.
#Take care in handling the CF card immediately after ejection be-
cause it may be hot (up to about 50°C under normal use).
Fig. 7
1
2
3
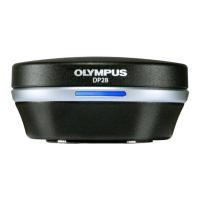
Fig. 8
4
Card access indicator LED (Fig. 8)
The card access indicator LED | blinks or lights steadily when the
card is being accessed.
Do not remove the CF card, set the main switch 5 to “ ” (OFF) or
disconnect the AC adapter in this period.
#Otherwise, the picture data recorded in the CF card may be
destroyed.
5
6
Inserting the 45HA Color Adjustment Filter
}The 45HA color adjustment filter @ should be inserted in the filter holder ² only when the microscope in use employs the
30 W halogen-bulb light source (i.e. microscope model CX/CKX/IX51/IX50).
CX
CKX
IX51
IX50
1
2
1
2