Last updated on Mar 2022
4.4 Laser Configuration Settings
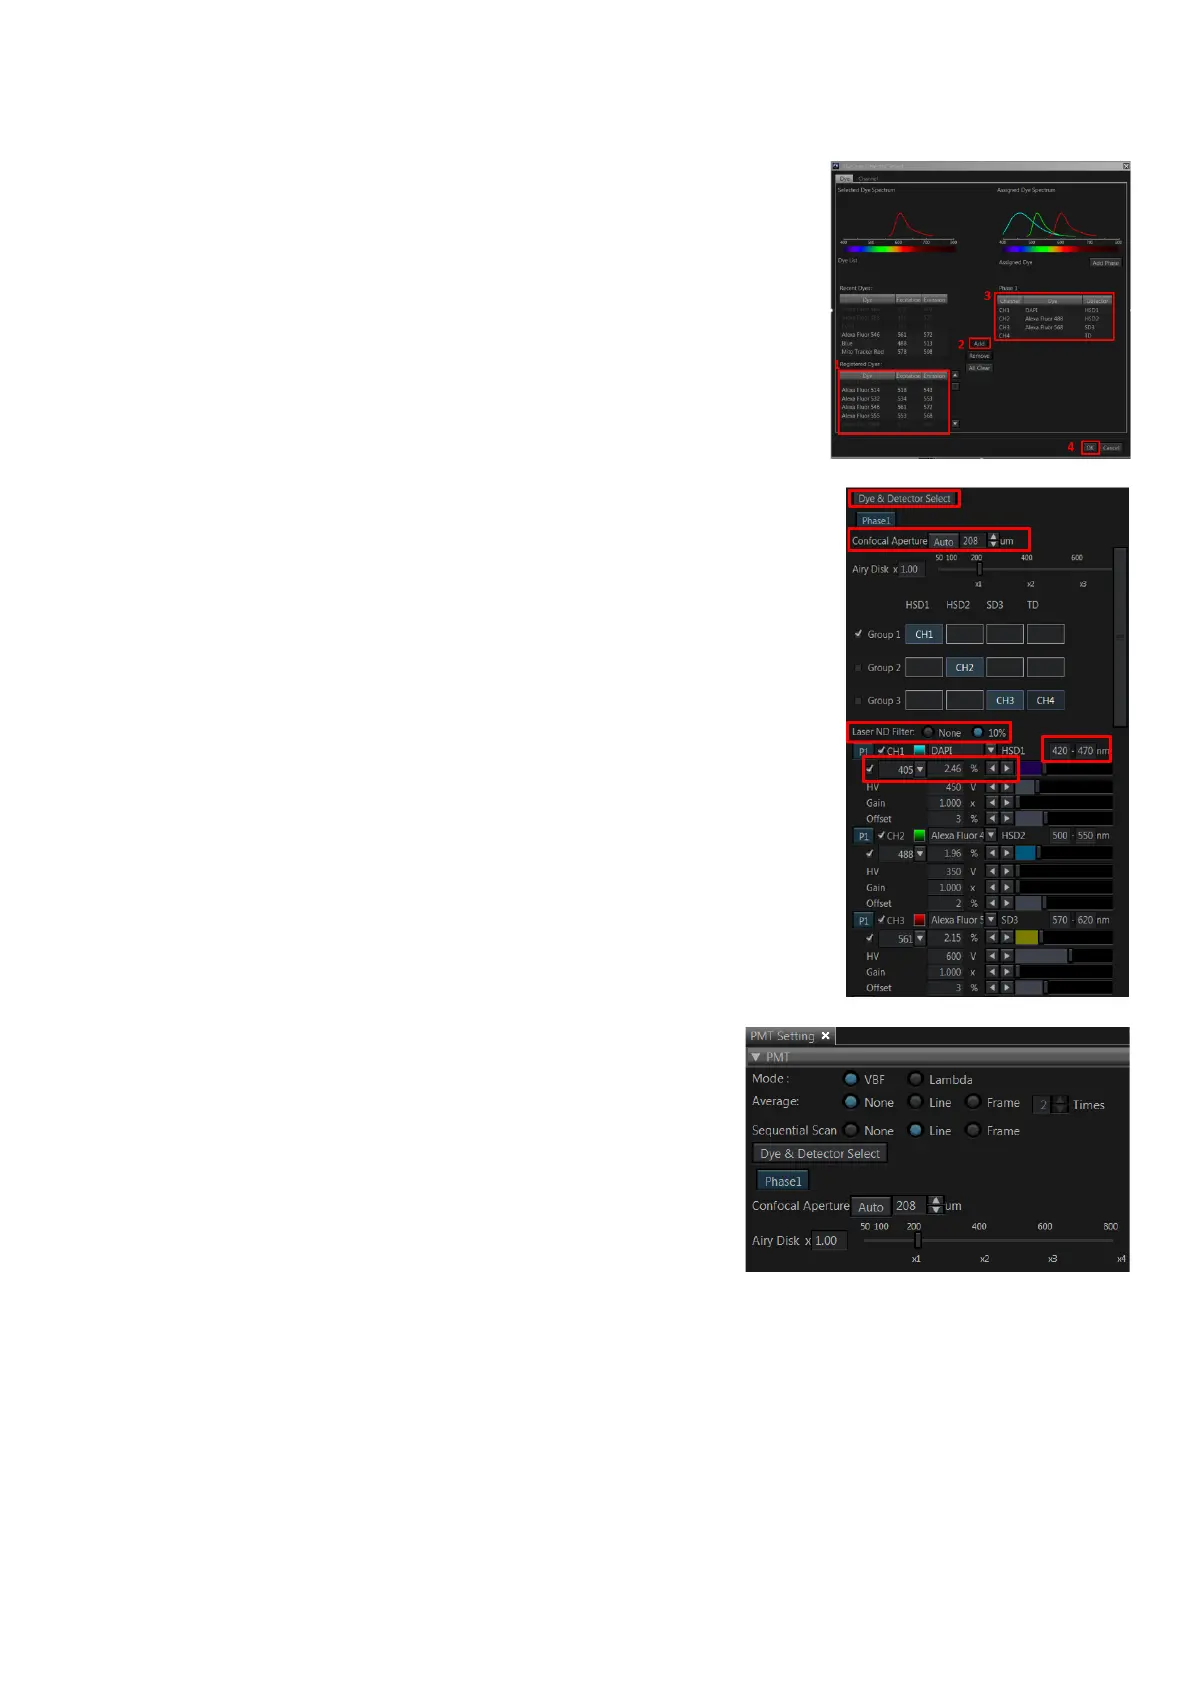
Under PMT Setting tab, click on Dye and Detector. A list of
commercially available dyes along with its excitation and emission
values are available for selection.
1. Choose the appropriate dye.
2. Select Add.
3. It will immediately be reflected under phase 1 where each dye
will be allocated to its respective channel. A transmitted light
channel will also be shown by default.
4. Click OK.
• Under Laser ND filter: Select 10%.
※ If you need more than 10% laser power you can switch
off the ND filter, but most imaging will not need that high
power of a laser.
• Set your laser power for all your channels at 1%.
• Emission range could be altered to include a broader range of
signal otherwise you could use the default settings.
• For detectors:
➢ HSD: keep HV within 350-500. More than 500 will
produce intense background noise.
➢ SD: keep HV within 600-800. More than 800 will
contribute to intense background noise.
Under PMT settings tab:
• Mode: Select VBF
• Average: average a given number of scans to get a
higher signal to noise ratio.
➢ In Line mode the averaging will be done on a line-
by-line basis.
➢ In Frame mode the averaging will be done frame-
by-frame. Drawback: slower scanning time, more
bleaching, double exposure effect if your sample
moves. Averaging of 2 times will help you to get
better quality images if you can afford to do so.
No averaging or Line averaging is recommended if you are doing live-cell imaging.
• Sequential scan: Select Line to prevent crosstalk among the fluorophores. If you select
None, simultaneously imaging is done where cross talk is prominent.
• Confocal Aperture: press Auto button to make sure pinhole size is set to optimal
confocal imaging at Airy Disk ×1. This gives the most optimum size for the thinnest
optical slice while not sacrificing imaging quality. Increasing the size of the Airy Disk from

 Loading...


