Do you have a question about the Omega CN16Pt and is the answer not in the manual?
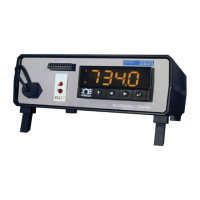
Provides a detailed overview of the PLATINUMTM Series controller's capabilities and features.
Explains how to navigate the manual, including menu structure and hyperlinks.
Outlines essential safety precautions and warnings for operating the instrument.
Details the back panel connections for different models of the controller.
Illustrates the back panel connections for CN8Pt and CN16Pt/CN32Pt models.
Explains how to connect AC or DC power to the controller.
Details the 10-pin input connector assignments and sensor connections.
Summarizes sensor types and their corresponding input connector pins.
Provides a visual guide for wiring RTD sensors to the input connector.
Illustrates wiring hookups for process current inputs with internal or external excitation.
Details the 5 types of outputs and their connector configurations.
Lists the different output types supported by the controller.
Shows wiring summaries for various output configurations on the 8-pin connector.
Defines abbreviations used in the output wiring summary table.
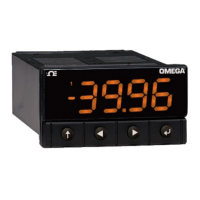
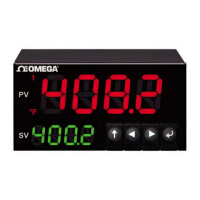
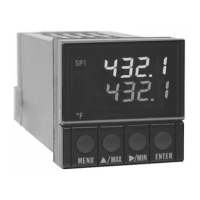
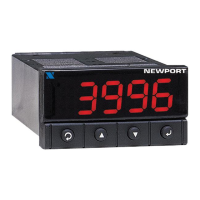
Illustrates the front panel display elements and their functions.
Explains the function of each button for navigating the controller's menus.
Describes the hierarchical structure of the controller's menus and submenus.
Details the three main Level 1 menu groups: Initialization, Programming, and Operating.
Illustrates how to navigate through menus using the LEFT, RIGHT, and ENTER buttons.
Maps the navigation path for the Initialization Mode menu.
Provides a detailed table mapping the Initialization Mode menu structure.
Continues the table mapping the Initialization Mode menu structure.
Continues the table mapping the Initialization Mode menu structure.
Maps the navigation path for the Programming Mode menu.
Provides a detailed table mapping the Programming Mode menu structure.
Continues the table mapping the Programming Mode menu structure.
Maps the navigation path for the Operating Mode menu.
Guides the user through configuring the controller's input type.
Explains how to select and specify thermocouple types for input.
Details configuration options for Resistance Temperature Detector (RTD) inputs.
Explains how to set the number of wires for RTD connection.
Details the available calibration curves for RTD inputs.
Guides configuration for Thermistor temperature sensor inputs.
Details selecting and scaling process voltage or current inputs.
Explains manual and live scaling methods for process inputs.
Details how to configure the front panel display settings.
Explains settings for the decimal point format on the display.
Covers selecting temperature units (°F or °C) for display.
Details filter settings to average input signals and suppress noise.
Explains how to configure annunciators for alarms or output status.
Configures the default display color, which can be overridden by alarms.
Allows adjustment of the front panel display brightness.
Sets the excitation voltage for sensors like RTDs and thermistors.
Configures communication ports like USB, Ethernet, and Serial.
Selects the communication protocol (e.g., Omega ASCII, Modbus).
Sets parameters for Omega ASCII data transfer mode.
Configures the device address, crucial for Modbus communication.
Allows configuration of serial communication parameters.
Selects between RS232 and RS485 serial communication formats.
Sets the baud rate for serial communication.
Configures the parity setting for serial data transmission.
Sets the number of data bits per character in serial communication.
Sets the number of stop bits for serial communication.
Configures safety features like power-on confirmation and setpoint limits.
Controls whether confirmation is required before automatic startup.
Determines user interaction for starting the program from other modes.
Allows setting minimum and maximum limits for setpoint values.
Sets a timeout to detect sensor malfunctions based on input value changes.
Enables monitoring for open circuit conditions in sensors.
Allows manual adjustment of thermocouple, RTD, or thermistor calibration.
Selects standard sensor calibration curves, disabling manual adjustments.
Allows manual adjustment of the calibration curve offset.
Enables manual adjustment of both offset and slope of the calibration curve.
Calibrates the zero point for temperature sensors at the freezing point of water.
Saves the current unit configuration settings to a file.
Loads a previously saved configuration file into the unit.
Displays the current firmware version number of the unit.
Guides the process of updating the unit's firmware.
Resets all unit parameters to their factory default settings.
Sets a password to protect access to Initialization Mode settings.
Sets a password to protect access to Programming Mode settings.
Configures the primary setpoint value for PID or On/Off control.
Configures the secondary setpoint, used for alarms or heat/cool control.
Sets up, changes, enables, or disables alarms and their behaviors.
Defines the basic behavior of an alarm (e.g., absolute, deviation).
Compares alarm range options for absolute and deviation modes.
Visually illustrates alarm range options for different modes.
Selects between absolute or deviation-based alarm triggering.
Sets the high reference value for alarm trigger calculations.
Sets the low reference value for alarm trigger calculations.
Configures the display color when an alarm condition is active.
Sets offset values for High High/Low Low alarm functions.
Illustrates the HI.HI parameter's effect on alarm trigger points.
Configures how alarms latch or reset after being triggered.
Sets the alarm output to normally closed or normally open.
Determines if alarms are active immediately upon power-on.
Sets a delay for triggering alarms to prevent false triggers.
Sets a delay for cancelling alarms to prevent chatter.
Configures the mode and behavior of output channels.
Selects the operating mode for each output channel (e.g., PID, Alarm).
Turns off a specific output channel.
Sets an output channel to operate in PID Control Mode.
Sets an output channel to operate in On/Off Control Mode.
Configures an output channel to function as Alarm 1.
Configures an output channel to function as Alarm 2.
Sets up an output channel for retransmission of signals.
Sets the pulse width for DC pulse, relay, and SSR outputs.
Selects the voltage or current range for analog outputs.
Configures the Proportional-Integral-Derivative (PID) control parameters.
Sets the action direction for PID control (heating or cooling).
Sets the timeout duration for the autotune process.
Initiates the autotuning process to optimize PID parameters.
Allows manual adjustment of Proportional, Integral, and Derivative PID factors.
Sets the lower limit for output power or PWM pulse width.
Sets the upper limit for output power or PWM pulse width.
Enables or disables fuzzy logic adaptive tuning for PID optimization.
Allows using an analog input to set or change the controller's setpoint.
Explains how remote setpoint enables cascade control setups.
Provides a generic diagram illustrating a cascade control system.
Shows a specific example of cascade control in a heat exchanger application.
Configures and manages multi-segment ramp and soak programs.
Activates or deactivates the Multi-Ramp/Soak mode.
Selects or loads a specific Ramp/Soak program profile.
Configures tracking modes for Ramp, Soak, or Cycle execution.
Sets the time format (MM:SS or HH:MM) for Ramp/Soak programs.
Defines the action to take upon program completion (STOP, HOLD, LINK).
Sets the number of segments (1-8) for a Ramp/Soak program.
Selects a segment number for editing within a Ramp/Soak program.
Provides an overview of advanced features like linking segments and profiles.
Explains the concept of linking ramp/soak segments to create sequences.
Starts the unit operating according to current settings; displays process value.
Allows changing Setpoint 1 while the unit is running in RUN Mode.
Allows changing Setpoint 2, used for alarms or heat/cool control.
Allows manual adjustment of control outputs or process input values.
Pauses the controller and holds the current process input value.
Turns off all control outputs and stops the process.
Clears any currently latched alarms, optionally via digital input.
Displays the lowest input reading since the buffer was last cleared.
Displays the highest input reading since the buffer was last cleared.
Disables outputs and alarm conditions, entering a standby state.
Lists specifications for input types, voltage, current, and impedance.
Details control actions, autotune, and PID modes.
Specifies details for analog, DC pulse, SPST, SPDT relay, and SSR outputs.
Lists specifications for USB, Ethernet, and Serial communication interfaces.
Details the dielectric withstand test values for isolation.
Covers display characteristics, dimensions, panel cutout, and environmental conditions.
Specifies the required external fuse ratings for the unit.
Details the line voltage and power consumption specifications.
Specifies power options for low-voltage configurations.
Details the protection ratings (e.g., NEMA, IP) for the unit's bezel.
Lists the weight of different series models.
Summarizes input type ranges and their corresponding accuracies.
Lists and explains various error codes that may appear on the unit.
Lists CE marking and electrical safety requirements met.
Provides results of dielectric withstand tests for various connections.
Defines the measurement category for the unit's circuits.
Lists surge voltage ratings for power and signal lines.
Details EMC immunity and emissions requirements met.
Provides instructions for returning products for warranty or repair.
Directs users to the OMEGA website for online shopping.
| Brand | Omega |
|---|---|
| Model | CN16Pt |
| Category | Controller |
| Language | English |