When battery is being charged, do not place battery close to fire or expose it under sun. When battery turns hot,
the built-in safety device will be activated to prevent battery from charging. Heating battery will damage the
safety device, thus causing additional heat; crack or burn of battery.
Warning: Li-ion Battery will become unstable (potential danger) in high or low temperatures.
Charging temperature range: 0° C to +45° C (+32° F to +113° F).Charging temperature out of this range will
possibly cause battery to heat or crack, which might damage battery performance and shortens battery life.When
charged normally, red light of charger is on. When green light is on, it means battery is charged fully.
Battery Handle Installation
Align battery handle with arrow mark under the device. Stick it flat and push forward to position. Tighten the
screw on battery handle.
Battery Handle Dismantle
Loosen screw on battery handle.
Pull battery handle toward the direction of screen to dismantle battery handle.
Battery Voltage Icon
For normal use of product, the device is equipped with detector of battery status. The relevant icon is on the
upper right of screen.
Low Battery Power-off Reminder:
When battery is low at starting up, there will be a text reminder in self-test; if battery is low during working, the
screen will enter full screen mode to display picture below. At this time please change batteries.
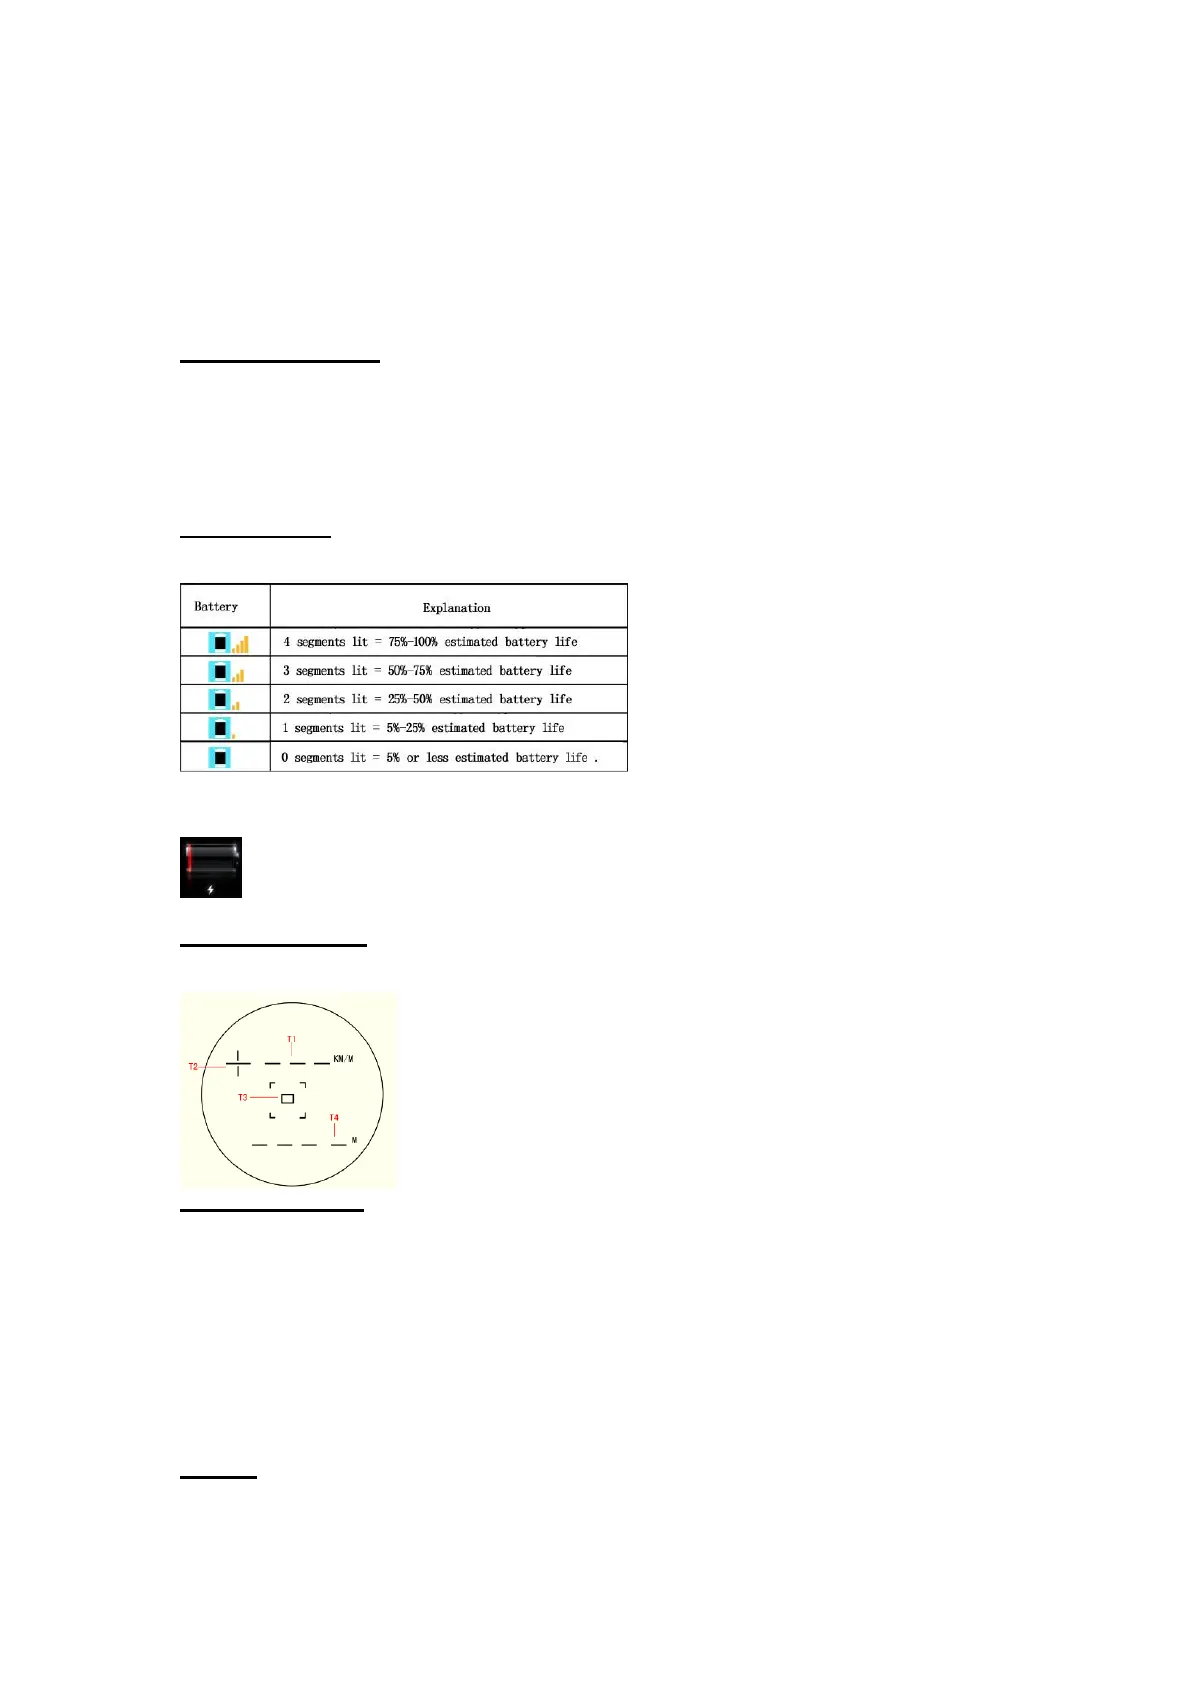
Sighting View System
The device is equipped with 4x optical magnification aiming system. It has a built-in pass-through LCD display,
with cursor aiming lines, capable of showing speed and distance.
High Speed (SD) Card
Note: Must use high speed SD card attached in the box with 30m/s read and write speed.
Do not copy other files onto SD card; otherwise it will not work properly.
Do not plug or pull SD card when the device is connected to power. The device is unable to work without SD
card.
The images and videos captured by the device will all be saved on the external SD card. Every file can be set to be
encrypted in AES-128 method. The number of files to be saved will depend on SD card storage space. The
accessory 16G card can save at least 8000 image files.
SD installation location is below the rubber with SD card mark at the side of device. Please pull apart rubber to
insert SD card. To prevent reverse insertion, please confirm label is facing panel. There will be two folders on SD
card for images and videos. Also, there’ll be a different file everyday named by time.
USB Port
USB port lies below the rubber marked with USB icons at the side of device. Please pull apart rubber to find
USB2.0 port. Connect via data cable to the computer and copy data. When inserting USB cable to connect
computer, the screen will show the icon below.
T1 : Display currently speed measured.
T2 : + / - is moving direction of vehicle. +for coming, - for going
T3 : Aim at license plate via central aiming rectangle
T4 : Display currently distance measured