9.
HDMI 3
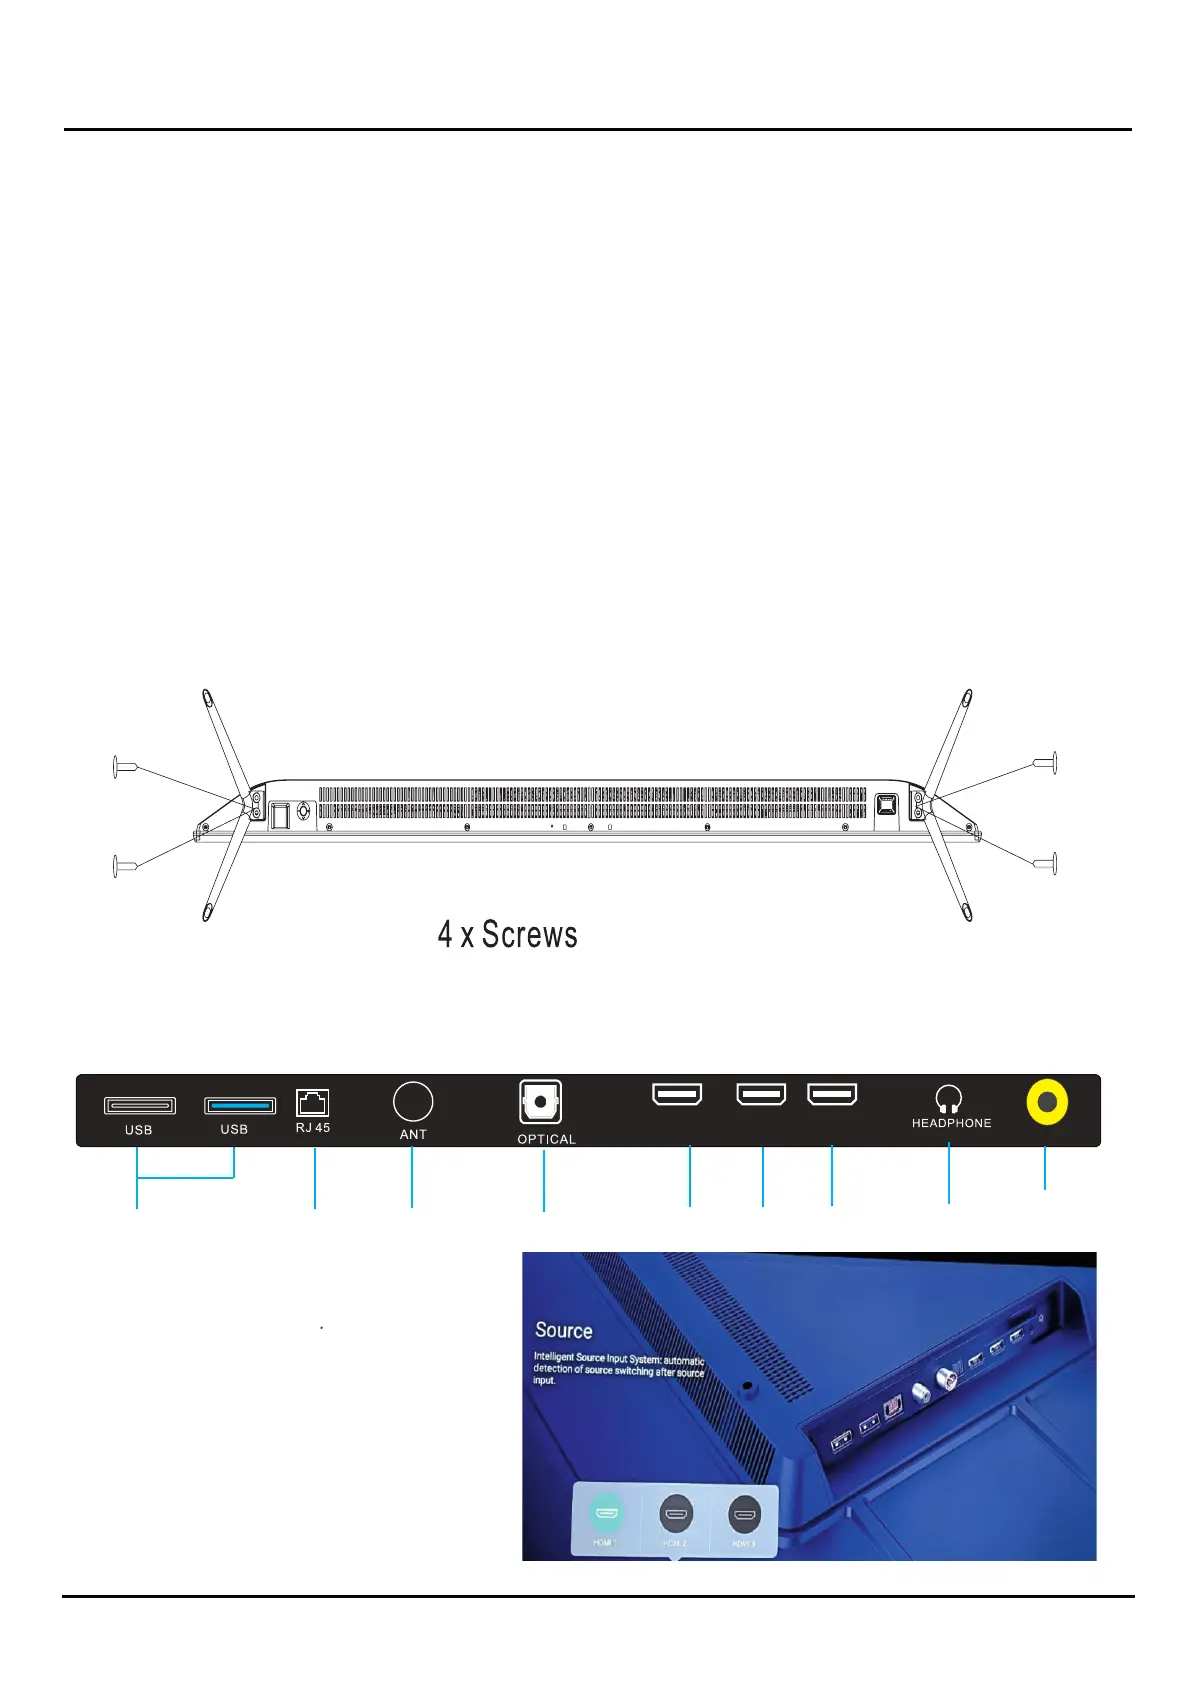
Chapter 2 Introducon
101010
HDMI1 HDMI2 HDMI 3
1.
USB INPUT VERSION 2.0 & VERSION 3.0
2.
HDMI 1 / ARC
3.
HEADPHONE PORT
4.
Rj45 (ETHERNET)
5.
OPTICAL/SPDIF
6.
7.
8.
MINI AV INPUT
ANTENNA (RF)
CONTROLS AND CONNECTIONS
HDMI 2
1 2 3 4 5 6 7 8 9
Install the stand as described below, or if you want to mount it to a wall, please contact a professional installer.
Please ensure the TV is not plugged into the wall socket and furthermore we recommend to get another person to assist in the
Step 1
Place a so cushioned m terial on top of a flat surface to prevent damaging the screen panel. Then place the TV screen
flat on top, with the screen side facing down, as illustrated on the right.
Step 2
Align the stand leg to the installaon poi t, as illustrated below.
Step 3
Tighten the screws (supplied) with a screwdriver to affix the stand to the panel, as illustrated on the right.
INSTALLATION
following task.
Ataching the stand
CAUTION!
Do not apply excessive force as this maydamage the screw holes
(As per provide in Accessory Bag)