5
GETTING STARTED
Getting Started
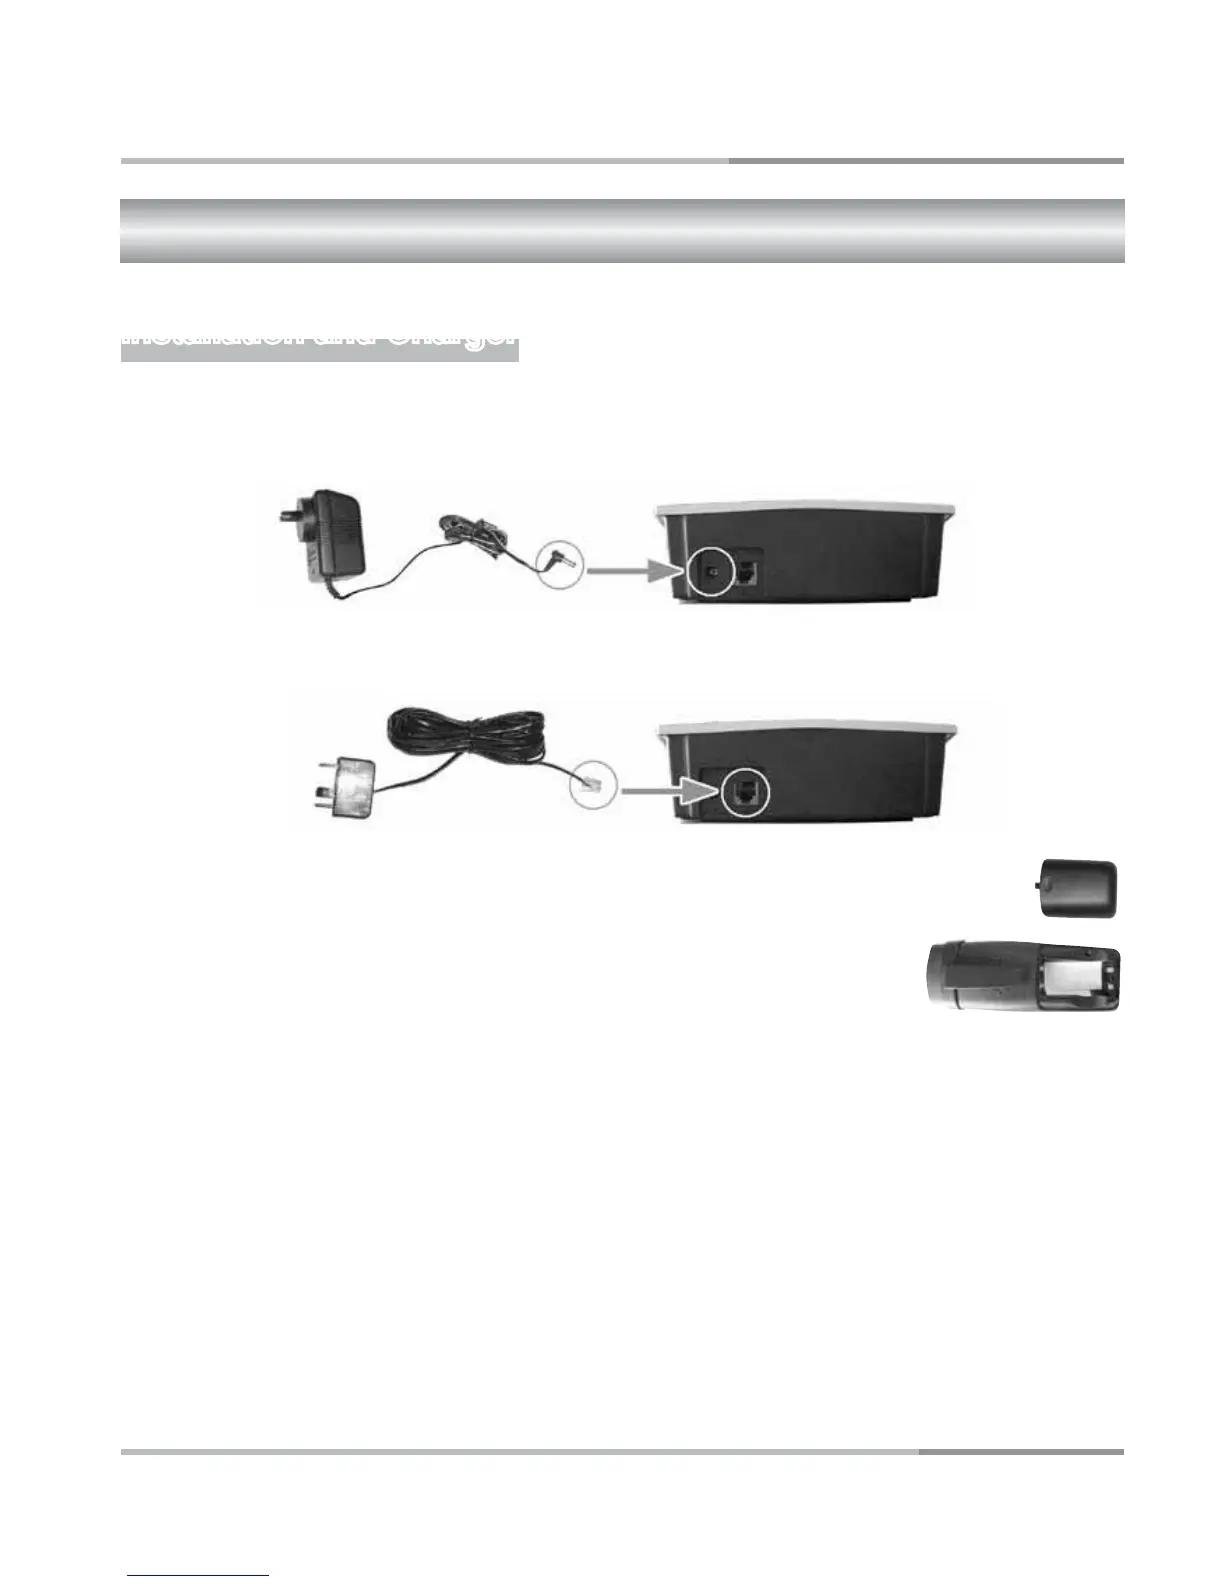
Installation and Charger
1
. Connect the mains adaptor (supplied) to the socket on the back of the base unit
and to the wall mains supply.
2
. Connect the telephone cord to the phone socket on the back of the base unit and
into the wall phone socket.
3
. Insert 2 rechargeable Ni-MH AAA batteries (included), ob-
serving the correct polarity, into the battery compartment on
the handset. Slide the battery door firmly into place.
4
. Place the handset on the charging cradle and charge the bat-
teries for a full 15 hours before using it for the first time.
Note: It may take some time for the cordless handset to
power up, and it may get warm during initial charge. This is normal.
Tip!
It is good practice to put the cordless handset on the charging cradle when it is not in
use to ensure that the handset is always fully charged.
Important: DO YOU HAVE BOADBAND/ADSL?
If you do, you must connect an in line filter (not supplied) between the telephone socket
and your M5200 base to ensure that your broadband and M5200 will work properly. If you
do not install the filter you will experience interference on the M5200 and your Broadband
may suffer dropouts. Please refer to the user guide of the in line filter for installation.
AC110~240V
 Loading...