EN19
Installation
English
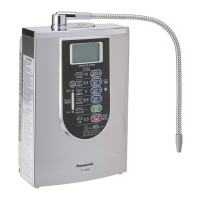
Installing the Alkaline Ionizer
5
After completing the preparations,
connect the water supply
hose.
Remove the hose fastening nut from
the bypass selector, and pass the hose
through the nut.
2
Insert the water supply hose into the
bypass selector as far as it will go.
3
<OK> <NG>
Gap
3
Tighten up the hose fastening nut securely.
z
Do not use any tools for this assembly
(since the hose fastening nut may be damaged)
6
Using the hose strap,
Secure the water supply hose.
z
Be sure to x the
water supply hose.
( Water leakage may occur.)
7
Screw in the outlet pipe until it is
secured rmly.
z Screw it in securely until it stops.
z
Ensure that the gasket does not come o or
protrude from the groove, preventing it from
twisting. (Water leakage may occur.)
z
Do not lift the unit by taking hold of the outlet pipe.
(The unit may be damaged.)
Outlet pipe
Gasket
Hose strap
Important
z If the hose is too long, it is recommended
that you cut it to the proper length
(cut it straight down).
z Do not bundle the hose as one. Do not x the
hose in such a way that the hose oats.
(Water remaining in the hose may cause
odor.)
z Do not remove the power plug normally
so that the automatic electrode cleaning
operates correctly and the cartridge life is
displayed correctly. (P. EN29, EN31)
8
Secure the drain hose using
the suction disc.
z Do not place a garbage bin under the
drain hose.
Height
dierence
(10–50 cm)
Lower than the
bottom of the
main unit
The tip of the drain hose must be lower than
the bottom of the main unit, and the height
dierence between the tip of main spout and
the tip of the drain hose must be more than
10 cm and less than 50 cm.
[So that the appropriate pH level
(ion exponent) is achieved]
9
Connect the power plug to
the power outlet
(AC 220 V - 240 V).
z A buzzer beeps, and indicator
lights up.
z The Alkaline Ionizer’s power
consumption is 0.5 W even in the
standby status.
 Loading...