100
Hardware Diagnostics
NOTE
Using the following procedure, you can run a diagnostic check on a specified hardware component, or
run an extended diagnostic check on the memory or the hard disk (The extended diagnostic check is
only for the memory and the hard disk). The extended diagnostic check is more detailed, and so
requires a longer period of time to run.
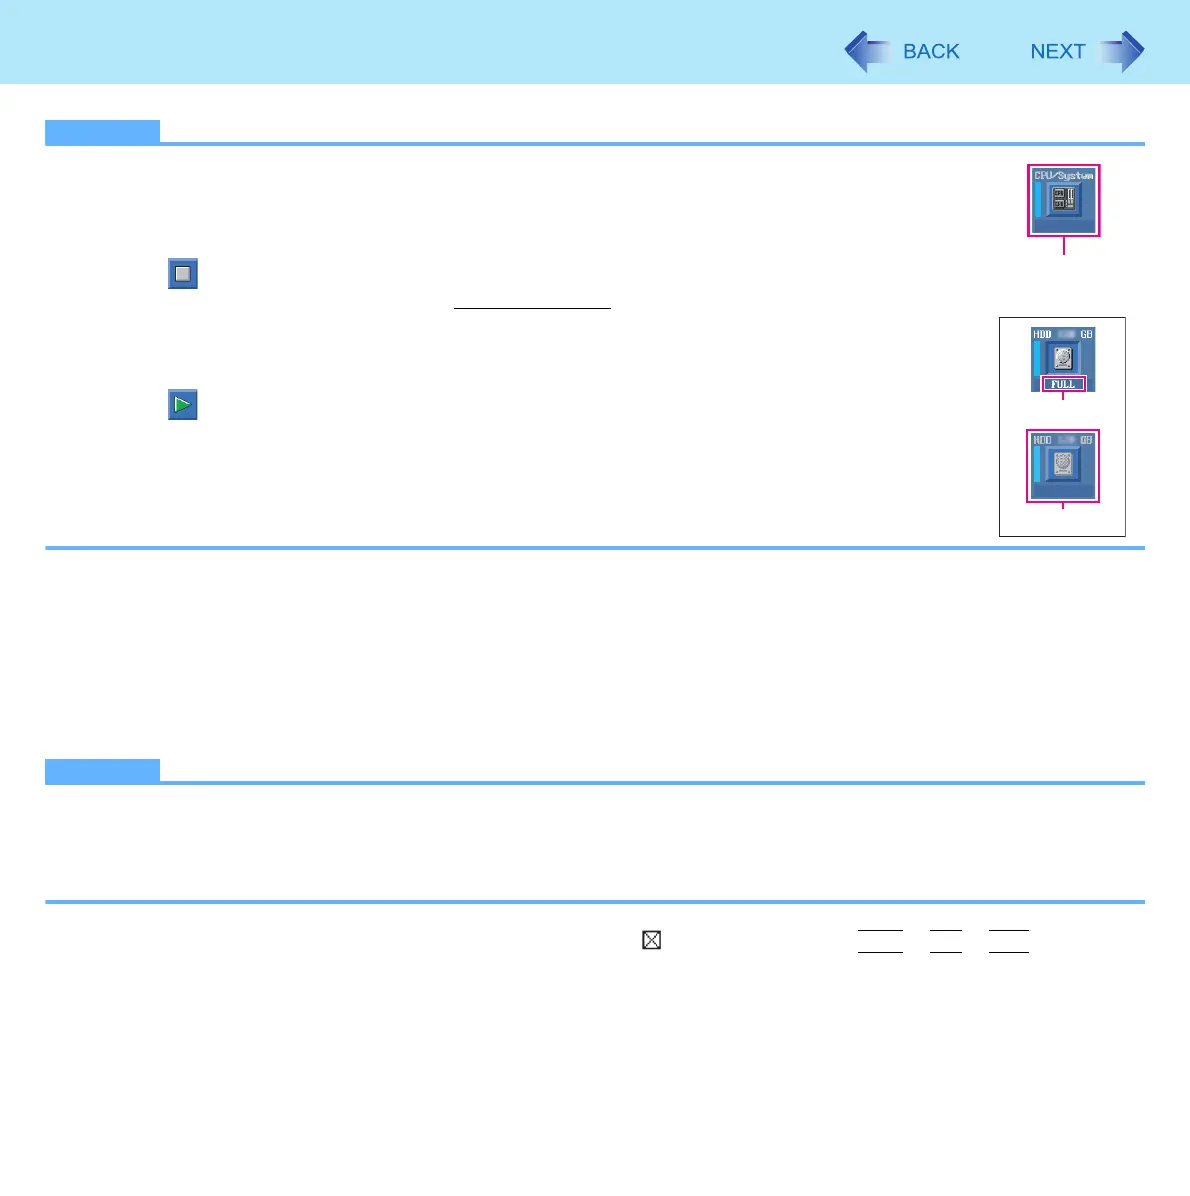
A Click to stop the diagnostic check.
B Click the icon for the hardware that is not to be checked
, so that the icon is displayed in gray (B).
When running a check on the memory or the hard disk, clicking the icon once will turn on the
extended diagnostic check (“FULL” (C) will be displayed below the icon); click again, and the icon
will be displayed in gray (D).
C Click to start the diagnostic check.
6 When all the hardware has been checked, confirm the diagnostic check results.
If the display is red and the message “Check Result TEST FAILED” is displayed, you can assume that there is a
problem with the computer’s hardware. Confirm which hardware component is displayed as red, and contact Pana-
sonic Technical Support.
If the display is green and the message “Check Result TEST PASSED” is displayed, the computer’s hardware is
operating normally. Continue using the computer as it is. If the computer still does not operate properly, reinstall the
software (
⇒ OPERATING INSTRUCTIONS “Reinstalling Software”).
NOTE
If you run a memory diagnostic check after installing a new RAM module (sold separately) and the message “Check
Result TEST FAILED” is displayed:
Remove the additional RAM module and run the diagnostic check again. If the message “Check Result TEST FAILED”
is still displayed, you can assume that there is a problem with the internal RAM module.
7 After the diagnostic check is complete, click (close), or press
Ctrl
+
Alt
+
Del
to restart
the computer.
B
e.g. hard disk
C
D
 Loading...