Do you have a question about the Panasonic HDC-SD600 and is the answer not in the manual?
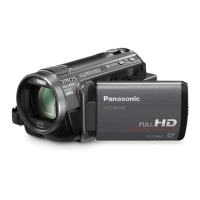
| Filter size | 46 mm |
|---|---|
| Digital zoom | 700 x |
| Optical zoom | 12 x |
| Image stabilizer | Yes |
| Focal length range | 3.45 - 41.4 mm |
| Focal length (35mm film equivalent) | 35 - 420 mm |
| Sensor type | MOS |
| Total megapixels | 9.15 MP |
| Optical sensor size | 1/4.1 \ |
| I/O ports | AV multi |
| Power requirements | DC 7.2V / 9.3V |
| Power consumption (typical) | 5.8 W |
| Display diagonal | 2.7 \ |
| Still image resolution(s) | 4608 x 3072 |
| Camera shutter speed | 1/25 - 1/8000 s |
| Minimum illumination | 1.6 lx |
| USB 2.0 ports quantity | 1 |
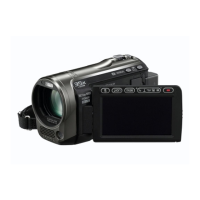
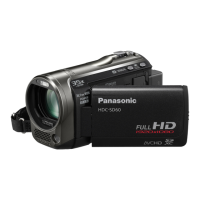
| Product color | Black |
| Bundled software | HD Writer AE 2.1 |
| Depth | 126 mm |
|---|---|
| Width | 62 mm |
| Height | 66 mm |
| Weight | 325 g |
Details on EMC compatibility, CE marking, and product identification markings.
Warnings and cautions regarding electrical safety, ventilation, and proper usage to prevent hazards.
Instructions for proper disposal of electrical equipment and batteries according to EU directives.
Guidelines for discarding items in countries outside the European Union.
Panasonic's disclaimer for damages related to recording or editing issues.
Details on SD Memory Card, SDHC Memory Card, and SDXC Memory Card compatibility.
Information on compatible batteries, charging procedures, and important notes.
Step-by-step instructions for installing and removing the battery pack.
Details charging times and recording durations for different battery models.
Instructions for connecting the unit to an AC outlet for power.
Lists compatible SD, SDHC, and SDXC memory cards and their specifications.
Step-by-step guide for inserting and removing SD cards, including precautions.
Instructions for powering the unit on and off using the dedicated power button.
Instructions for powering the unit on and off by opening and closing the LCD monitor.
Details on how to interact with the touch screen, including operation icons.
Instructions on how to rotate the LCD monitor to record yourself.
Guidance on holding the unit correctly for stable recording.
Advice on steady handling and zoom usage for better motion picture recording.
Instructions on how to attach and remove the lens hood for improved picture clarity.
Explanation of icons and information displayed on the screen during motion picture recording.
Information on compatibility of recorded motion pictures with other devices.
Explains focus indications, screen indicators, and focusing areas for still picture recording.
Explanation of icons and information displayed on the screen during still picture recording.
Details on how to record still pictures while recording motion pictures.
Explains the button used to switch between intelligent auto and manual modes.
Details on automatic white balance functions and auto focus behavior in intelligent auto mode.
Details on selecting playback operations using on-screen icons and controls.
Instructions for playing back recorded scenes in 1080/50p format.
How to change thumbnail displays and adjust speaker volume during playback.
Information on motion picture and still picture file compatibility.
Explanation of the guide display feature within the menu screen.
Configuration options for screen display settings and clock setup.
Procedure for setting the world time, including home and destination regions.
Enables the unit to enter recording pause quickly when turned on.
Allows the unit to resume recording pause mode quickly after the LCD monitor is reopened.
Enables or disables the remote control functionality.
Adjusts LCD brightness and enables/disables alert sounds for operations.
Allows adjustment of LCD monitor brightness and color density.
Settings for HDMI output resolution and VIERA Link connectivity.
Procedures for formatting SD cards and checking their status.
Steps to calibrate the touch screen for accurate input.
Enables demonstration modes for the unit's functions and optical image stabilizer.
Allows selection of the display and menu language.
Details on the functions of various buttons on the remote control.
Guide for replacing the button-type battery in the remote control.
Details on the optical and extra optical zoom mechanisms and their operation.
Configuration of the optical image stabilizer for still picture recording modes.
Explanation of the target frame, subject tracking, and conditions affecting AF/AE tracking.
Selects icons to add effects like fade, intelligent contrast, and PRE-REC.
Using fade effects and intelligent contrast control for image enhancement.
Enables recording of scenes starting a few seconds before the record button is pressed.
Using the self-timer for still pictures and intelligent exposure for clear images.
Compensating for backlighting and softening skin tones for better portraits.
Using tele macro for close-ups and guidelines for composition and leveling.
Enables recording of color images in very low light situations.
Optimizing settings for various shooting conditions like sports, portraits, and scenery.
Configuring zoom ratios for motion picture recording.
Selecting picture quality settings (HA, HG, HX, HE) for motion picture recording.
How to register faces, enter names, and manage recognition data.
Enables displaying recognized person names and framing detected faces on screen.
Highlights prioritized faces for focus and brightness adjustments.
Automatic adjustments for recording stability and low light conditions.
Enhancing color vividness using x.v.Colour technology.
Provides shooting tips and reduces wind noise for clearer audio.
Adjusts microphone directionality based on zoom operation for clearer sound.
Sets resolution and aspect ratio for still and motion pictures.
Enables manual control over recording settings by pressing the iA/MANUAL button.
Navigating scenes with index for quick playback from specific points.
Setting playback to repeat the current scene or sequence.
Resuming playback from stopped points.
Zooming in on still pictures during playback for detailed viewing.
Playing back motion pictures and still pictures organized by recording date.
Setting playback duration, date, and format.
Choosing background music for playback or slide shows.
How to delete multiple scenes or still pictures from the thumbnail display.
Removing personal face recognition data from recorded scenes.
Safeguarding content from accidental deletion.
Steps for connecting the camera to a TV using HDMI or AV multi cables.
Instructions for connecting the unit using an HDMI mini cable.
Connecting via AV multi cable and adjusting component output settings.
Explanation of the VIERA Link function for automatic linked operations.
Information on preparing for copying and compatible disc types.
Step-by-step guide for connecting the unit to a DVD burner and inserting a disc.
Procedures for formatting discs and enabling auto protect for data safety.
Accessing information about recorded discs, such as recorded scenes and finalization status.
Introduction to the PC software for copying, editing, and managing data.
Capabilities for copying data to PC hard drives or discs using the software.
Playing back data on PC and using the conversion assist function for efficient transfer.
Key considerations regarding AVCHD disc compatibility and SDXC card usage.
Specifies PC OS, CPU, RAM, display, and storage needed for the software.
Instructions from inserting CD-ROM to creating shortcuts.
Connecting the unit to AC, turning it on, and linking to the PC via USB.
Transferring still pictures from the camera to a PC using file explorer.
Steps to start the HD Writer AE 2.1 application on the PC.
Guidance on reading the PDF operating instructions for the software.
System requirements and software compatibility for Mac users.
Transferring still pictures from the camera to a Mac using USB.
Icons indicating connection status with other devices.
Specific indications shown when a DVD burner is connected.
Displays critical messages like 'CHECK CARD' and 'THIS BATTERY CANNOT BE USED'.
Troubleshooting for power, operation, remote control, and battery indication problems.
Troubleshooting VIERA Link not working and PC not detecting the unit via USB.
Resolving PC error messages, DVD burner power, and PDF instruction access problems.
Keeping unit away from electromagnetic fields, dust, water, and avoiding drops.
Proper cleaning methods and avoiding chemicals that could damage the unit.
Notes on unit usage limitations and recommendations for long-term storage.
Information on handling, storing, and maintaining the rechargeable lithium-ion battery.
Advice on spare batteries and safety precautions when handling batteries.
Guidelines for using the AC adaptor, including connection and potential interference.
Recommendations for SD card management, including formatting and disposal.
Guidelines for cleaning and handling the LCD monitor to ensure proper touch response.
Handling personal data and Panasonic's disclaimer for information loss.
Understanding condensation causes and methods to prevent it.
Guidance on respecting copyright laws when recording material.
List of trademarks and licensing information for technologies used in the unit.
Details on power source, signal system, image sensor, lens, and zoom.
Specifications for microphone, speaker, video outputs, USB, flash, dimensions, and operating conditions.
Recording media, compression, modes, transfer rates, and picture sizes for motion pictures.
Recording media, compression, and picture sizes for still pictures.
Instructions for attaching the battery pack holder kit.
Instructions for attaching conversion lenses and filter kits.
Guidelines for using the lens cap supplied with the filter kit.