Advanced (Playback)
- 112 -
3 Press [MENU/SET].
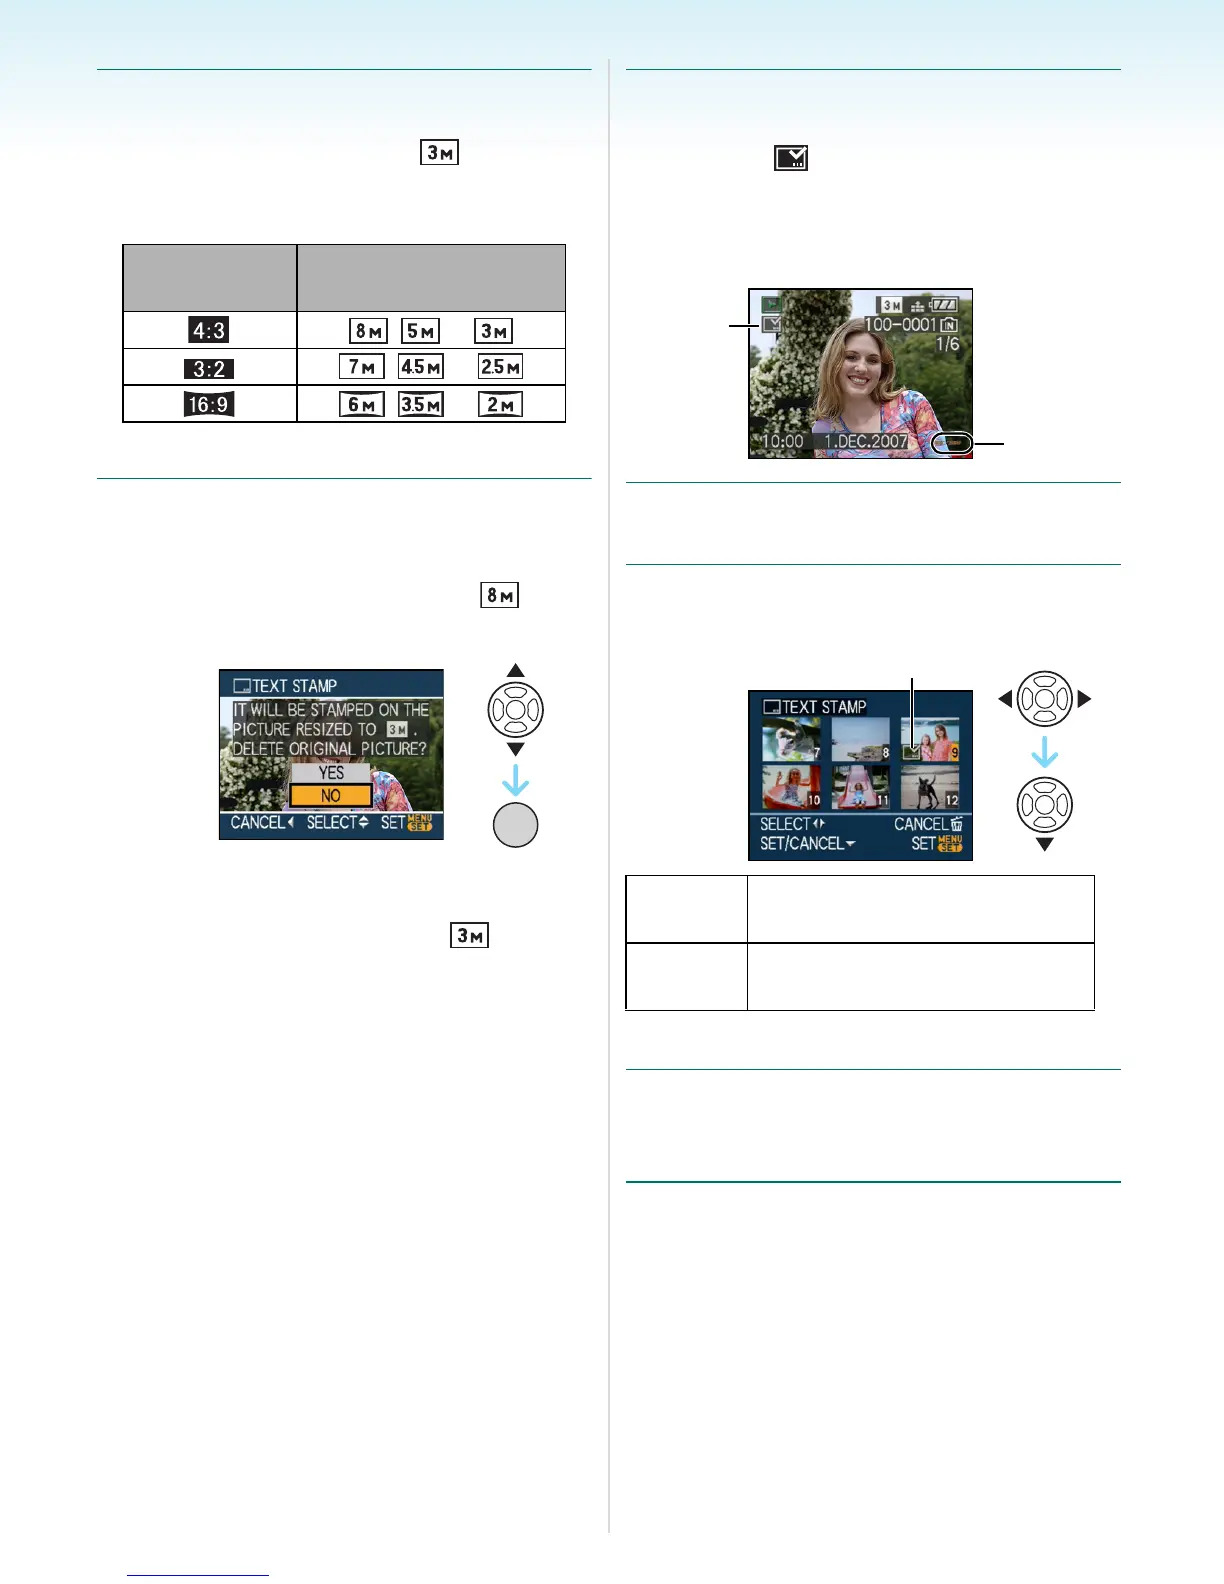
• If you set [TEXT STAMP] for a picture with
a picture size larger than [ ], the
picture size will become smaller as shown
below.
• The picture becomes slightly rougher.
4 Press 3/4 to select [YES] or [NO]
and then press [MENU/SET].
(The screen shown appears when you
select a picture recorded with a [ ]
picture size.)
• The message [DELETE ORIGINAL
PICTURE?] appears if the picture was
recorded with a picture size [ ] or less.
• The picture is overwritten when you select
[YES]. Pictures stamped with text cannot
be restored once they are overwritten.
• A picture stamped with text is newly
created when you select [NO].
• If the original picture is protected, you
cannot overwrite it. Select [NO] and newly
create the picture stamped with text.
5 Press [MENU/SET] twice to close
the menu.
• The icon [ ] A appears on screen if the
picture is stamped with text.
• Use playback zoom to check added text
and dates information B.
∫ Multi setting
1 Press 2/1 to select the picture and
then press 4 to SET/CANCEL.
• Repeat this step.
2 Press [MENU/SET].
• After performing step 2, perform step
2 onwards in “Single setting”.
Aspect ratio
setting
Picture size
/ >
/ >
/ >
/SET
MENU
[SET]
The [TEXT STAMP] icon A
appears.
[CANCEL]
The [TEXT STAMP] icon A
disappears.
A
B
A

 Loading...