- 133 -
Advanced (Playback)
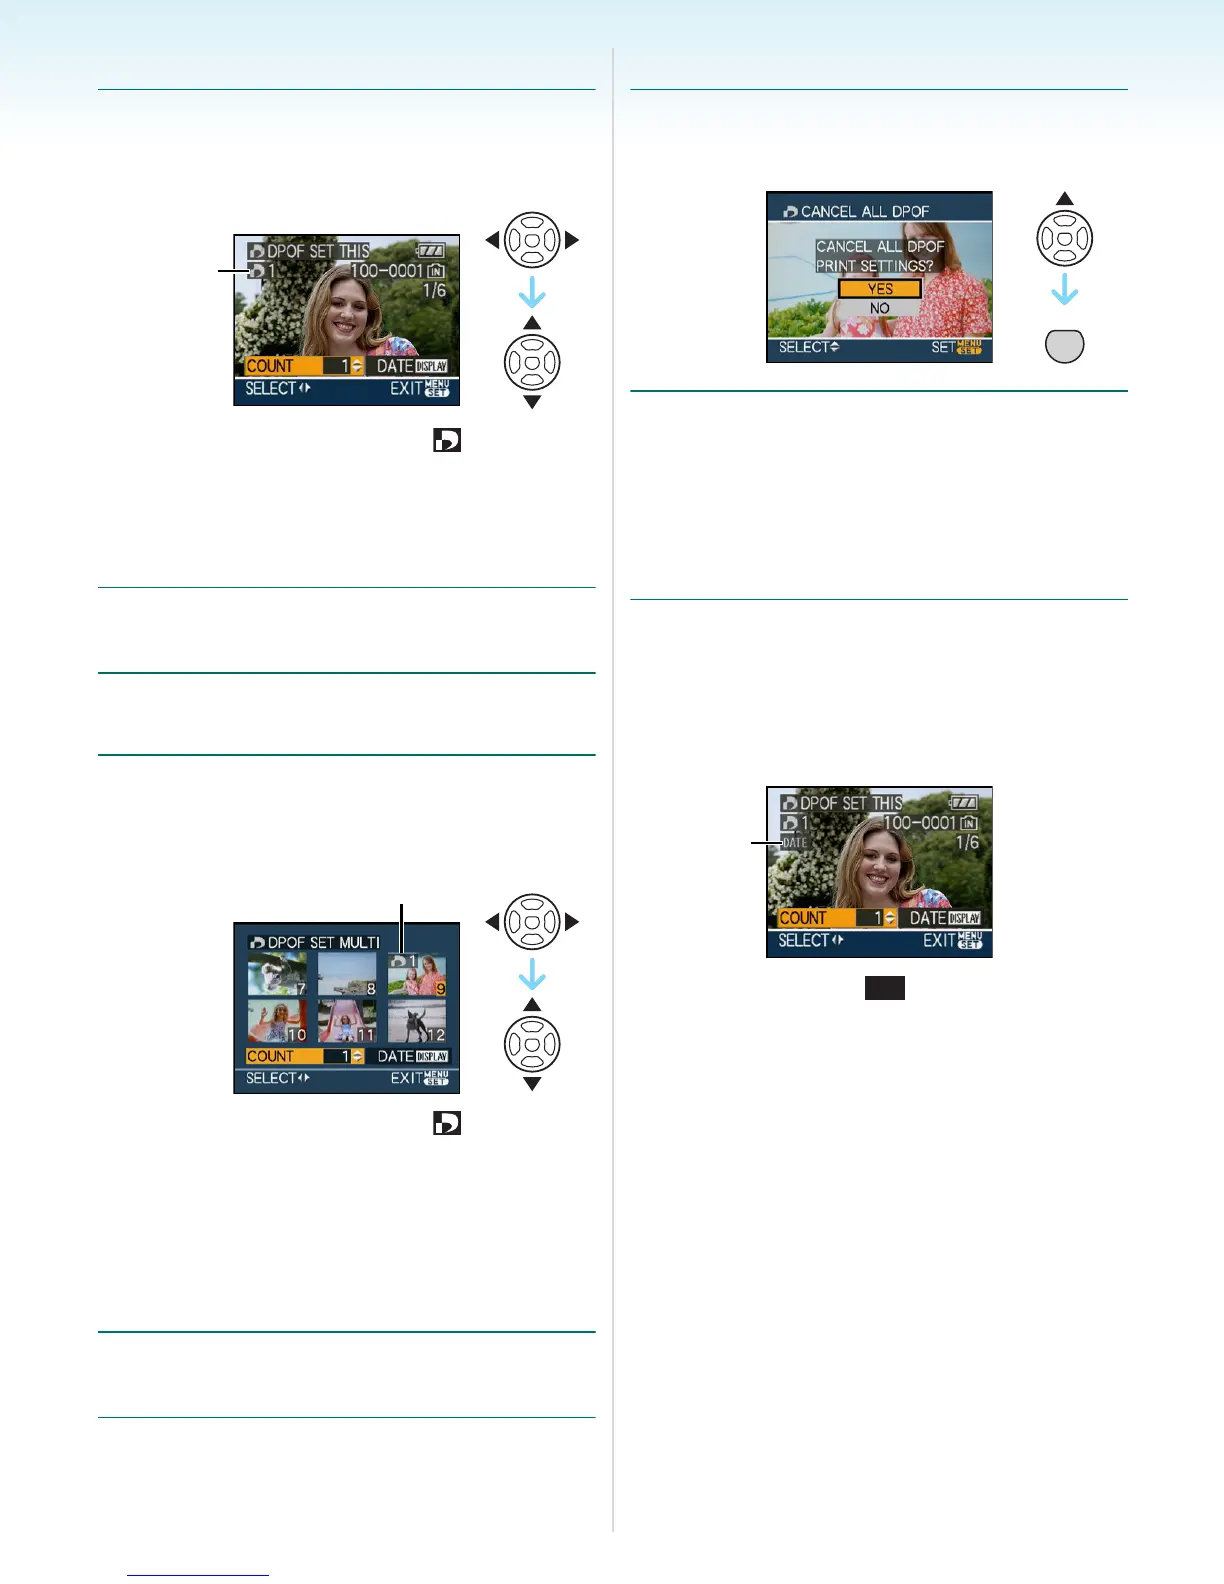
∫ Single setting
1 Press 2/1 to select the picture to
print and then press 3/4 to set the
number of prints.
• The number of prints icon [ ] A
appears.
• The number of prints can be set from 0 to
999. The DPOF print setting is cancelled
when the number of prints is set to [0].
2 Press [MENU/SET] twice to close
the menu.
∫ Multi setting
1 Press 2/1 to select the picture to
print and then press 3/4 to set the
number of prints.
• The number of prints icon [ ] B
appears.
• Repeat the above procedure. (You cannot
set all the pictures at one time.)
• The number of prints can be set from 0 to
999. The DPOF print setting is cancelled
when the number of prints is set to [0].
2 Press [MENU/SET] twice to close
the menu.
∫ To cancel all settings
1 Press 3 to select [YES] and then
press [MENU/SET].
2 Press [MENU/SET] to close the
menu.
• DPOF print settings on the built-in
memory are cancelled when a card is not
inserted. DPOF print settings on the card
are cancelled when a card is inserted.
∫ To print the date
After setting the number of prints, set/cancel
printing with the recording date by pressing
[DISPLAY].
• The date print icon [ ] C appears.
• When you go to a photo printing store for
digital printing, be sure to order the printing
of the date additionally if required.
• Depending on the photo printing store or the
printer, the date may not be printed even if
you set to print the date. For further
information, ask at your photo printing store
or refer to the operating instructions for the
printer.
• The date cannot be printed on pictures
stamped with text.
• If you set [TEXT STAMP] for pictures that
have been set for date printing, the date
printing setting is cancelled.
A
B
MENU
SET
C
DATE
 Loading...