Advanced (Recording pictures)
- 50 -
Taking Pictures using
the Built-in Flash
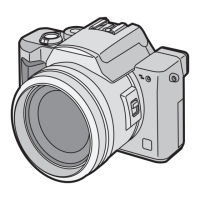
A To open the flash
Press the flash open button.
B To close the flash
Press the flash until it clicks.
• Be sure to close the flash when not in use.
• The flash setting is fixed to Forced OFF [ ]
while the flash is closed.
∫ Switching to the appropriate flash
setting
Set the flash to match the recording.
1 Press 1 [].
2 Press 3/4 to select a mode.
• You can also press 1 [ ] to select.
• For information about flash settings that
can be selected, refer to “Available flash
settings by recording mode”. (P51)
3 Press [MENU/SET].
• You can also press the shutter button
halfway or press the centre of the
joystick to finish.
• The menu screen disappears after about
5 seconds. At this time, the selected item
is automatically set.
OPEN
:AUTO
The flash is automatically activated when
the recording conditions make it
necessary.
: AUTO/Red-eye reduction
¢
The flash is automatically activated when
the recording conditions make it
necessary.
It is activated once before the actual
recording to reduce the red-eye
phenomenon (eyes of the subject
appearing red in the picture) and then
activated again for the actual recording.
• Use this when you take pictures of
people in low lighting conditions.
or
 Loading...
