12
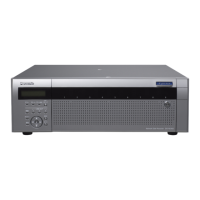
1 Confirm that the standby display is on the LCD.
When a display other than the standby display is on
the LCD, continue pressing the [ESC] button until
the standby display is displayed on the LCD.
2 Display the IP address setup display by press the
arrows button (up or down).
3 Press the [SET] button.
The "PT#1 IP ADDR" indication will be displayed.
4 Select the desired network port by pressing the
arrows button (left or right).
PT#1: Camera port
PT#2: Client PC port
PT#3: Maintenance port
5 Display the settings item by pressing the arrows
button (up or down).
DHCP
IP address
Subnet mask
Default gateway
HTTP port
Note:
• ThesettingsofDHCP,defaultgatewayandHTTP
port can be configured only for "PT#2".
6 Press the [SET] button while the underscore
mark (_) is displayed below the ">" indication.
Move the underscore mark below the number to be
edited.
The current selected settings item or a value will be
indicated by the underscore mark "_".
7 Enter values using the arrows button.
Move the underscore mark "_": Arrows button (left
or right)
Enter a value: Arrows button (up or down)
8 To determine the edited setting, move the under-
score mark below the ">" indication by pressing
the [ESC] button.
9 To configure other setting items, shift the display
by pressing the arrows button (up or down).
10
Repeat steps 5 - 8 to configure each setting
item.
 Loading...