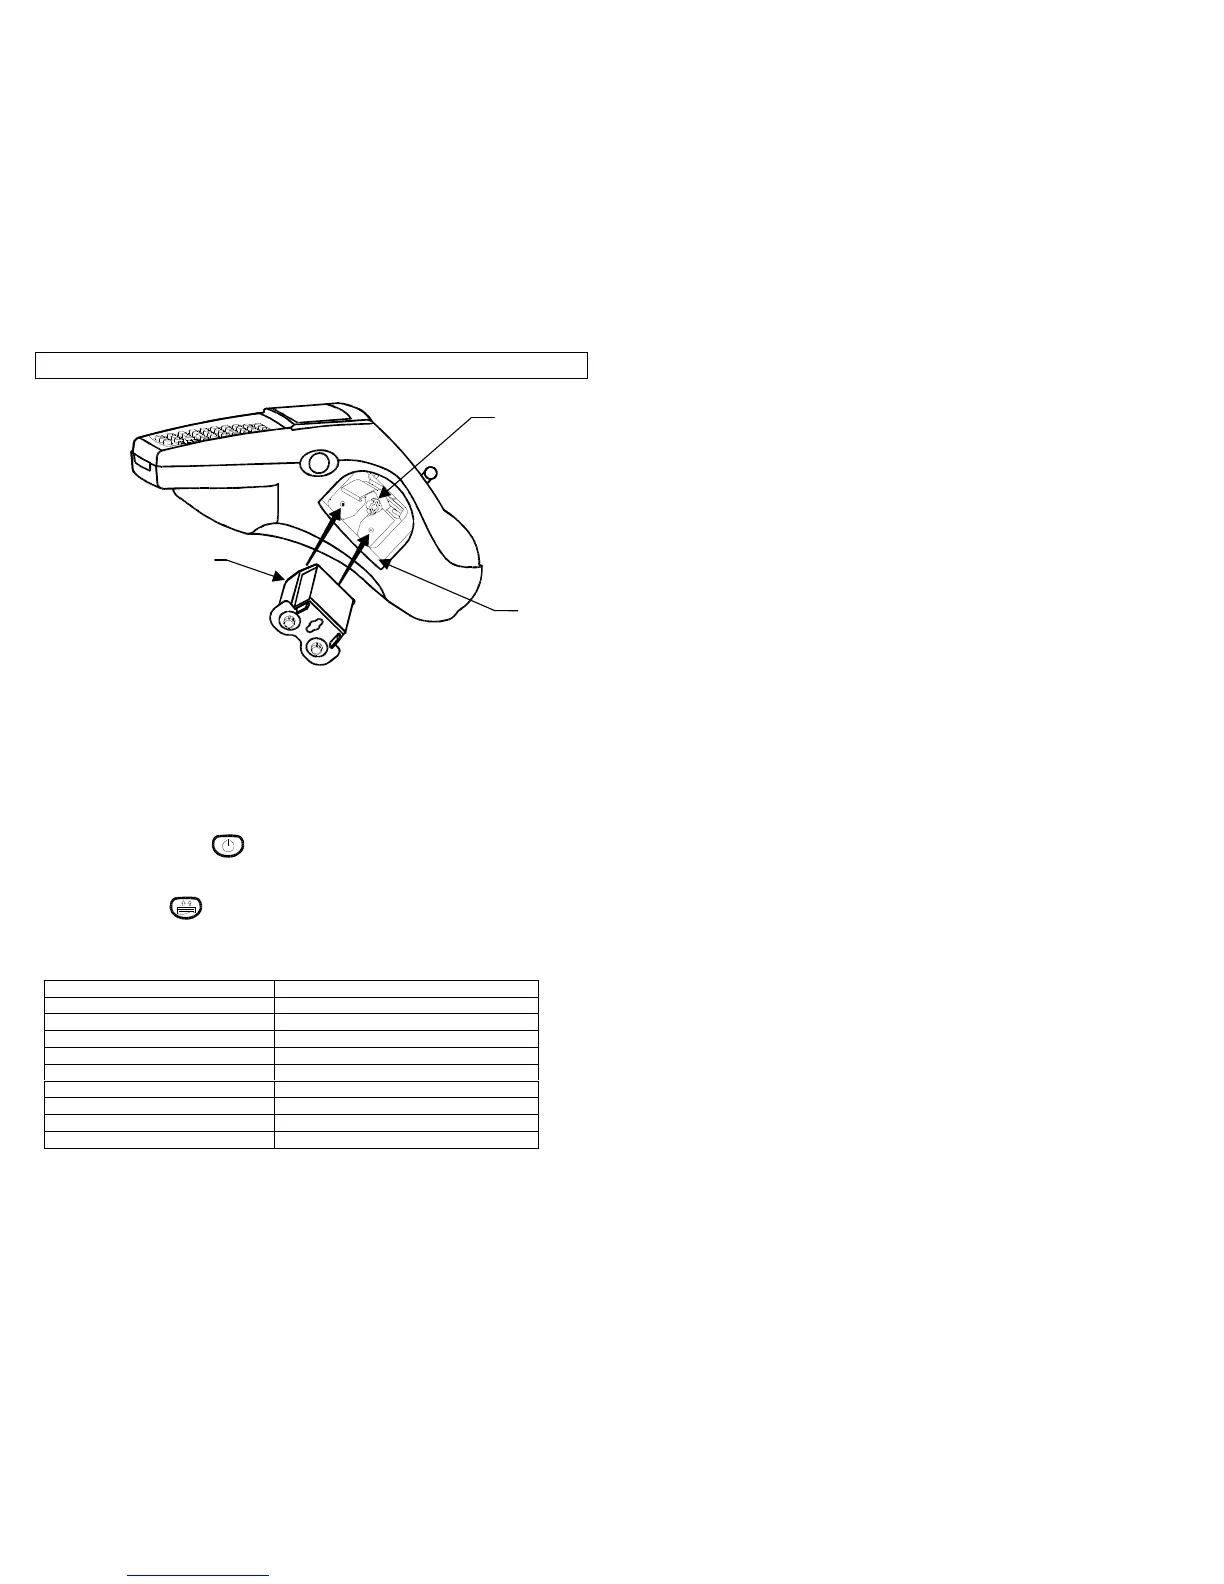
RIBBON LOADING & SELECTION
10
The Viper™ LS6 uses a cartridge based ribbon (wax or resin) to form legends
on labels. The ribbon is loaded into the printer by the following steps:
Printer must be turned OFF.
1. Open ribbon door on side of printer by pushing on arrow.
2. Rotate ribbon lock knob into open (unlocked) position [Counter
clockwise].
3. Remove slack from ribbon by winding left roller.
4. Insert the ribbon cartridge, the web of the ribbon should slide freely
between the rubber roller and the print head.
5. Turn printer ON .
6. Rotate ribbon lock knob into closed (locked) position –[Clockwise].
7. Close ribbon door on side of printer.
8. Press the key to align the ribbon, by advancing forward an inch
or two. If the label is not installed, you may need to press any key to
stop the feed.
Viper™ LS6 label media ribbon compatibility chart
Label Material Ribbon Required
Vinyl, Self-Laminating LS6-RWBLK
Heat Shrink LS6-RWBLK
Vinyl Tape LS6-RRBLK
Vinyl Cloth LS6-RWBLK
Polyester, Clear LS6-RRBLK or LS6-RRWHT
Polyester, White LS6-RRBLK
Polyolefin LS6-RRBLK
Non-Adhesive Polyester LS6-RRBLK
Paper NONE
LS6-RWBLK – Black Wax LS6-RRBLK – Black Resin
LS6-RRWHT – White Resin
Ribbon
Lock Knob
Ribbon
Cartridge
Ribbon
Door
 Loading...