www.parweld.com
10
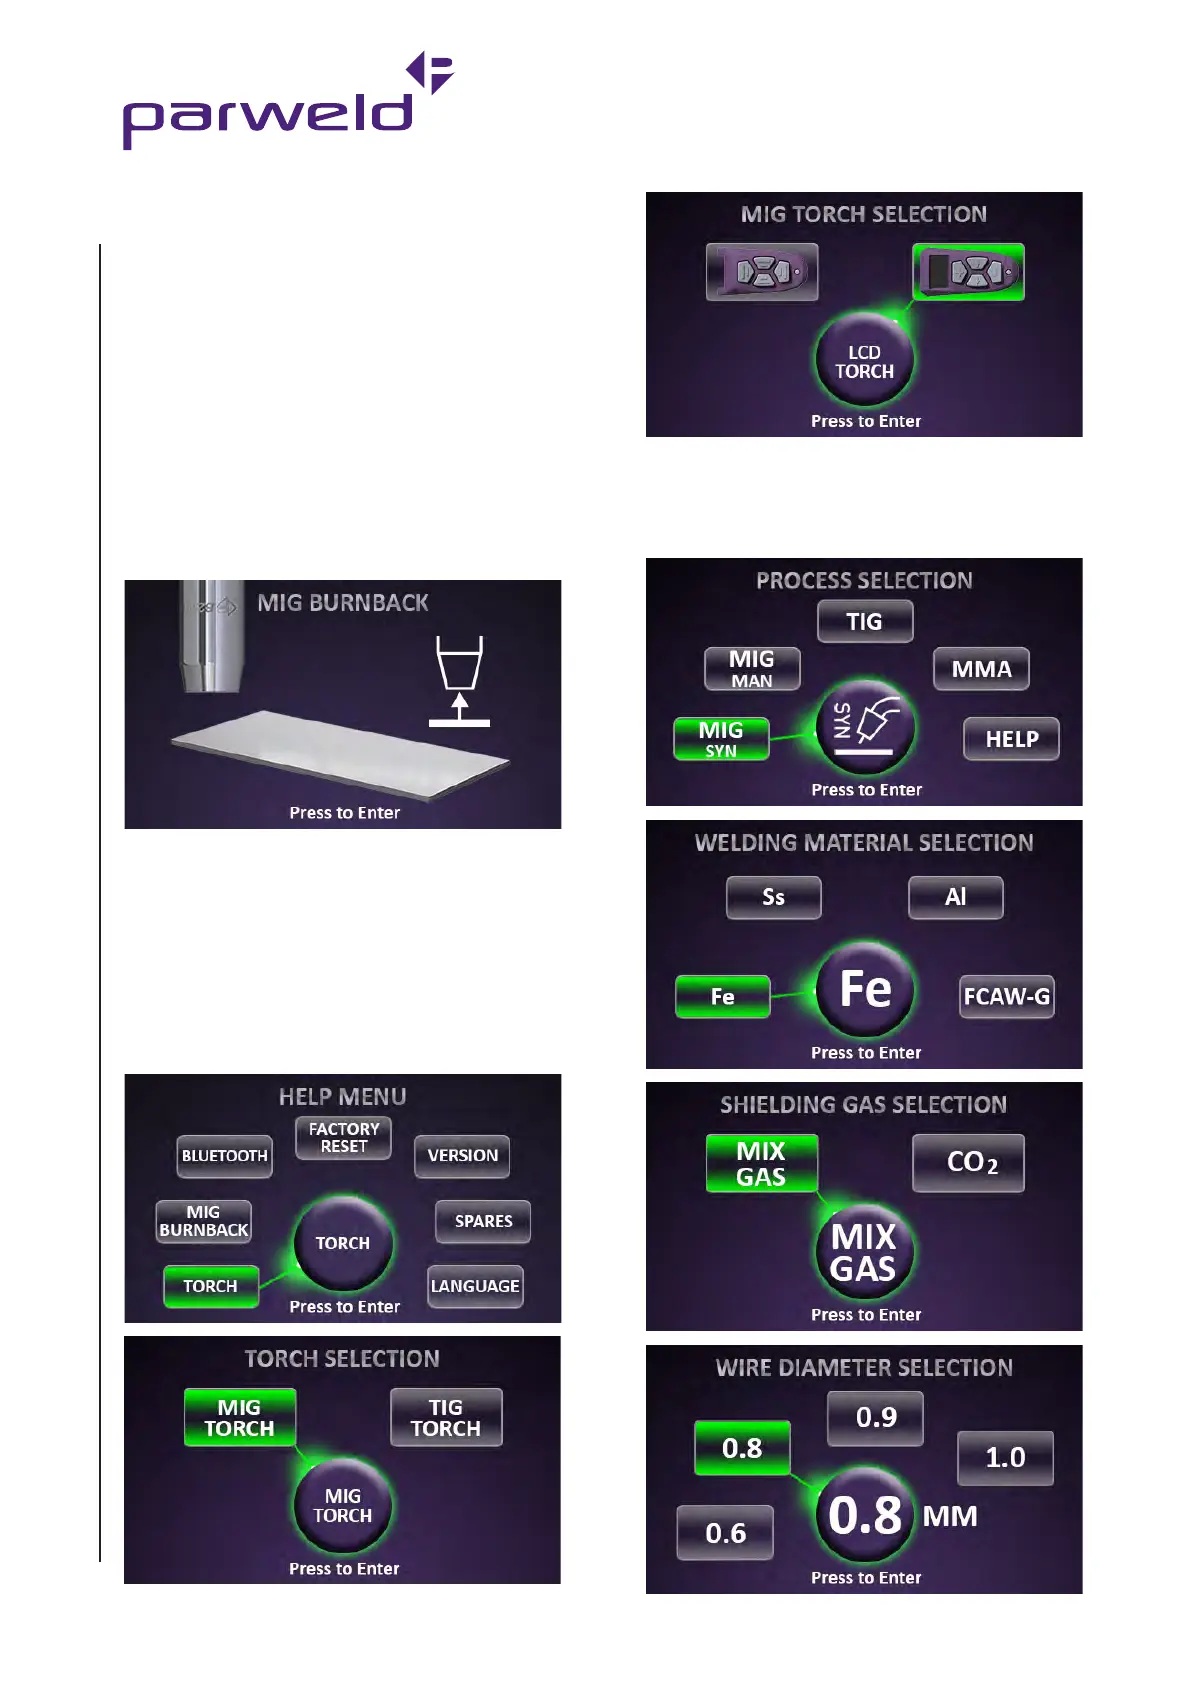
7.2 MIG SYN Synergic MIG Welding Allows
Simple and Rapid Setup.
Follow the screen prompts to complete the machine setup.
Example setting.
MIG Torch Installation (continued)
8. Press end of gun against a solid object that is electrically isolated
from the welder output and press the gun trigger for several
seconds.
9. If the wire "bird nests", jams or breaks at the drive roll, the idle
roll pressure is too great. Back the adjustment knob out 1/2 turn,
run new wire. If the only result was drive roll slippage, loosen
the Hand nut on the central connector and pull the torch forward
about 6" (15cm) away from the power source. There should be
a slight waviness in the exposed wire. If there is not waviness,
the pressure is too low. Tighten the adjustment knob 1/4 turn,
reinstall the torch cable and repeat the above steps.
10. When triggering, the electrode and drive mechanism are
electrically "LIVE" relative to work and ground and remain "LIVE"
several seconds after the gun trigger is released.
Burn back
Adjusted on screen from the Help Menu.
Soft start
The machine has a pre-set soft start system.
7.0 Setting the Machine
for Welding
7.1 MIG Torch Selection
Select the HELP menu from the main Process Selection screen and
follow the screen prompts as follows.


 To Next Page