Install a DSC 6000 . 39
Set Up the DSC 6000 System Components
Place the DSC 6000 on your laboratory bench. Do not plug in the power cord until instructed.
The computer and printer should already be on the bench and installed according to each
item’s instructions.
Be sure to set up all of the system components listed below before switching on the
DSC 6000:
• Select the correct voltage
• Install the purge gases
• Install the cooling device
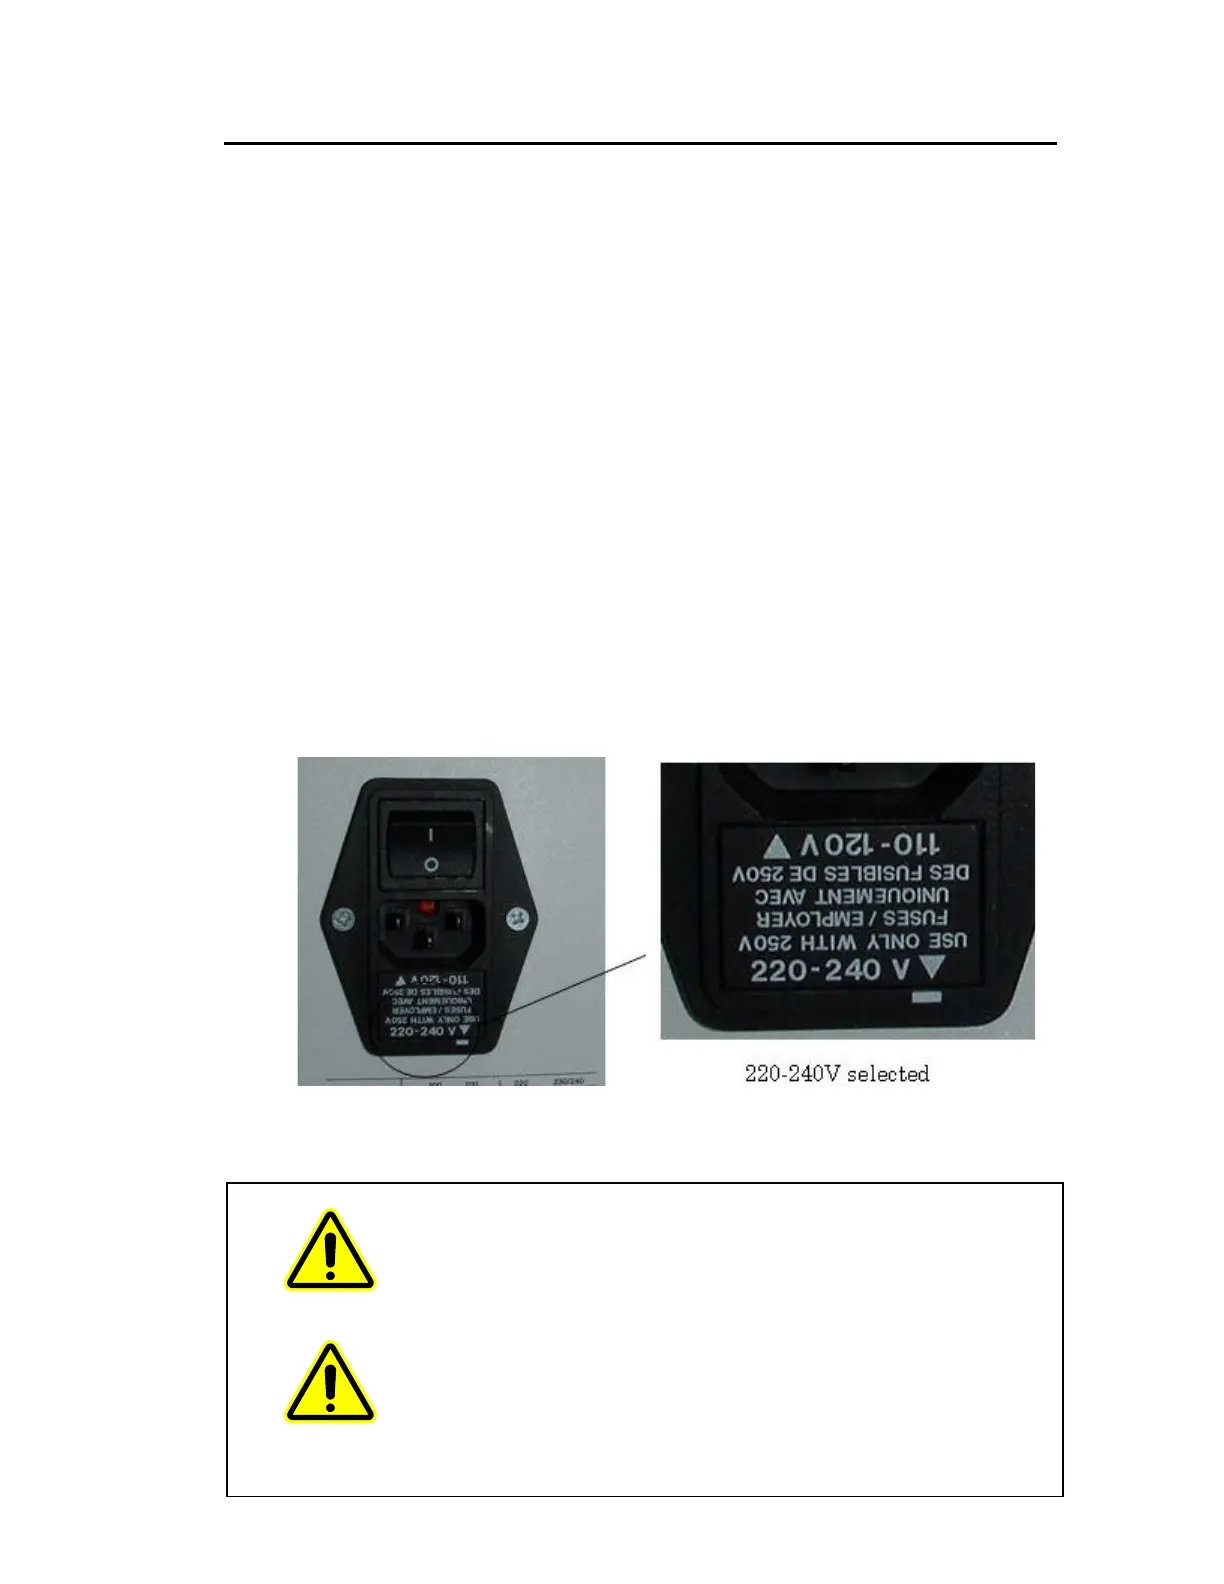
Select the Correct Voltage for the DSC 6000
The DSC 6000 accepts the following voltages: 100–120 V and 200–240 V (50/60 Hz).
It is configured and shipped to operate at 200–240 V. Selection of the correct voltage for
your lab can be done at the AC inlet plug at the rear of the DSC 6000.
First check whether the voltage selection corresponds to the voltage in your laboratory. This
can be seen easily: the voltage range with the text in an upright position and the arrow
pointing at the small line represents the voltage that has been selected.
To select the correct voltage for the DSC 6000 in your laboratory:
WARNING
AVERTISSEMENT
Ensure that the mains power lead is disconnected from the
instrument before proceeding
.
Assurez-vous que le cordon d'alimentation secteur est
débranché de l'instrument avant de continuer
.
 Loading...