48 . DSC 6000 Installation and Hardware Guide
Connect the DSC 6000 System Components
The computer and optional printer should already be connected together and the Pyris
software already installed. To complete the connection of the system components, the
DSC 6000 has to be connected to the computer.
CAUTION
ATTENTION
Make sure that the computer is off before plugging in the DSC 6000.
Assurez-vous que l'ordinateur est éteint avant de brancher le DSC 6000.
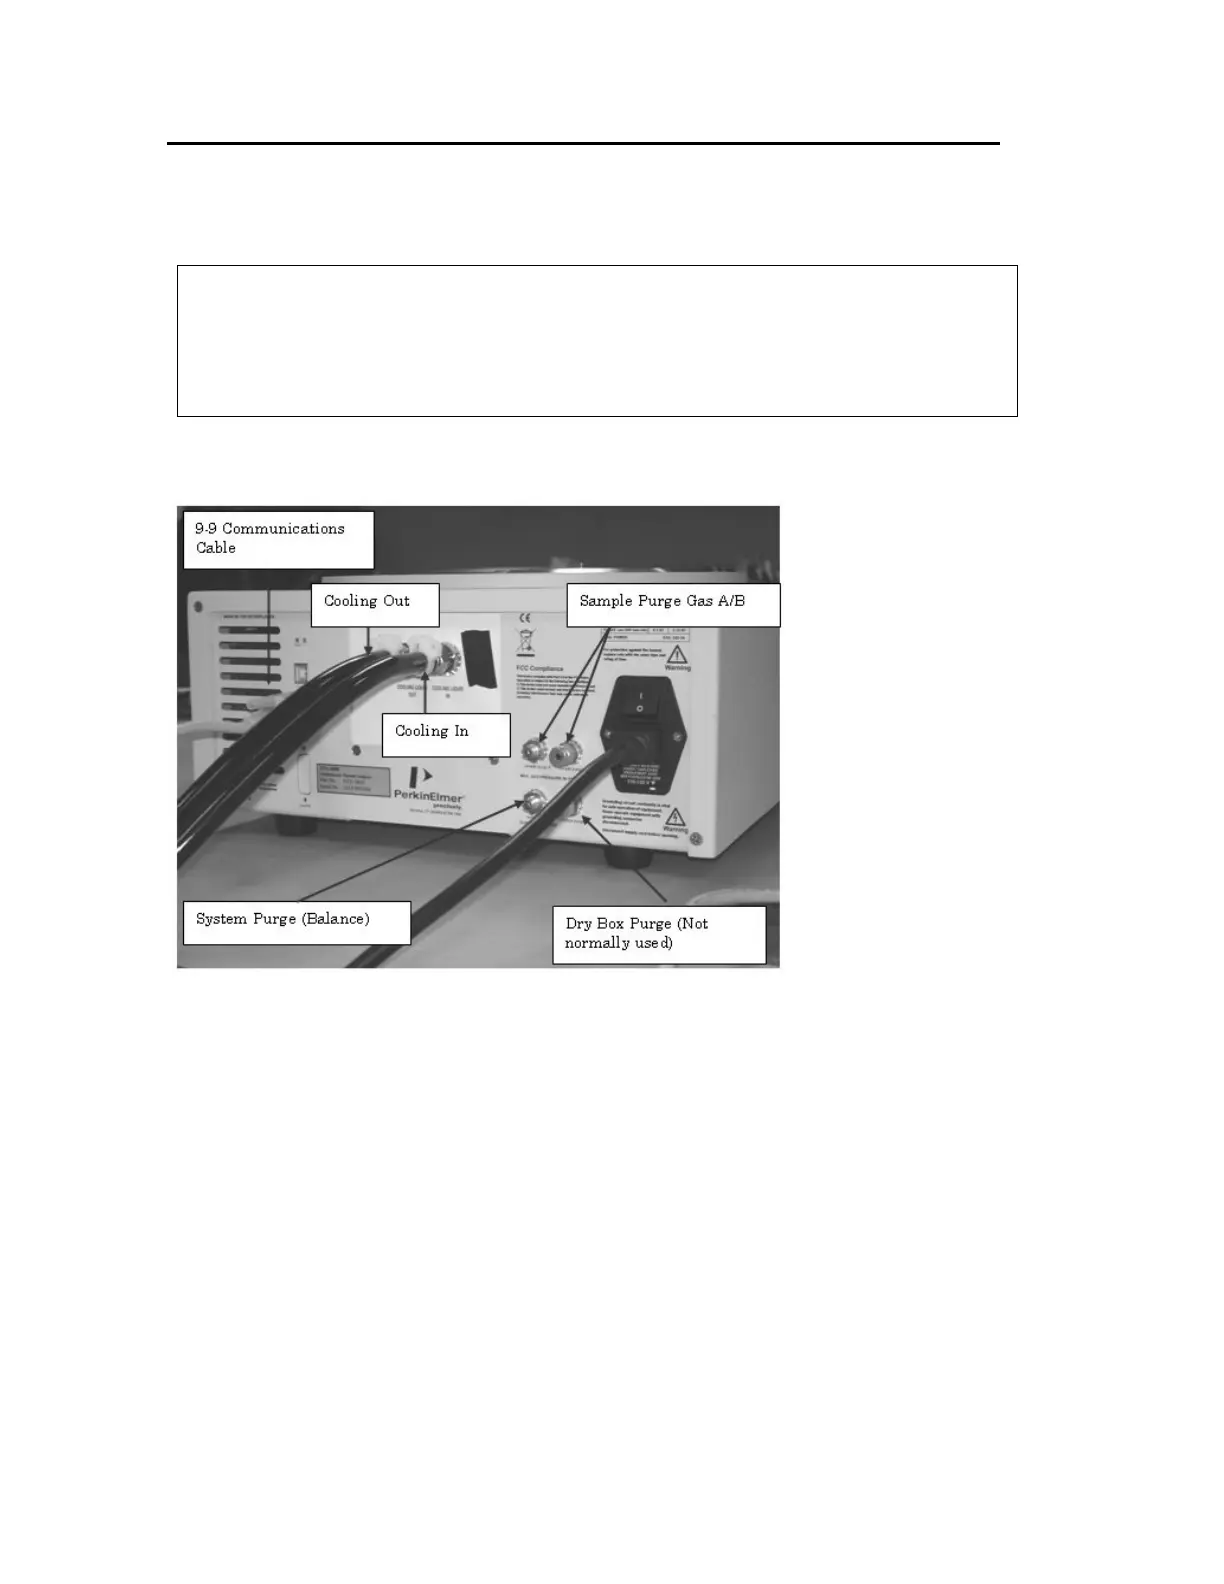
The image below shows the connections on the DSC 6000 (Your instrument may show a
slight variation):
Make sure all components are turned off and unplugged before you begin.
1. Connect one end of the USB cable to the back of the DSC 6000.
2. Connect the other end of the USB cable to the back of the computer.
3. Connect the printer and printer cable to the computer.
4. Connect the analyzer, printer and computer power cords to AC outlets.
5. Connect the LN2 cable to the back of the DSC 6000 (CryoFill system only).
6. Connect the other end of the LN2 CryoFill cable to the CryoFill Accessory (CryoFill
system only).
7. Once the system connections are made, switch on the system in the following order:
– Computer
– DSC 6000
– Printer
8. Turn on the purge gas and dry gas, the water for the DSC 6000 cooling system or any
other accessories for the cooling device you are using.
 Loading...