Back Bar Service Manual
Return to Table of Contents Refrigeration System Repair Instructions Page 6-2
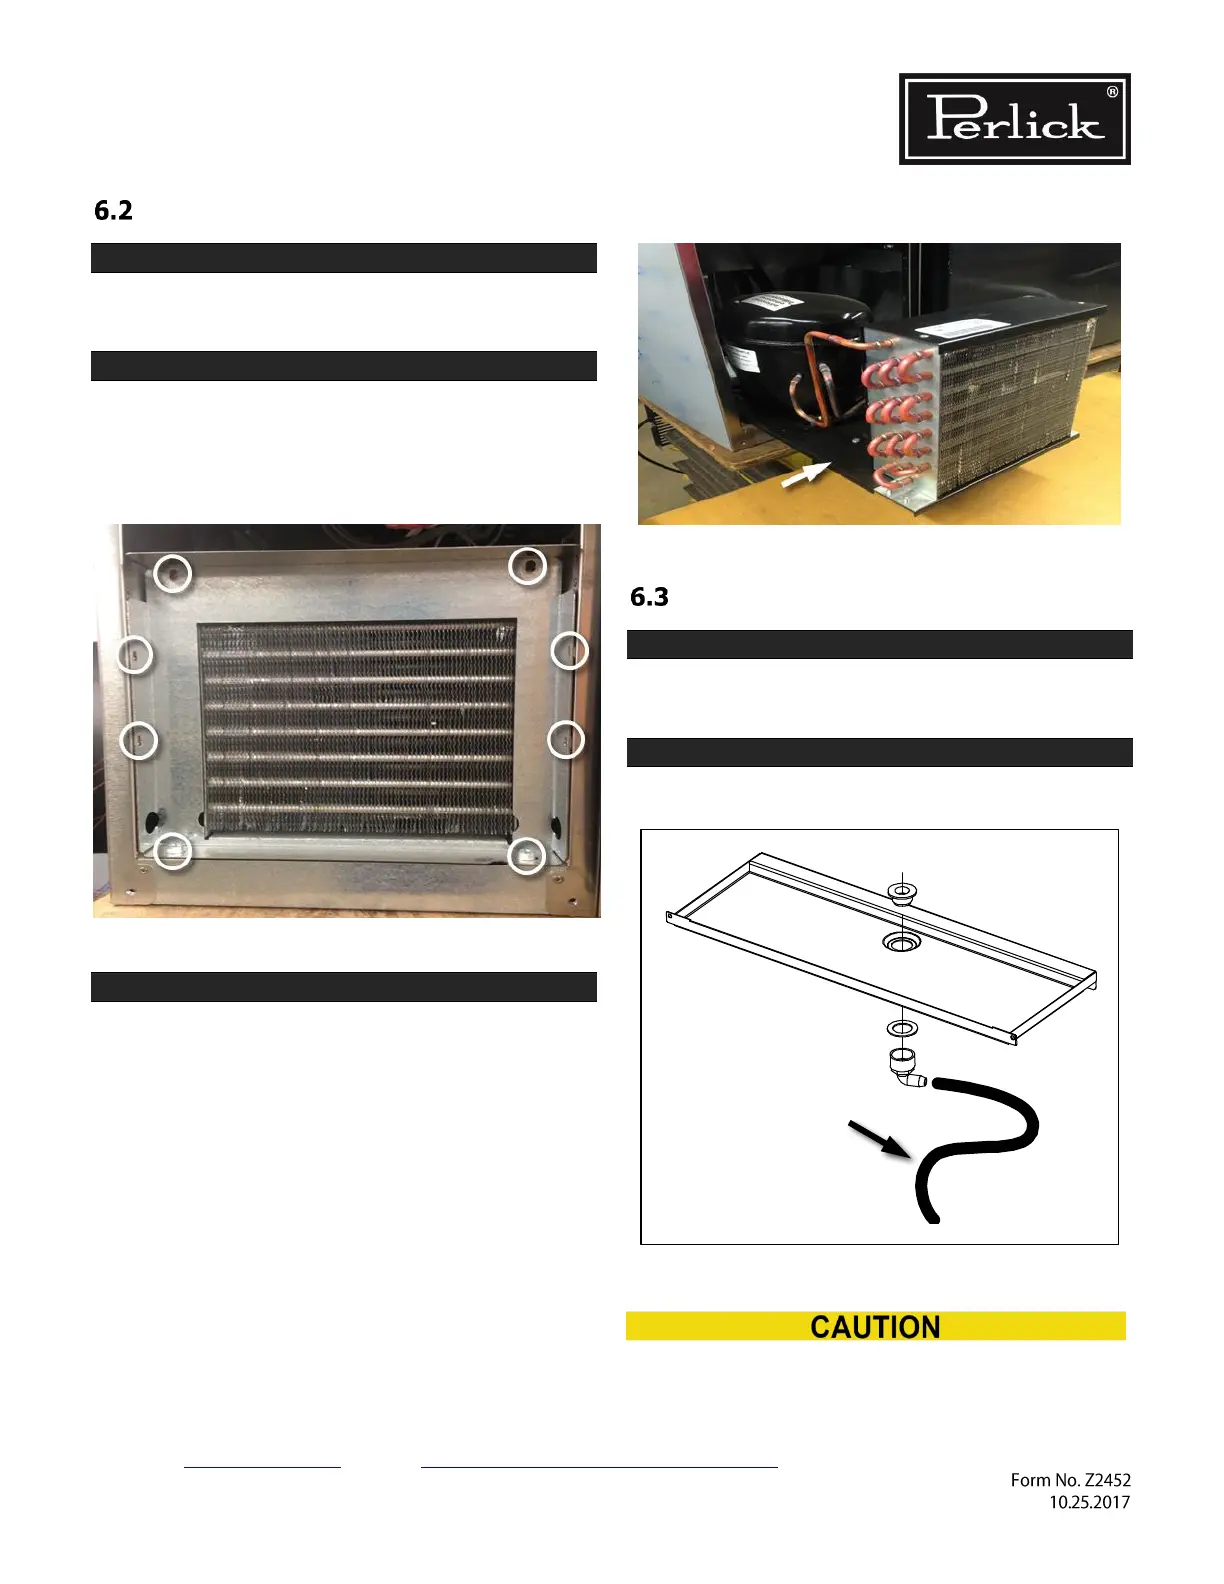
Slide Out the Refrigeration Deck
STEP 1.
Remove grille by removing 1 Phillips head screw at
the top center grille and 2 at the bottom edge.
STEP 2.
Remove square bracket around the front of
condensing unit by removing 6 Phillips screws and
2 hex head bolts. Figure 6-4
Pull the square bracket straight out.
Figure 6-4. Remove Condensing Unit Bracket
STEP 3.
The condensing unit/refrigeration deck can now be
pulled straight out. Figure 6-5
Pull slowly and carefully to avoid damaging the
copper line set.
• The copper line set is coiled with enough
additional line to allow condensing unit to be
removed from the cabinet.
• Do not place undue stress on copper lines
when removing condensing unit.
• Damage/kinking of lines may occur if they
are forcibly handled.
Figure 6-5. Removing Refrigeration Deck
Plumbing for Remote Drain
STEP 1.
Remove panel to gain access to the evaporator
drip pan.
STEP 2.
Attach drain tube provided. See Figure 6-6.
Figure 6-6. Remote Drain Tube