Back Bar Service Manual
Return to Table of Contents Electrical System Repair Instructions Page 7-27
STEP 14.
Remove screw holding probe “mass” to the probe
bracket and remove the probe.
STEP 15.
Remove sealing compound from top of wire pass-
through (inside evaporator box).
STEP 16.
Remove sealing compound from bottom of wire
pass-through (inside condenser compartment).
STEP 17.
Pull probe out through the bottom of the
evaporator box.
STEP 18.
Discard Dixell probe assembly.
7.5.3.2 Installing Eliwell Controller
STEP 1.
Feed Eliwell probe through the bottom of the
evaporator box.
STEP 2.
Attach probe and mass onto probe bracket with
screw.
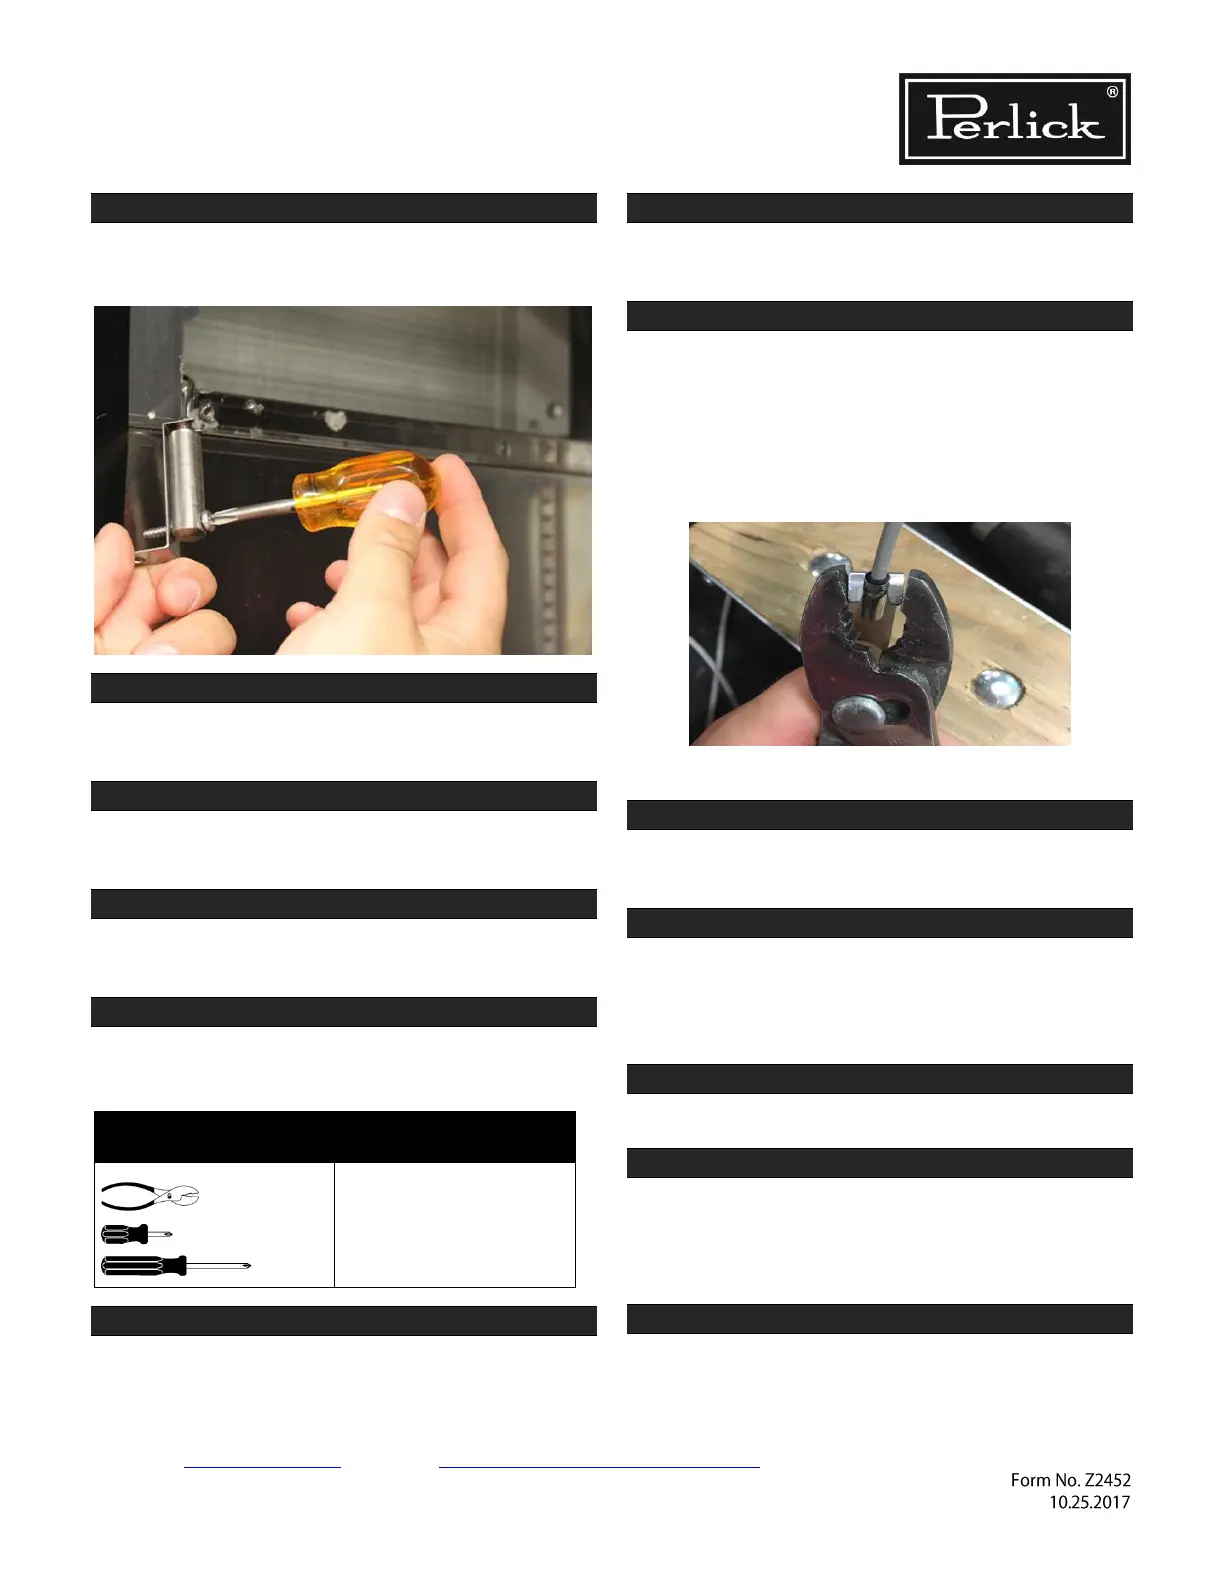
STEP 3.
Use pliers if needed to secure probe notch to sheet
metal probe bracket. See Figure 7-2.
Crimp gently to avoid damaging the probe. The
notch in the probe body should fit into the bracket
slot to encapsulate the probe into stainless steel
sleeve.
Figure 7-2. Attach Probe to Bracket
STEP 4.
Attach the bracket/probe assembly to the bottom
of the evaporator box with screw.
STEP 5.
Replace sealing compound at top of wire pass-
through (inside evaporator box). Verify a complete
seal around the wire harness and pass-through
hole.
STEP 6.
Replace the evaporator fan panel.
STEP 7.
Replace the sealing compound at bottom of wire
pass-through (inside condenser compartment).
Verify a complete seal around the wire harness and
pass-through hole.
STEP 8.
Reverse this instruction to connect the replacement
wire harness/controller/bracket assembly.