STEP 1.
Lift divider straight up and move to desired
position, engaging tabs in holes. Make sure
divider tabs engage corresponding holes on both
sides.
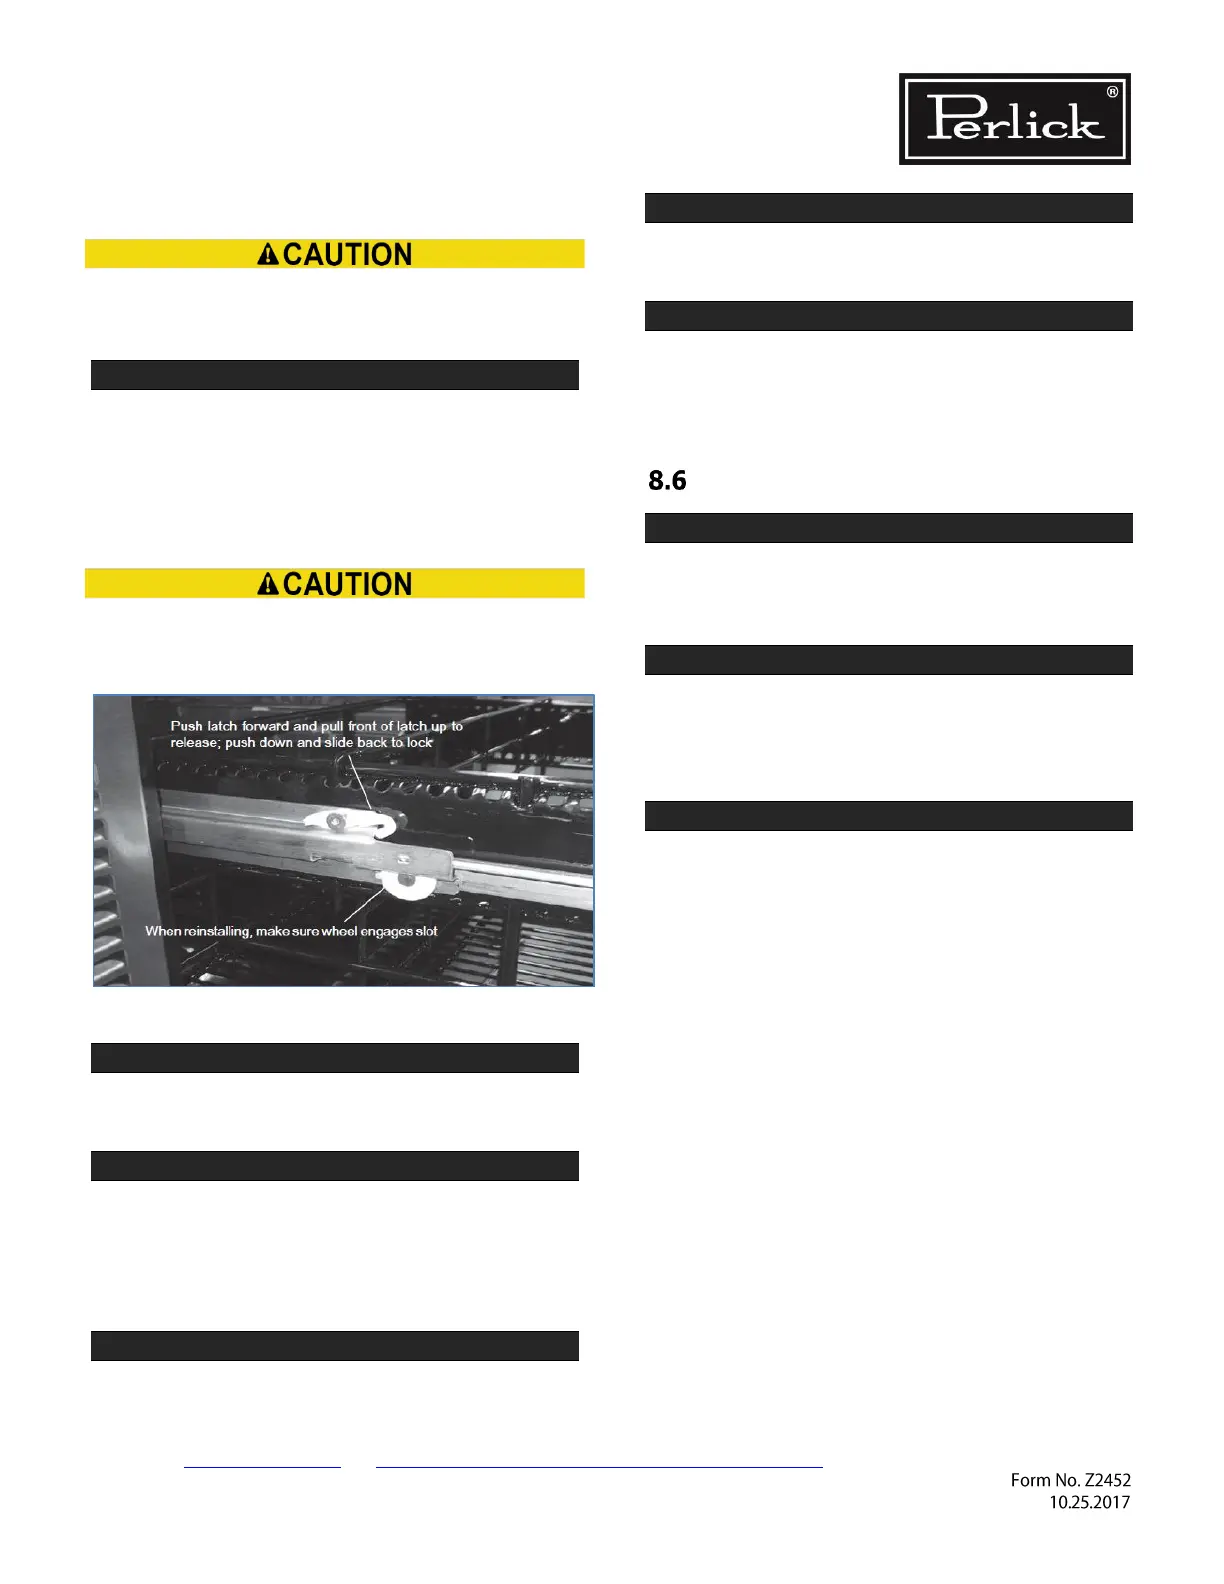
8.5.3 Cleaning/Lubricating Drawer Extenders
Figure 8-13. Removing/Installing Drawer
STEP 1.
Drawer must be removed to clean or lubricate
the extenders.
STEP 2.
Pull the drawer out to its furthest position.
Locate the latch in the middle of both extenders.
Push each latch forward and lift front of latch up
(unlocked position), then lift the front of the
drawer and pull out.
STEP 3.
Use a food grade lubricant to lubricate the
drawer extenders.
STEP 4.
Place drawer on to the extenders, making sure
wheels engage the slots on each side.
STEP 5.
Push drawer all the way in, then pull drawer out
and push the latch down and back to engage.
Make sure front of latches are fully down and
back, engaging the extenders.
Replace Door & Drawer Gasket
STEP 1.
Remove gasket by lifting at one corner and
pulling gasket away from door. Work around the
door until gasket is free.
STEP 2.
To replace, start at one corner and press firmly
to seat the gasket dart in the channel of the door
frame. Listen/feel for a click to indicate the dart
is completely seated.
STEP 3.
Finish by going around the gasket once more to
feel for any gaps and to ensure the gasket is flat
and fully seated.