Back Bar Service Manual
Return to Table of Contents Electrical System Repair Instructions Page 7-28
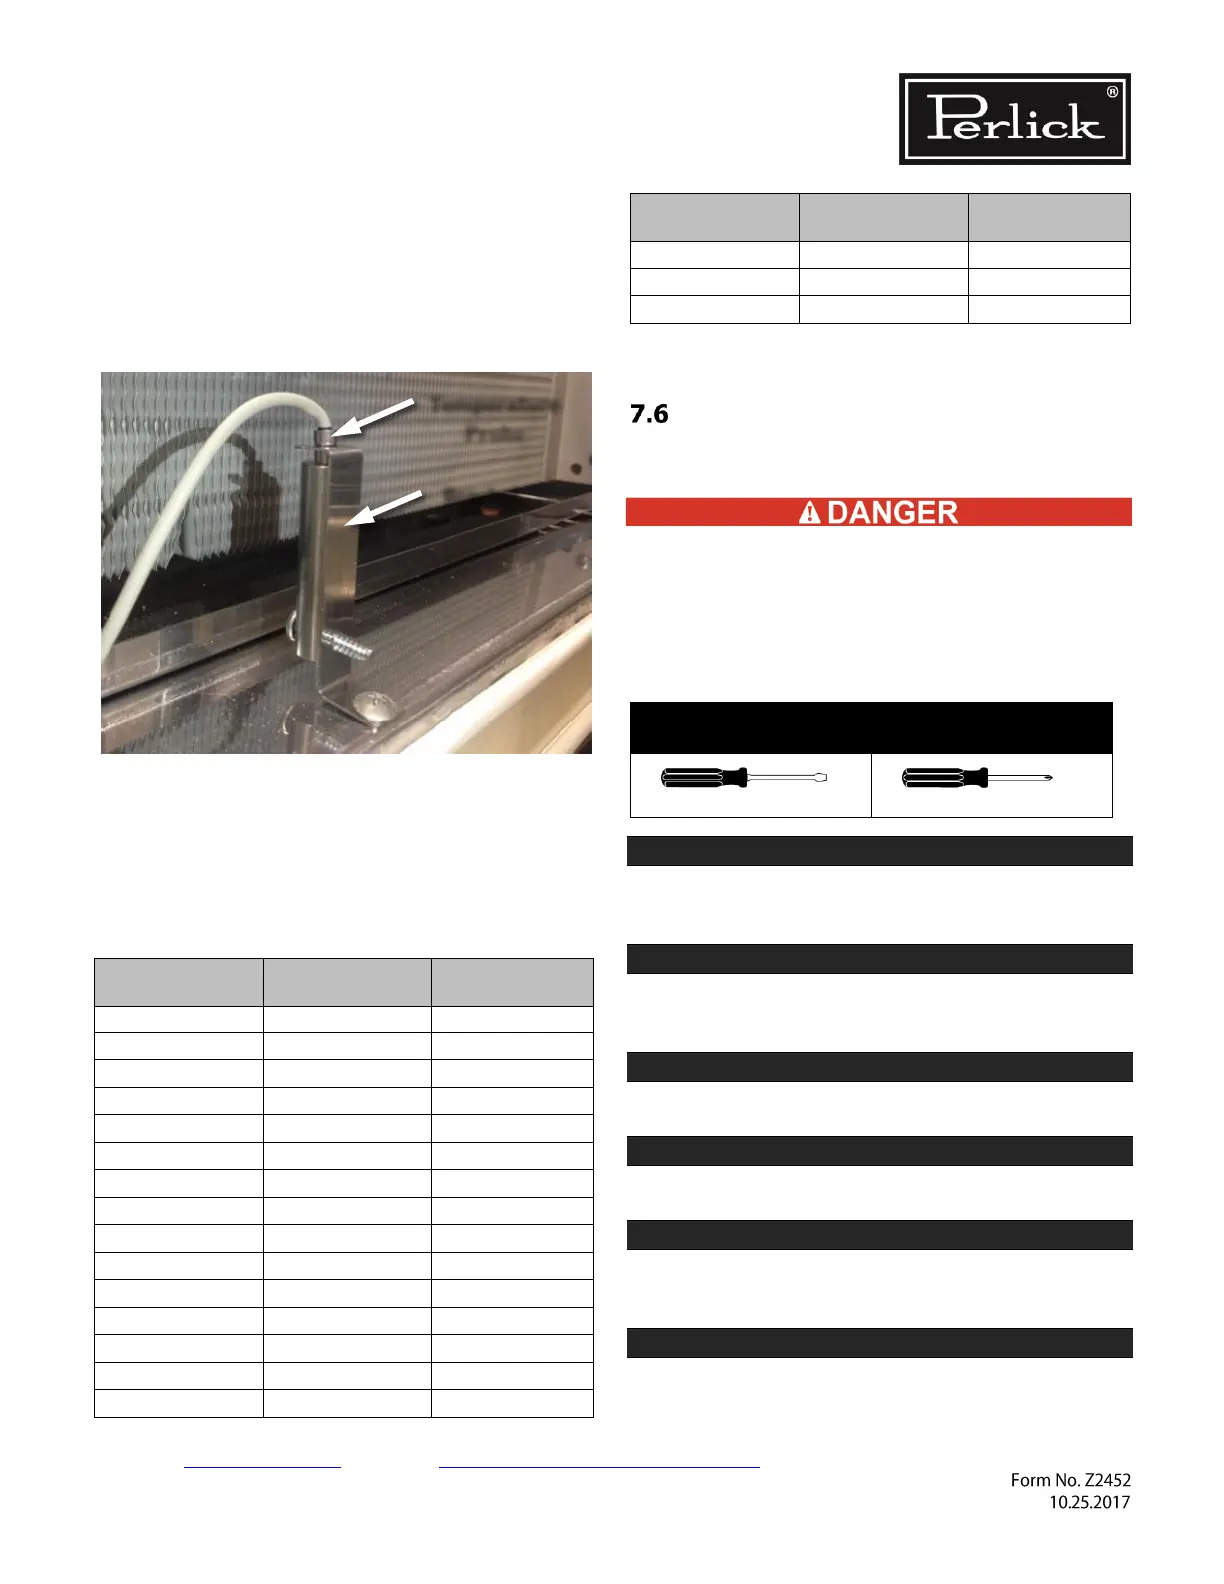
7.5.4 Temperature Probe
• Each refrigerated zone has one 10K
ohm NTC probe, which senses
compartment temperature. Sensing
probe is located behind evaporator fan
panel.
Figure 7-3. Temperature Probe and Bracket
• See Table 7-5 for temperature to
resistance values when
troubleshooting probe or temperature
issues.
Table 7-5. Temperature – Resistance Values
• To replace temperature probe, refer to
section 7.5.3.
LED Lighting
7.6.1 Replace LED Light Strip
ELECTROCUTION HAZARD!!
Never attempt to repair or perform
maintenance on unit until main electrical
power to the unit has been disconnected!
STEP 1.
Open door or remove upper drawer. See Figure
8-13.
STEP 2.
Using a flat blade screwdriver, carefully pry off the
lens cover. See Figure 7-4.
STEP 3.
Remove two screws securing LED light to housing.
STEP 4.
Unplug the LED from the wiring harness.
STEP 5.
Plug new LED into harness and secure to housing
using screws removed in step 2.
STEP 6.
Snap LED cover into place.