form this check each time you place the collar receiver
on your dog.
B.Setting the Transmitter Controls
1. Correction Level Settings
Always use the lowest correction level necessary to
contain your dog. The goal is for your dog to associate
an unpleasant consequence with ignoring the training
and straying outside the boundary you have defined.
2. Charge Reminder Settings
Your transmitter's built-in charge reminder allows you to
set a timer to remind you that it is time to
check/recharge the receiver battery. The REMINDER
switch allows you to select a reminder interval of 60
(Labeled A) or 30 (Labeled B) days or turn the function
OFF. The timer starts when the collar receiver is
removed from the charger. This switch should be set at
a time interval that will remind you to check the collar
receiver and verify that it has an adequate charge to
contain your dog. During the initial training period or if
your dog frequently "challenges" the containment sys-
tem boundary, we recommend that you set the
reminder switch to the B position and check the collar
receiver indicator light weekly for a low battery indica-
tion.Once your dog is trained or rarely "challenges" the
system boundary, you may be able to set the reminder
switch to the A position and charge the collar receiver
less frequently.
NOTE: The timer is automatically reset when the collar
receiver is placed in the charging cradle for greater than
5 minutes.
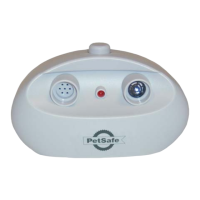
3. Alarm Volume Setting
Your transmitter contains an audible alarm to warn you
if there is a break in your boundary wire, a low backup
battery condition, a transmitter power outage or to
remind you to check your receiver battery status. The
volume of the alarm tone can be adjusted using the
ALARM VOLUME knob. Set the alarm volume at a level
that you can easily hear when you are in the vicinity of
the transmitter. To test the alarm volume, disconnect
one of the loop wires at the transmitter.This will cause
the wire break alarm to activate and produce an alarm
tone. Reconnect the loop wire after you have set the
alarm volume.
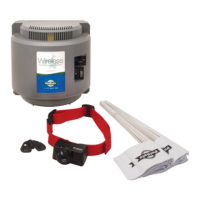
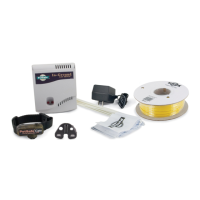
4. Charging the receiver
Your transmitter includes a built-in battery charger for
the collar receiver. For the transmitter's built-in battery
charger to function, the transmitter must be plugged in,
turned ON and have boundary wire attached to the
LOOP terminals on the transmitter. By placing the
receiver on top of the transmitter in the charge cradle
with the receiver indicator light aligned toward the end
of the charge cradle marked with an arrow a 14-hour
battery charging cycle will be initiated. During this 14-
hour charging cycle, the transmitter indicator light will
flash green and a high frequency tone will be heard
from the transmitter. After the 14-hour charge cycle the
battery charger will continue to provide a trickle charge
to maintain the receiver battery at a full charge.
NOTE: Removing the receiver from the charge cradle
for longer than 15 seconds during the 14-hour charge
cycle (transmitter light flashing green) will result in the
battery charger restarting the 14-hour charge cycle
when the receiver is returned to the charge cradle.
Resetting the 14-hour charge cycle in this manner will
not damage your receiver or transmitter.
To charge additional receivers, wait until the charge
cycle has completed and the indicator light has
returned to a solid green. Wait at least 15 seconds
between removing one receiver and placing the next
receiver on the charge cradle to initiate a new 14-hour
charge cycle for subsequent receivers.
5. Battery Backup
Your transmitter includes the capability to install eight
standard AA alkaline batteries to provide your contain-
ment system with backup power in case household
power fails or the transmitter power adapter is uninten-
tionally disconnected. Your system will function without
the backup batteries installed, but we recommend you
take advantage of this feature for added security and
the safety of your dog.
The condition of the backup batteries is monitored by
circuitry in your transmitter. If the battery voltage drops
below the monitor threshold, an audible alarm sounds
and a yellow light flashes on the transmitter. If you
choose not to maintain backup batteries in the trans-
mitter, you can silence this alarm and turn off the flash-
ing yellow light by setting the BATTERY BACKUP MON-
ITOR switch to the OFF position.
When operating on battery power, the status indicator
light on the transmitter is disabled in order to conserve
battery life. An audible alarm will sound once per sec-
ond to remind you that the system is operating on bat-
13.
collar receiver light to this end