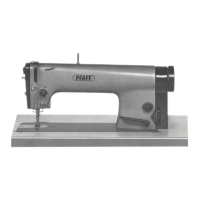
Einfadein
des
Oberfadens
Threading
the
needle
Enfilage
du
fll
superieur
Oberfaden
nach
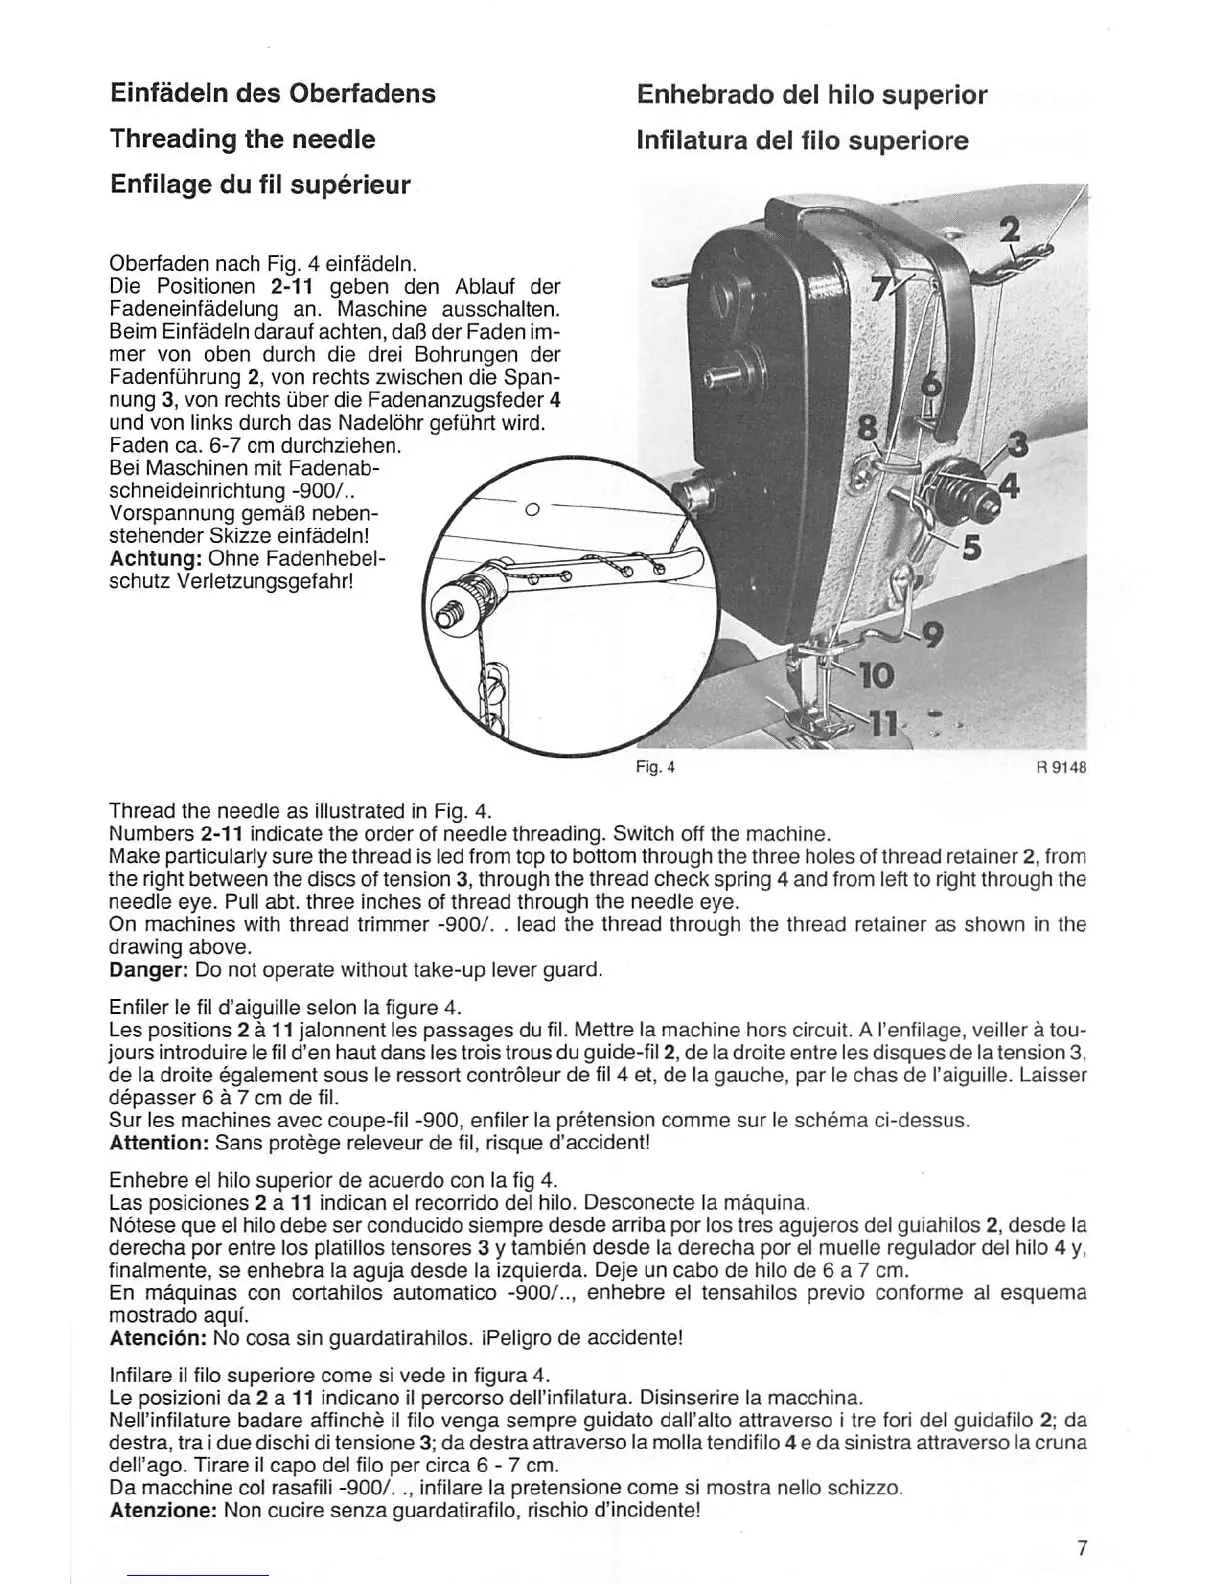
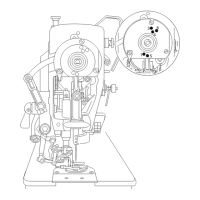
Fig. 4 einfadein.
Die Positlonen 2-11
geben
den
Ablauf
der
Fadeneinfadeiung
an.
Maschine
ausschalten.
Beim
Einfadein
darauf
achten,
daf3
der
Faden
im-
mer
von
oben
durch die drel
Bohrungen
der
Fadenfuhrung
2, von
rechls
zwischen
die
Span-
nung
3,
von
rechts
iiber
die
Fadenanzugsfeder
4
und von links durch
das
Nadeldhr gefuhrt wird.
Faden
ca.
6-7
cm
durchzlehen.
Bei
Maschinen
mil
Fadenab-
schneideinrichtung -900/.. _
__
Vorspannung
gemaB
neben-
/ ^
stehender
Skizze
einfadeini
A
Achtung:
Ohne
Fadenhebei-
schutz
Verletzungsgefahr!
/
Enhebrado
del
hilo
superior
Infilatura
del
flic
superiore
Thread
the
needie
as
iiiustrated in Fig. 4.
Numbers
2-11
indicate
the
order
of
needle
threading.
Switch
off
the
machine.
Make
particularly
sure
the
thread
is led from
top
to
bottom
through
the
three
holes
of
thread
retainer
2, from
the
right
between
the
discs
of
tension
3, through
the
thread
check
spring 4
and
from left to right through
the
needie
eye.
Puil abt.
three
inches
of
thread
through
the
needle
eye.
On
machines
with
thread
trimmer
-900/.
. lead
the
thread
through
the
thread
retainer
as
shown
in
the
drawing
above.
Danger:
Do not
operate
without
take-up
lever
guard.
Enfiler ie fil d'aiguille
seion
la figure 4.
Les positions 2 a 11 jaionnent ies
passages
du fii. Mettre ia
machine
hors
circuit. A i'enfilage, veiller d tou-
jours introduire Iefil
d'en
haut
dans
les
trois trous du guide-fii 2,
de
ia droite
entre
ies
disques
de la
tension
3,
de
ia droite
egaiement
sous
ie
ressort
contrdleur
de
fil4 et, de ia
gauche,
par
ie
chas
de I'aiguiiie.
Laisser
depasser
6 a 7 cm
de
fii.
Sur
ies
machines
avec
coupe-fil -900, enfiler la pretension
comme
sur
Ie
schema
ci-dessus.
Attention:
Sans
protege
reieveur
de
fil,
risque
d'accident!
Enhebre
el hiio
superior
de
acuerdo
con
la fig 4.
Las
posiciones
2 a 11
indican
el
recorrido
del hiio.
Desconecte
la
maquina.
Notese
que
ei hiio
debe
ser
conducido
siempre
desde
arriba por los
tres
agujeros
del guiahiios 2,
desde
la
derecha
por
entre
ios piatilios
tensores
3 y
tambien
desde
la
derecha
por ei mueiie regulador del hilo 4 y,
finaimente,
se
enhebra
la
aguja
desde
la
izquierda.
Deje
un
cabo
de
hilo
de
6 a 7
cm.
En
maquinas
con cortahiios automatico -900/..,
enhebre
el
tensahilos
previo conforme ai
esquema
mostrado
aquf.
Atenci6n:
No
cosa
sin guardatirahiios. iPeiigro de accidente!
Infiiare iifilo
superiore
come
si
vede
in figura 4.
Le posizioni
da
2 a 11
indicano
ii
percorso
dell'infiiatura. Disinserire la
macchina.
Neirinfiiature
badare
affinche ilfilo
venga
sempre
guidato daii'aito
attraverso
i tre fori del guidafilo 2;
da
destra,
tra
i
due
dischi
di
tensione
3;
da
destra
attraverso
la
molla
tendifilo
4 e
da
sinistra
attraverso
ia
cruna
deii'ago.
Tirare
11
capo
del filo
per
circa
6-7
cm.
Da
macchine
coi rasafiii
-900/..,
infiiare la
pretensione
come
si
mostra
nelio
schizzo.
Atenzione:
Non cucire
senza
guardatirafilo, rischio d'incidente!