Push
the
shaft
toward
the
right
and
tighten
binding
screw
9 on
clamp
crank
K9
securely.
Set
the
machine
for its
longest
stitch,
turn
the
balance
wheel
and
check
to
see
that
the
feed
rock
shaft
crank
is
not
distorted
on its
shaft
and
the
feed
dog
is
centered
in
the
feed
slot.
Tighten
binding
screws
u
and
v
securely.
30.
Adjusting
the
Presser
Foot
When
you
mount
the
presser
foot
on
the
machine,
push
it up
against
the
bracket
as
far
as
it
will
go,
then
tighten
the
set
screw
securely.
When
the
presser
bar is raised, i.e.
the
presser
bar
lifter is flicked to
the
left,
there
should
be
a
clearance
of
about
^/i6", or
5.0
mm,
between
presser
foot
and
needle
plate
and
the
needle
should
be
centered
in
the
needle
hole
of
the
presser
foot.
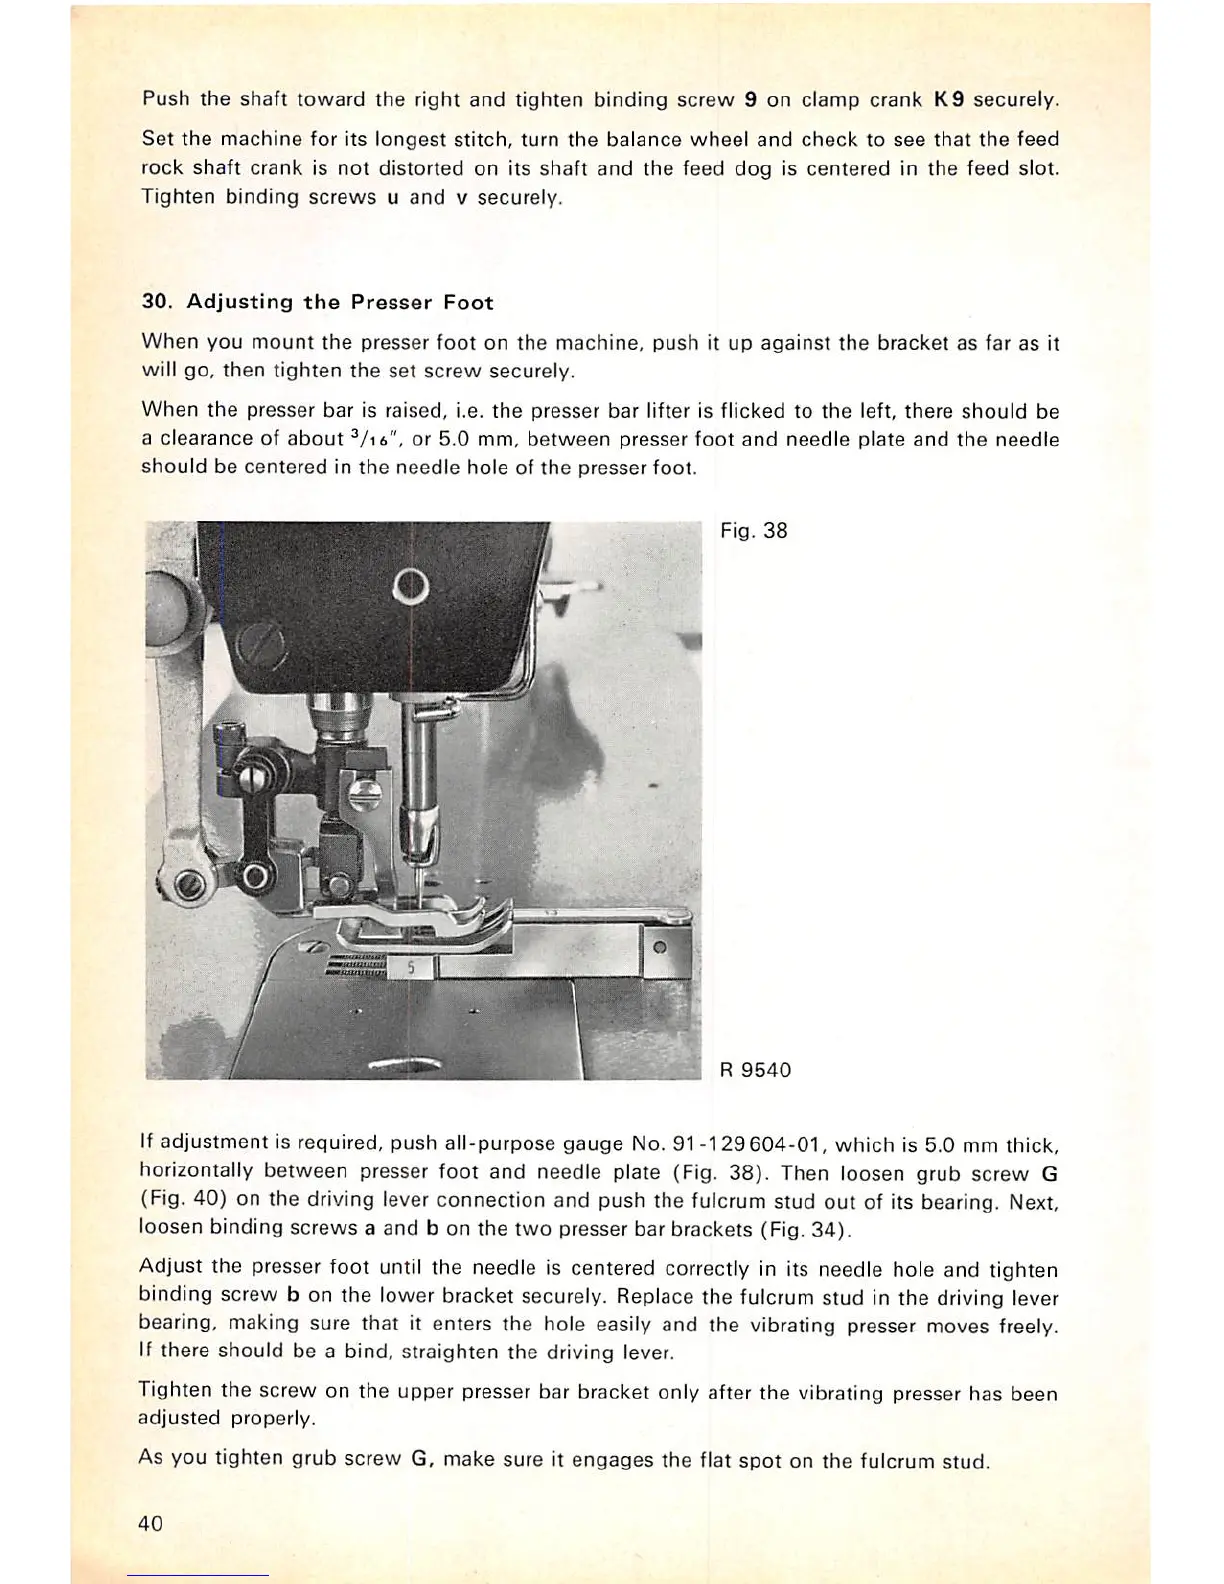
Fig.
38
1
R
9540
If adjustment is required, push all-purpose gauge No. 91
-129604-01,
which is 5.0 mm thick,
horizontally between presser foot and needle plate (Fig. 38). Then loosen grub screw G
(Fig. 40) on the driving lever connection and push the fulcrum stud out of its bearing. Next,
loosen binding screws a and b on the two presser bar brackets (Fig. 34).
Adjust the presser foot until the needle is centered correctly in its needle hole and tighten
binding screw b on the lower bracket securely. Replace the fulcrum stud in the driving lever
bearing, making sure that it enters the hole easily and the vibrating presser moves freely.
If there should be a bind, straighten the driving lever.
Tighten the screw on the upper presser bar bracket only after the vibrating presser has been
adjusted
properly.
As you tighten grub
screw
G, make sure it
engages
the
flat
spot
on the fulcrum stud.
40