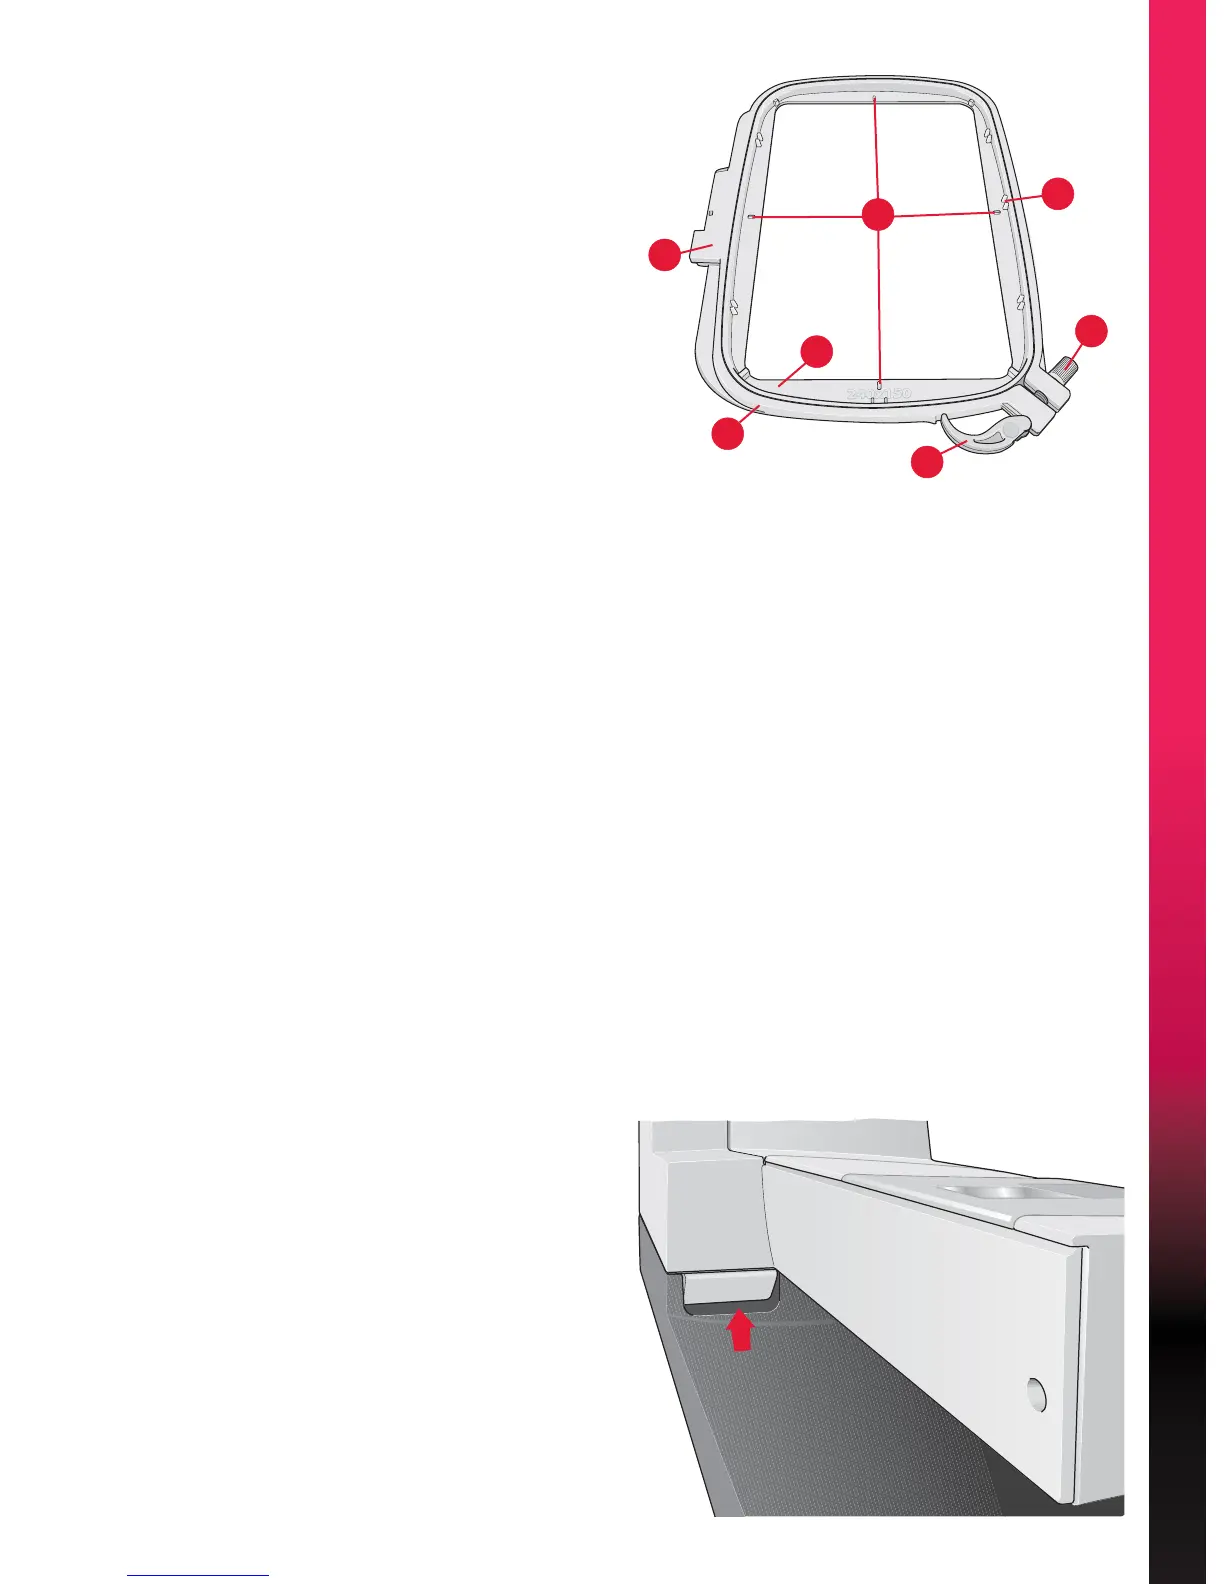
7:3
G
H
J
K
L
M
I
(PEURLGHU\KRRSoverview
G Embroidery hoop connector
H Outer hoop
I Inner hoop
J Quick release
K Retaining screw
/ 5LEVIRUÀWWLQJWKHFOLSV
M Center marks
Embroidery mode - preparations
Built-in GHVLJQV
About 270 designs are included in the memory in your
machine.
(PEURLGHU\FROOHFWLRQ
Page through the creative™ 4.5 Embroidery collection
for designs and fonts.
The design number, stitch count (number of stitches in
the design) and the design size are displayed next to
each design. The suggested thread colors for each color
number are shown.
Connect the HPEURLGHU\XQLW
There is a covered socket behind the free-arm, see
picture. The cover will open automatically when
connecting the embroidery unit.
1. Slide the accessory tray off.
2. Slide the embroidery unit onto the free arm of
WKHPDFKLQHXQWLOLWSOXJVÀUPO\LQWRWKHVRFNHW
If needed, use the level adjusting feet so that the
machine and embroidery unit are even. If the
machine is turned off, turn it on.
3. A pop-up tells you to clear the embroidery
area and remove the hoop for positioning.
Touch OK. The machine will calibrate and
the embroidery arm will move to the ready
position. This calibration will set your
embroidery functions each time you slide on the
embroidery unit.
Make sure not to calibrate the machine with the
embroidery hoop attached as this can damage the
needle, presser foot, hoop and/or the embroidery
unit. Be sure to clear all materials from around the
machine before calibrating so that the embroidery
arm does not bump into anything while calibrating.