% He in the
gas used
100% 50% 5% 1%
Leak rate dis-
played on the
leak detector
without correc-
tion factor
1 · 10
-5
mbar · l/s
(1 · 10
-6
Pa · m
3
/s)
5 · 10
-6
mbar · l/s
(5 · 10
-7
Pa · m
3
/s)
5 · 10
-7
mbar · l/s
(5 · 10
-8
Pa · m
3
/s)
1 · 10
-7
mbar · l/s
(1 · 10
-8
Pa · m
3
/s)
Correction fac-
tor value
1 2 20 100
Leak rate dis-
played on the
leak detector
with correction
1 · 10
-5
mbar · l/s (1 · 10
-6
Pa · m
3
/s)
Display
The COR indicator light is displayed on the control panel when the correction factor value is not 1.
The leak rate displayed takes into account the correction factor applied.
Correction factor calculation
When the leak detector is connected to an installation equipped with its own pumping system, only part
of the leak will be measured by the leak detector. Calibration gives a direct reading of the leak rate by
taking into account the loss of tracer gas of the leak pumped by the pumping unit.
Calibration is performed via the Correction function.
Correction must be performed when the leak detector is already calibrated with its internal calibrated
leak.
When an external calibrated leak is used, it is recommended to take into account the calibration date
and temperature effect for calculating the target value from the calibrated leak value featured on its
identification label.
Corrected leak rate = target value = measured leak value x correction factor
1. Allocate a function key to [COR.] (see “Function keys”).
2. Select the ‘hard Vacuum’ test method (see chapter “Test method”).
3. Press the START/STOP button to start a test.
4. Press the [COR.] function key.
5. Enable the correction factor.
6. If the value of the correction factor to be applied is known:
a
Press [Value].
b
Set the correction factor to be applied. The correction factor is the coefficient to be applied to
the measured leak rate.
C
Press [✔].
C
Press [X].
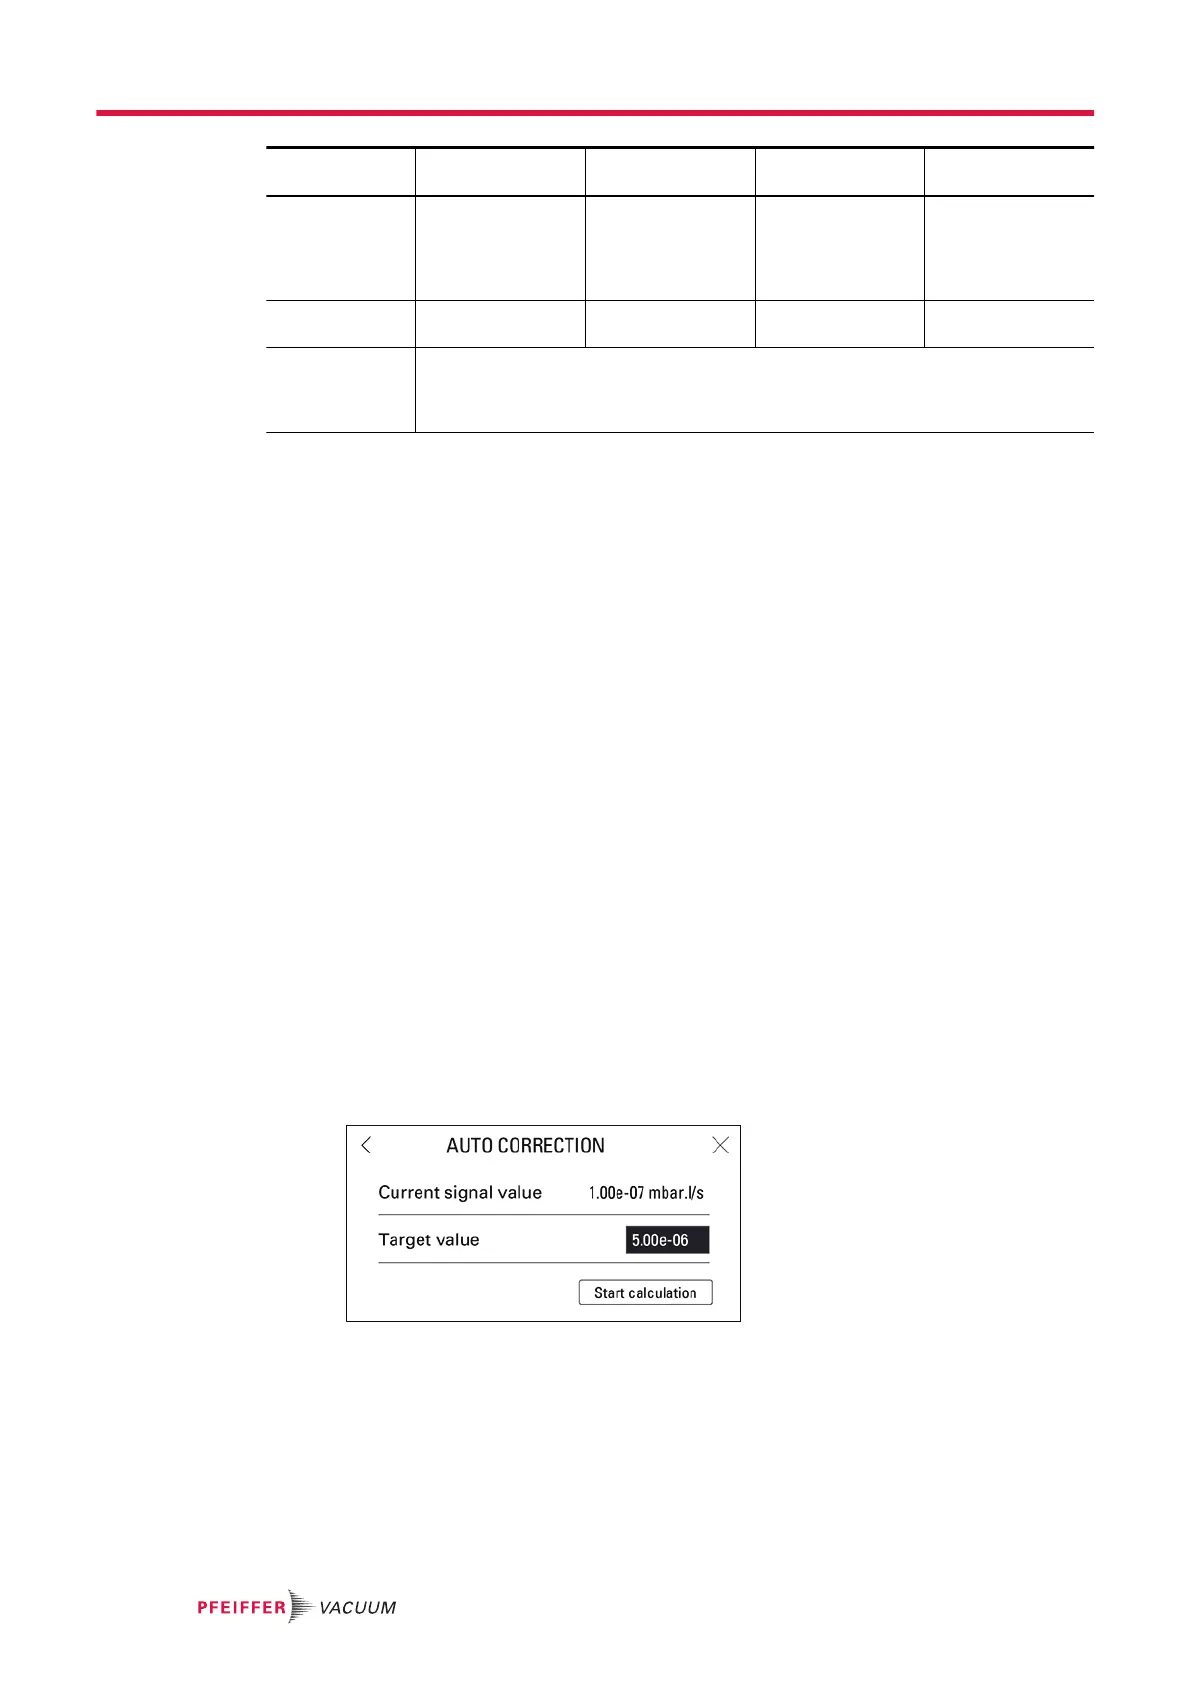
7. If the value of the correction factor is unknown:
a
Press [>>] to access the ‘Auto Correction’ function.
b
Press [Target Value].
C
Set the target leak rate of the target value.
d
Press [Start Calculation].
e
Press [X] to exit the function.
8. if no factor is enabled, it is 1 by default
The value of the correction factor is calculated automatically and updated.
The COR indicator light is displayed on the control panel when the value of the correction factor is not 1.
The ‘Auto correction’ function is automatically enabled.
The digital display takes into account the applied correction factor.
Settings menu
58/108