Action
Suspensions - check
Electrical system and battery - check
Headlight - adjustment
Tyre pressure and wear - check
Secondary air filter (250) - Cleaning
Vehicle and brake test - road test
(*) Vedere norme della sezione «Regolazione del minimo»
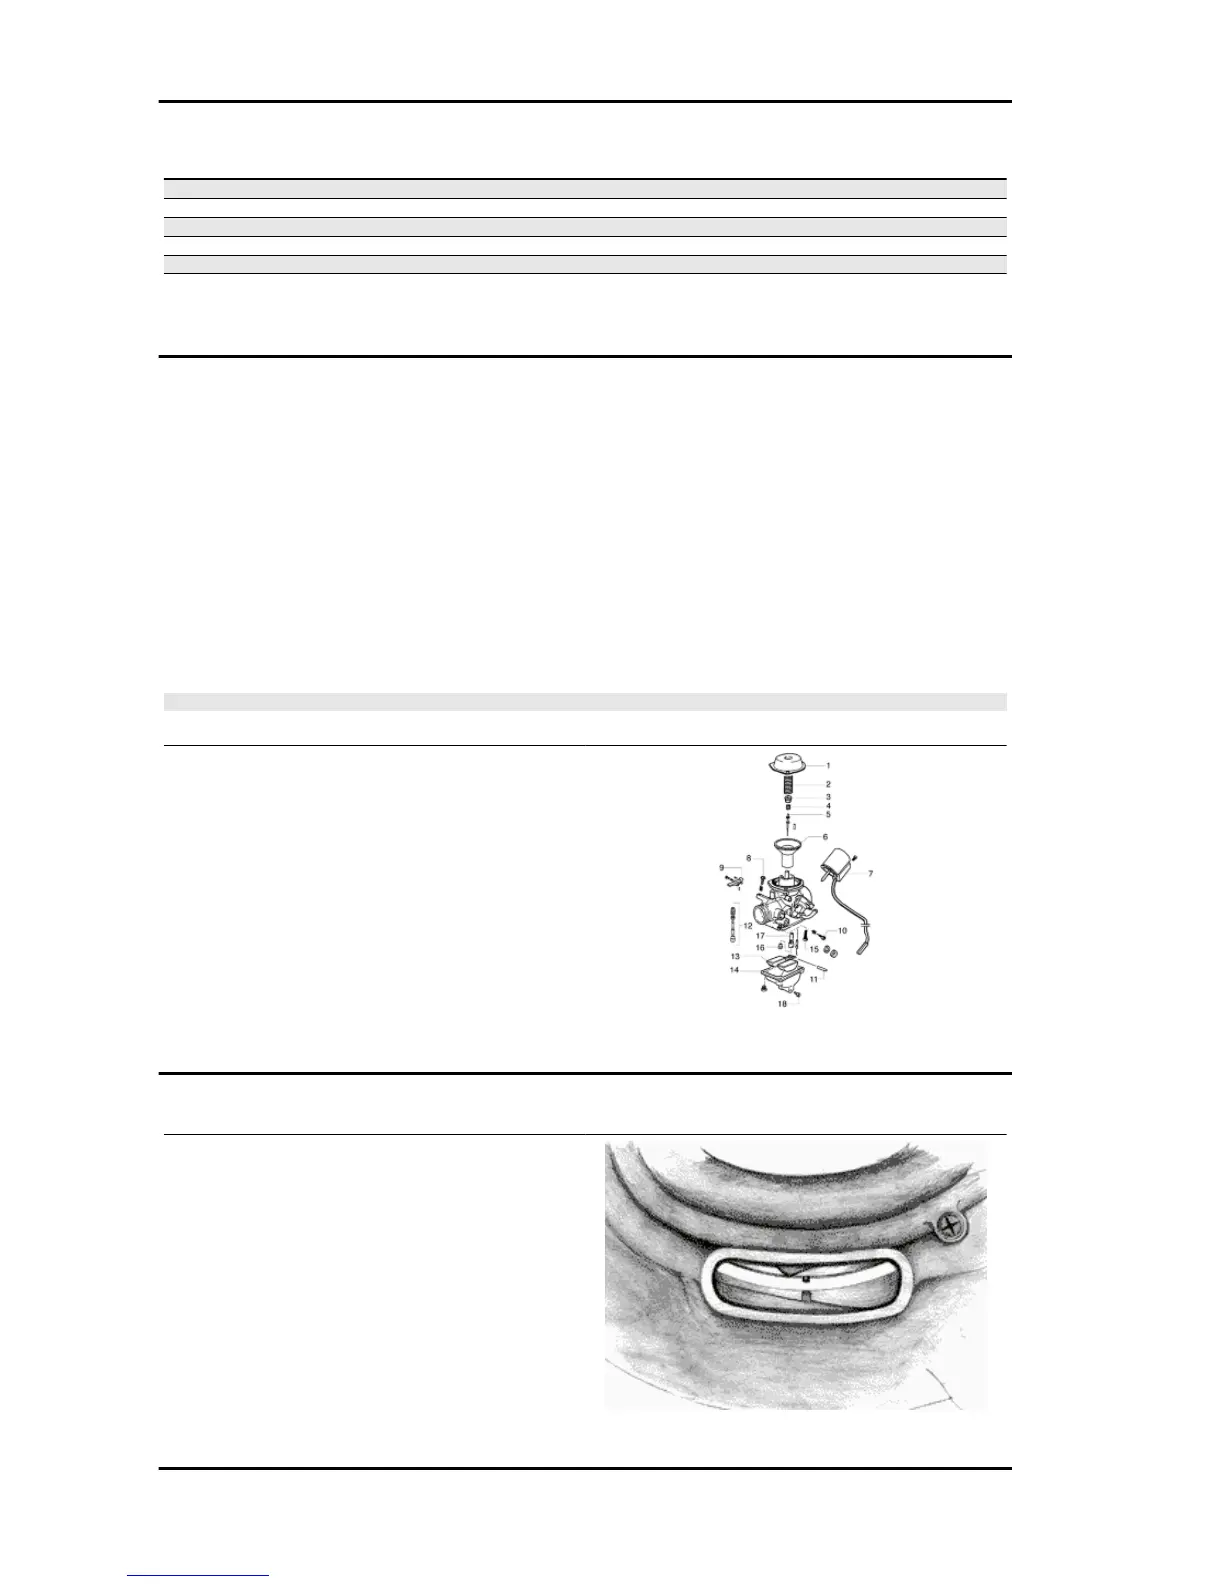
Carburettor
- Disassemble the carburettor in its parts, wash all of them with solvent, dry all body grooves with
compressed air to ensure adequate cleaning.
- Check carefully that the parts are in good condition.
- The throttle valve should move freely in the chamber. Replace it in case of excessive clearance due
to wear.
- If there are wear marks in the chamber causing inadequate tightness or a free valve slide (even if it
is new), replace the carburettor.
- It is advisable to replace the gaskets at every refit
WARNING
PETROL IS HIGHLY EXPLOSIVE ALWAYS REPLACE THE GASKETS TO AVOID PETROL LEAKS
1. Diaphragm cover - 2. Throttle valve spring - 3.
Conical needle support - 4. Conical needle spring
- 5. Conical needle - 6. Throttle valve diaphragm -
7. Automatic starting device - 8. Idle speed adjust-
ing screw - 9. Accelerating pump rocker - 10. Idle
mixture adjusting screw - 11. Float pin - 12. Accel-
erating pump assembly - 13. Float - 14. Float
chamber - 15. Idling jet - 16. Main jet - 17. Diffuser
- 18. Float chamber drain screw.
Checking the spark advance
- To check ignition advance, use the stroboscopic
light with induction pincers connected to the spark
plug power wire.
- Connect the induction pincers being careful to
respect the proper polarity (the arrow stamped on
the pincers must be pointing at the spark plug).
- Place the light selector in central position (1 spark
= 1 crankshaft turn as in 2-T engines).
Maintenance B 125-250
MAIN - 42