Notches
Lower rear
baffle
Fig. 67
DT2010158-01
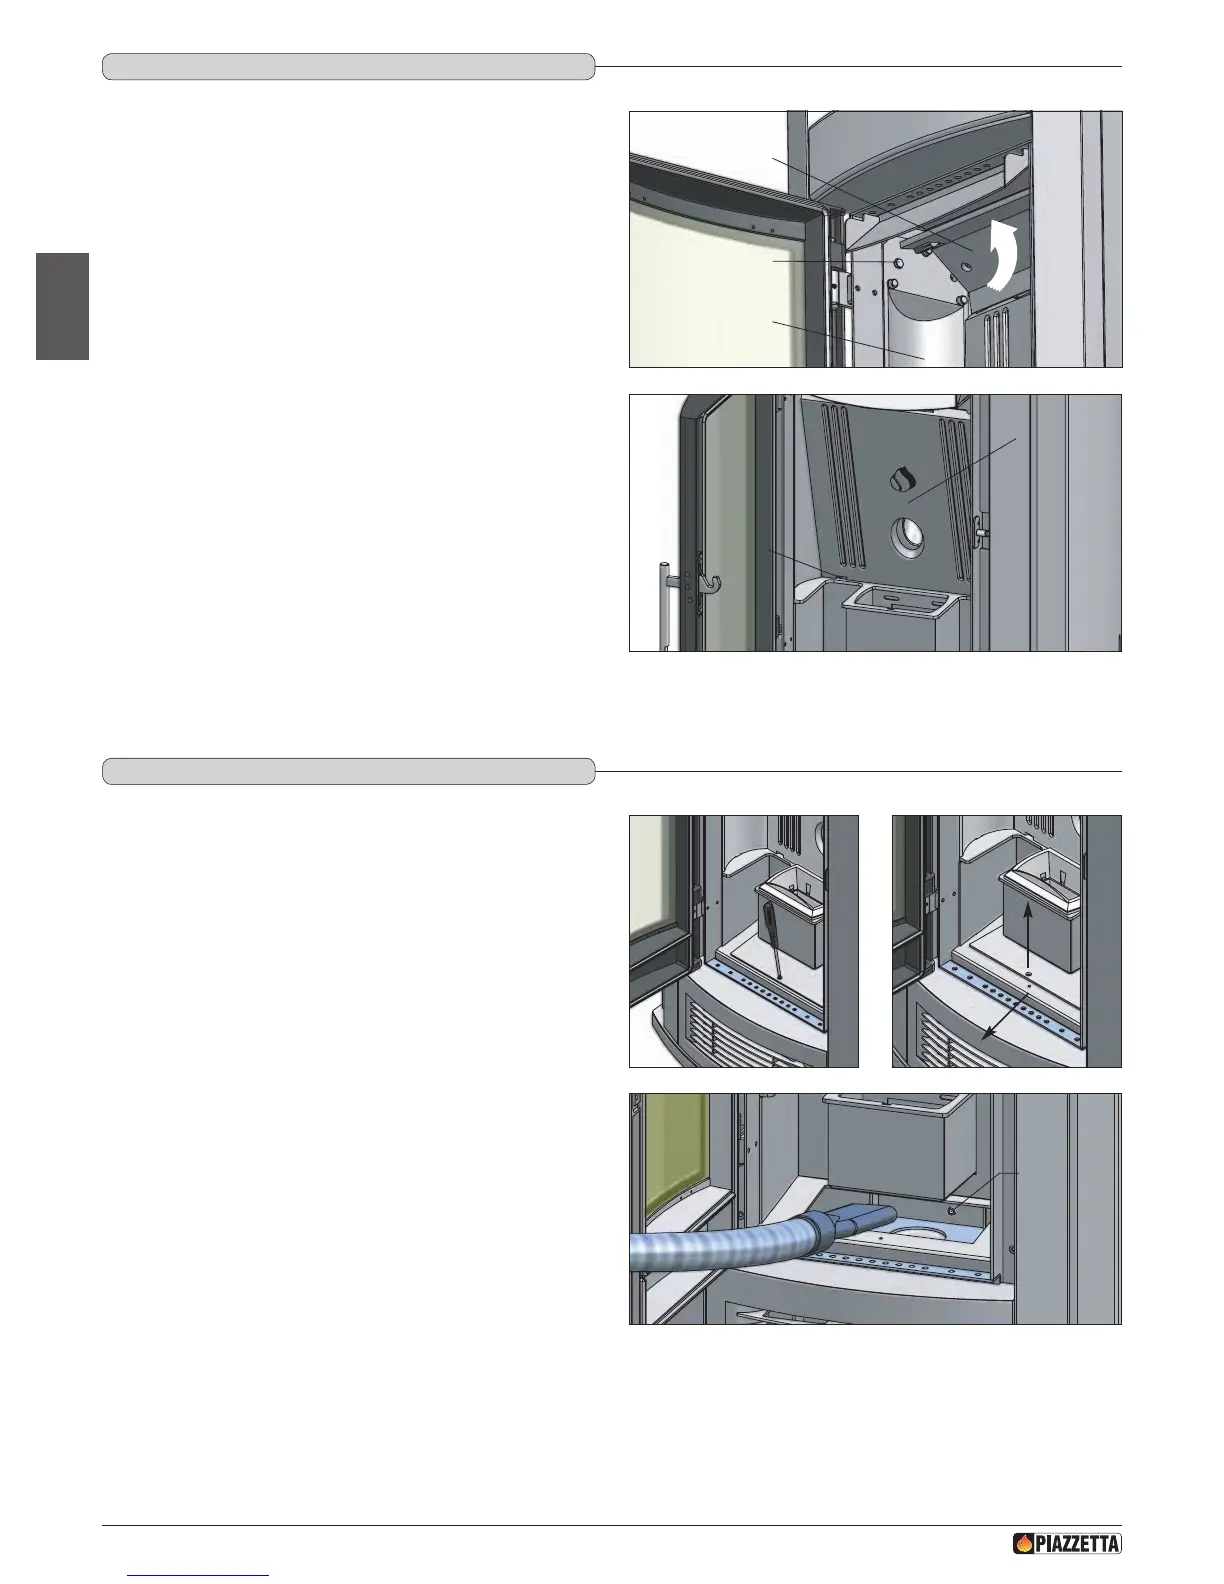
7.3 CLEANING ThE COMbUSTION ChAMbER
Once a week clean the rebox as follows:
- remove the grate and the ash tray;
- loosen but do not remove the two hexagon-head brass screws M6
located on the sides in the top part of the two lateral bafes;
- with one hand lift the “Upper rear bafe”;
a The “Upper rear bafe” is now free and could fall unless held
with one hand.
- with the other hand tilt the “Lower rear bafe” outwards and then
remove it;
- let the upper rear bafe return to its original position;
- using a vacuum cleaner remove the ash from the rebox;
- after having thoroughly cleaned the rebox, remount the pieces
proceeding in the reverse order to above;
- ensure that the lugs of the “Lower rear bafe” are properly inserted
into the relative notches in the sides of the rebox;
- now secure the “Lower rear bafe” by attaching it to the relative
notches in the “Upper rear bafe”.
a This type of cleaning requires a vacuum cleaner suitable for
holding ash.
Screw
Upper rear
baffle
Lateral
baffle
Fig. 66
DT2010159-04
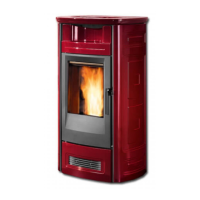
7.4 CLEANING ThE SMOkE ChAMbER
Once a year clean the smoke chamber as follows:
- remove the screws which secure the smoke chamber cover, then lift it
slightly and take it out by pulling it towards you (Fig. 68 - 69);
- use a vacuum cleaner to remove any ash and carbon deposits which
can accumulate in the chamber, taking care not to damage the blades
of the fan (Fig. 70);
- check the hole inside the smoke chamber at the rear (leading to
the device for measuring the vacuum) for dust and ash and clean if
necessary;
- after thorough cleaning, change the gasket and replace the smoke
chamber closing element.
Fig. 68
Fig. 69
Clean
hole
Fig. 70
H07028100/DT2000970 – 01
54
English
DT2030277-01
DT2030276-00
DT2030247-01
DT2030248-01
DT2030249-02