DT2010222-07
6.6 CONTROL PANEL
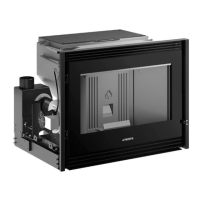
1
2
3
1
3
5
2
8
7
4
6
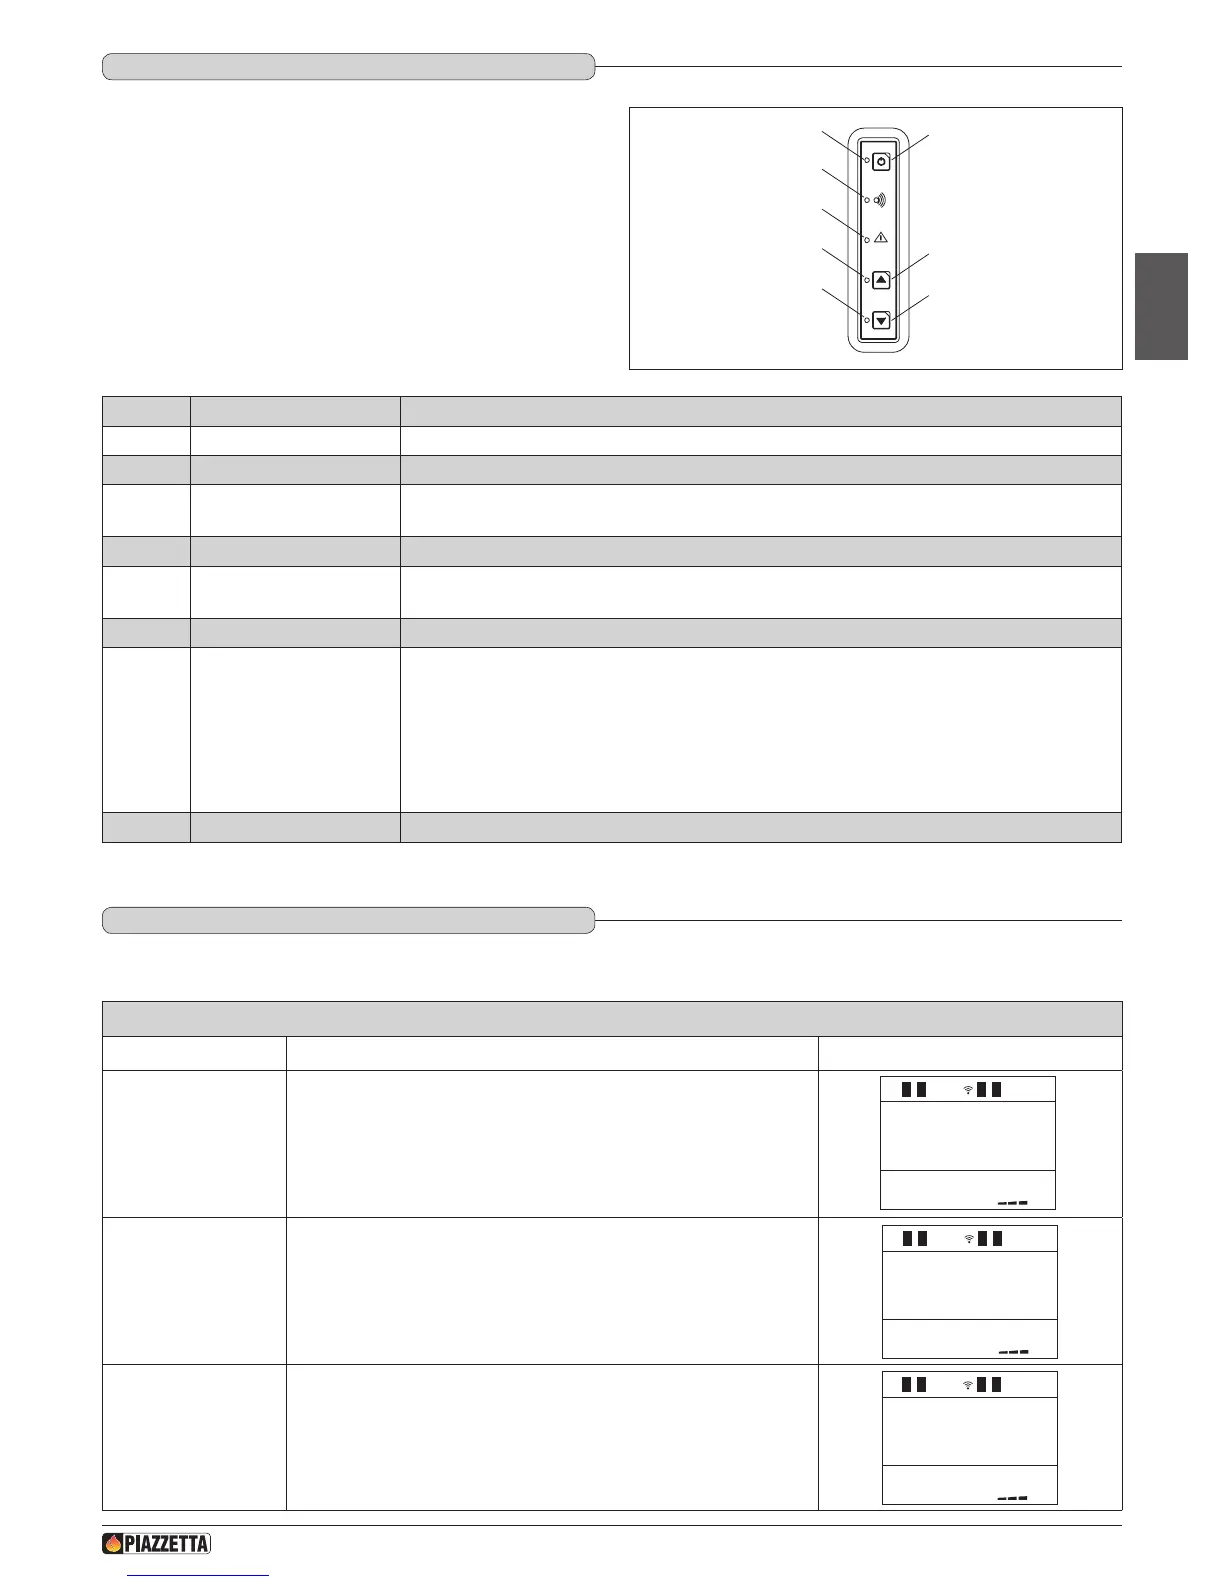
The stove is tted with a digital control panel to operate stove functions
when the LCD remote control is unavailable. The various functions of
the control panel are listed below.
NUMBER KEY / DISPLAY DESCRIPTION
1
Key ON/OFF Allows you to start up or shut down the product manually.
2
ON/OFF Led If the LED lights up, it indicates that the stove is lit.
3
Key INCREASE POWER
Allows you to increase the power setting. You can choose between the two available settings, P1-P3. The
Multifuoco fan has a default setting for each of the two power settings.
4
INCREASE POWER Led The LED lights up when the power-increase key is pressed and indicates that the power has been increased.
5
Key DECREASE POWER
Allows you to decrease the power setting. You can choose between the two available settings, P1-P3. The
Multifuoco fan has a default setting for each of the two power settings.
6
DECREASE POWER Led The LED lights up when the power-decrease key is pressed and indicates that the power has been decreased.
7
SAFETY DEVICE Led
If the LED lights up, it indicates that a safety device has activated. After approx. 60 seconds the alarm signal will
sound (if activated). In the event of activation proceed as follows:
- turn off the stove by pressing the ON/OFF key for several seconds;
- the alarm signal will stop;
- wait until you are sure that combustion of any pellets left in the grate has ceased;
- wait for the stove to cool, then check for and remove whatever has activated the safety device. Finally, after
having cleaned the grate, restart the stove by pressing the ON/OFF key.
8
RADIO SIGNAL EMISSION Led The led lights up when the stove receives data from the remote control.
Fig. 59
HOW TO SET THE LANGUAGE
Function Action Display
Selecting the
language menu
Press the MENU button, use the MENU SELECTION button to select the
language selection menu and the SET button to conrm.
1