PDP-436SXE
131
5678
56
7
8
C
D
F
A
B
E
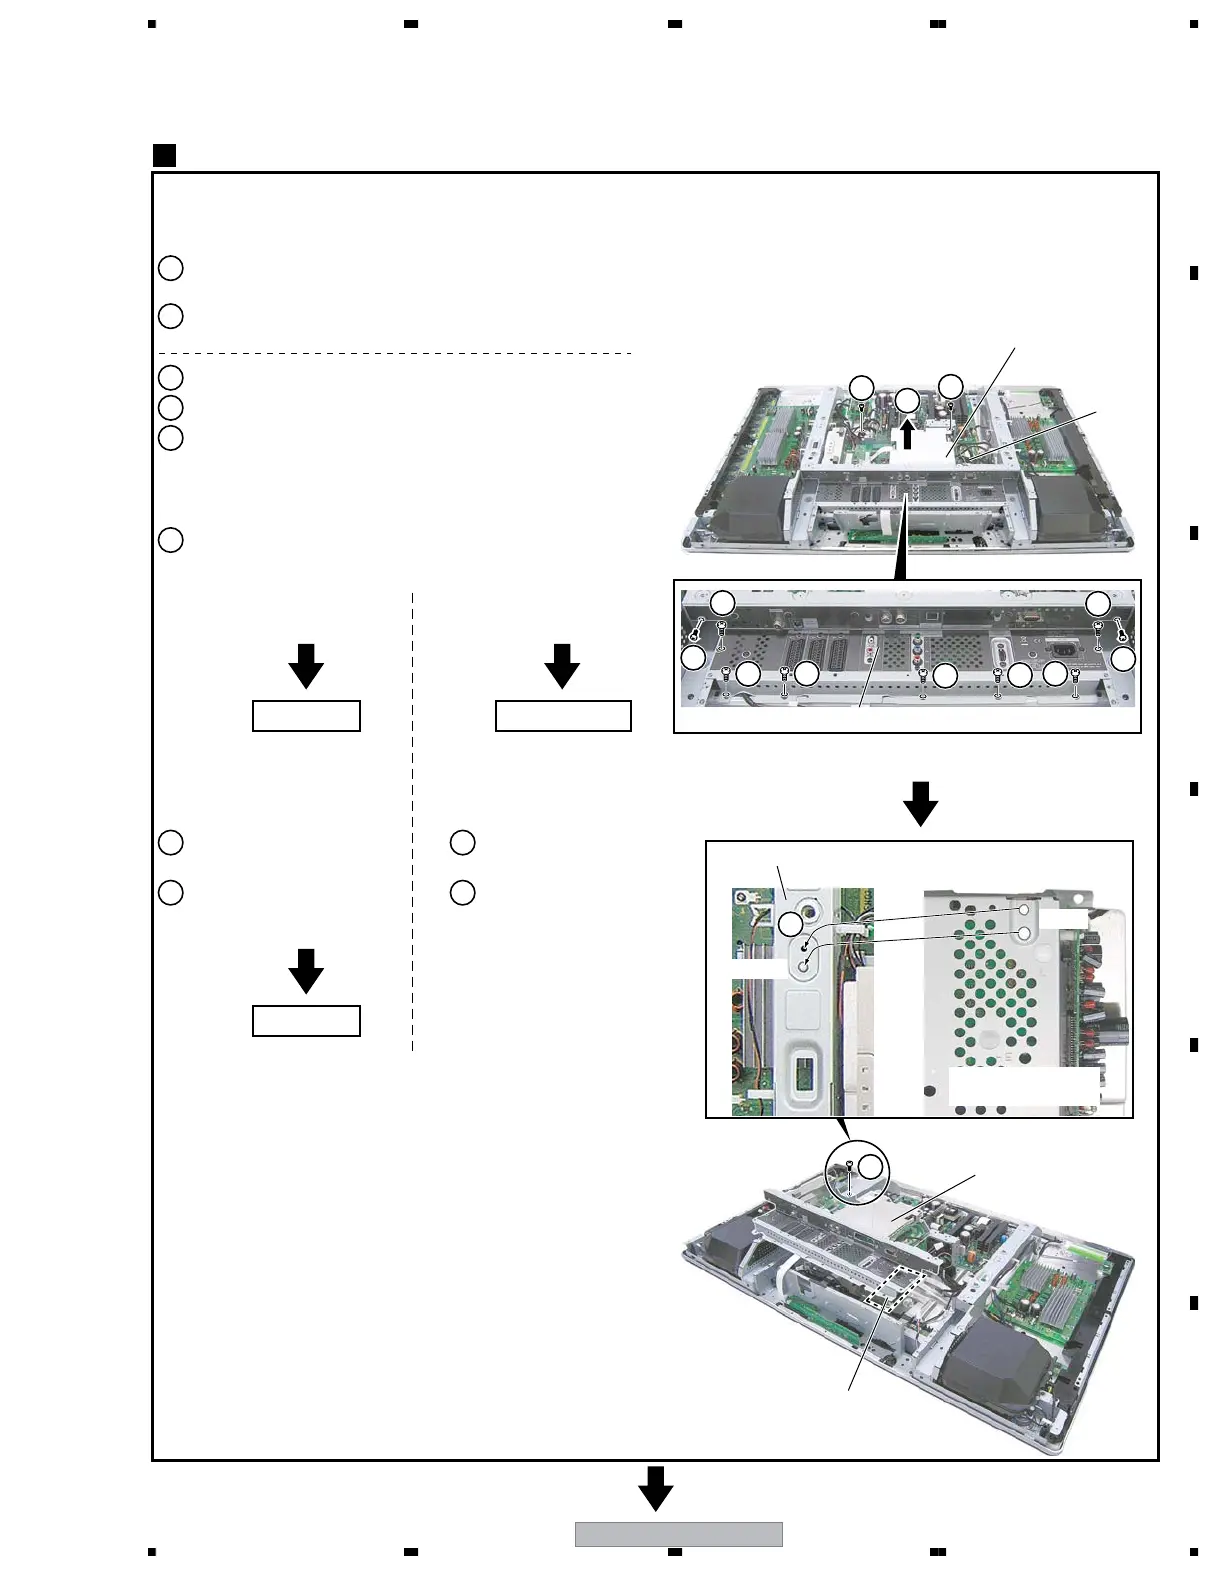
Diagnosis and replacement of the OB DIGITAL Assy
8
1
Remove the rear case (436SX).
(See the procedure ¥.)
2
Remove the under cover (436SX).
(See the procedure ø.)
3
Remove the two screws.
4
Remove the nine screws.
5
Disconnect cables, as required.
6
8
Remove the AV Block with the terminal panel E.
7
Dress the units, as shown
in the photo.
Install the screw.
8
7
Disconnect all cables on
OB DIGITAL Assy.
Replace OB DIGITAL Assy..
For diagnosis of the OB DIGITAL Assy, it is not necessary to
remove all the parts mentioned above. To perform a diagnosis
and replacement, follow the procedures below:
AV Block
AV Block
3
3
6
4
4
Terminal panel E
Sub frame L Assy 436SX
OB DIGITAL Assy
Projection
Holes
AV base chassis E
(Bottom view)
4
4
4
4
8
8
4
4
4
Diagnosis
Diagnosis Replacement
∗ Note: Be careful in handling the shielded flexible cable that
connects between the OBE MAIN and OB DIGITAL
Assys.
Note:
In this state, it is not possible to check the front inputs. If checking
of the front inputs is necessary in this state, remove Terminal
panel E then connect the Flexible Extension cable for servicing
(GGD1170) between CN4001 on the OBE MAIN Assy and
CN7804 on the FRONT Assy.
∗
 Loading...