PDP-6071PU
90
1234
1234
C
D
F
A
B
E
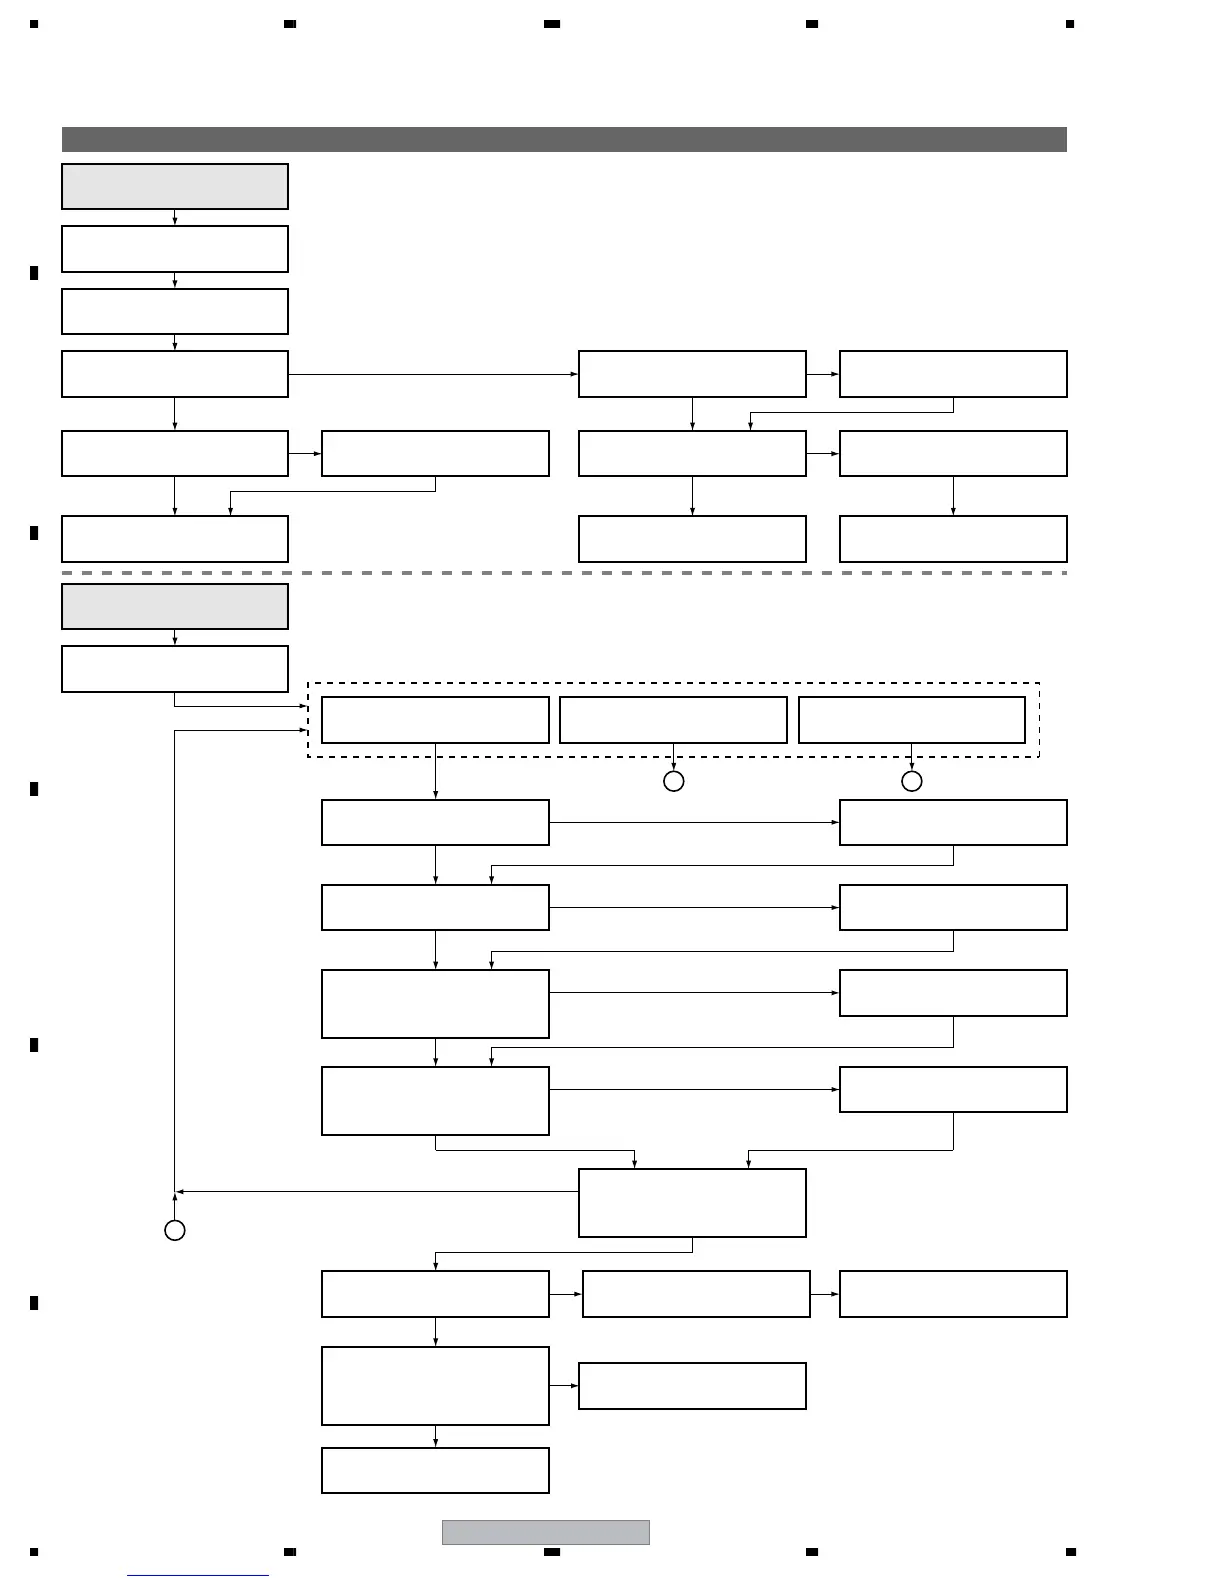
5.1.4 FLOWCHART OF FAILURE ANALYSIS FOR THE DRIVE ASSY
Flowchart of Failure Analysis for The Drive Assy (1)
X/Y DRIVE Assys
No
No
No
NG
NGYes
Yes
Yes
Yes
Are the FFC cables properly
connected?
Are the panel FFC cables properly
connected to the X/Y DRIVE Assys?
Is the input signal normal?
Replace the panel chassis.
Yes
Replace the X/Y DRIVE Assys.
NG
Replace the DIGITAL Assy.
Properly connect the panel
FFC cables.
Properly connect the FFC cables.
No
Replace the FFC cables.
Reset lighting is not displayed.
Is the waveform normal when the
voltage is applied to the panel?
Failure analysis for the
drive system ⇒ DR1
No
Is the waveform normal when the
voltage is applied to the panel?
(See the oscilloscope photos.)
Are all the connectors properly
connected?
Reconnect the connectors.
No
Set the VH voltage correctly.
X DRIVE AssyY DRIVE Assy / SCAN Assy
ADDRESS Assy
Abnormality across the whole
screen, such as luminescent spots
C
E
D
NG
Yes
No
Set the VYNRST voltage correctly.
NG
Is the VH set voltage (130 V)
correctly set?
Yes
Is the VYNRST set voltage
correctly set (set value: designated
for each panel)?
No
No
Another Assy may be in failure.
Set the VYRST voltage correctly.
No
Replace the FFC cables.
Replace the DIGITAL Assy.
Replace the Y DRIVE Assy.
Replace the SCAN Assy.
NG
NG
NG
Yes
Yes
Yes
Yes
Yes
Is the VYRST set voltage correctly
set (set value: designated for
each panel)?
Is the input signal normal?
(See the oscilloscope photos.)
No
Is the waveform of the control
signal from the SCAN Assy
normal?
(See the oscilloscope photos.)
Failure analysis for the
drive system ⇒ DR2
Because it is difficult to identify which drive is in failure, follow the flowchart below to check each Assy.
 Loading...