EasyManua.ls Logo

Pioneer PDP-60MXE20 User Manual

Pioneer PDP-60MXE20
195 pages
To Next Page IconTo Next Page
Page #1 background imageLoading...
Page #1 background image
PLASMA DISPLAY MONITOR: PDP-60MXE20
VIDEO CARD: PDA-5003 / PDA-5004
TABLE TOP STAND: PDK-TS26
WALL MOUNT UNIT: PDK-WM03
SPEAKER SYSTEM: PDP-S55-LR
This manual provides precautions and information for installation, preparation, and handling of the Plasma Display and
its dedicated mounting hardware.
Before installation and preparatory work, choose a safe and appropriate site after thorough consideration of construction,
materials used, strength, and surroundings. If adequate safeguards are not in place, immediately halt the installation
process and discontinue marketing activities.
TECHNICAL MANUAL (Ver. 1.0)
FOR PIONEER PLASMA DISPLAY MONITOR WHEN USED WITH
VIDEO CARDS (EXPANSION SOLUTIONS CARDS)
To use this product safely
When using this product attached to a ceiling or wall or
piled up, there is a danger that, according to its weight or
attachment method, it may fall down or fall over.
In order to use this product safely, be sure to have a
professional installer or the retail agent perform the
installation work. Verify that it is appropriately attached and
take adequate safety measures.
ABOUT MOUNTING/INSTALLATION
This product is sold under the assumption that installation
will be performed by experienced, qualified experts.
Refer all mounting and installation work to qualified
personnel or consult the nearest PIONEER dealer for
assistance.
We accept no responsibility for accident or loss resulting
from failure to select an appropriate installation site,
situations occurring during assembly, installation,
mounting, operation resulting from modifications made
to this product, or from natural disasters.
PRECAUTIONS:
We accept no responsibility for losses resulting from the
use of parts other than those supplied by Pioneer or those
authorized by Pioneer.
We guarantee the performance of our products only when
they are assembled and adjusted as described in this
manual.
The specifications and external designs shown in this
manual are subject to change without notice.
Attention professional installer
Install this product according to the instructions in the
owner’s manual or installation manual.
To ensure safety when this product is installed on a ceiling,
wall or stacked be sure to take measures to prevent any
danger of the panel(s) falling down or falling over.
Choose an installation or attachment location that has
sufficient strength to fully withstand its weight.
When installing it on the floor, select an adequately stable,
flat, and level place.
To prevent damage to the power or connection cords, take
great care not to place any equipment on them or pinch
them between any equipment.
Absolutely do not alter the product or any of its attachment
hardware.

Table of Contents

Question and Answer IconNeed help?

Do you have a question about the Pioneer PDP-60MXE20 and is the answer not in the manual?

Pioneer PDP-60MXE20 Specifications

General IconGeneral
Depth122 mm
Width1470 mm
Height880 mm
Weight62000 g
Pixel pitch0.966 x 0.966 mm
Product colorBlack
Audio (L/R) out1
Noise reductionYes
Display diagonal60 \
Display brightness1000 cd/m²
Display resolution1365 x 768 pixels
Display technologyPlasma
Power requirementsAC 100 - 240 V, 50/60 Hz
Viewing angle, horizontal160 °
Display viewable area (HxV)1318.6 x 741.9 mm
Operating temperature (T-T)0 - 40 °C
Power consumption (standby)0.8 W
Power consumption (typical)450 W
Operating relative humidity (H-H)20 - 80 %

Summary

Introduction

Introduction

Provides an overview and context for the manual's content.

Features

Features and Functions of this device

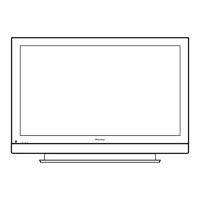
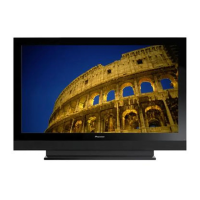
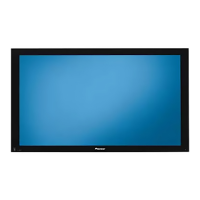
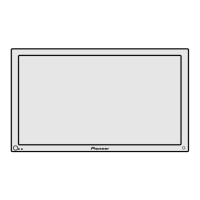
Details the key features and functionalities of the plasma display.

Specifications

2.1 Specifications

Lists the technical specifications of the plasma display.

2.3 Controls and Connectors

Identifies and explains the various controls and connection ports.

2.5 Remote Control Unit

Explains the functions of each button on the remote control.

Installation Site Requirements

3.1 Installation Site Requirements

Outlines the necessary conditions and safety precautions for the installation site.

Installation Conditions

3.2 Installation Conditions

Details environmental and operational conditions for installation.

3.2.3 Product mounting holes

Specifies the locations and types of mounting holes for installation.

Installation Procedures

3.3 Installation Procedures

Step-by-step guide for unpacking and preparing the unit.

3.3.4 Wiring

Guides on connecting power and signal cables for proper setup.

Special Installation

3.4 Special Installation

Covers alternative installation methods beyond standard mounting.

3.4.1 Mounting to fittings

Specifies guidelines for mounting the unit to various fittings.

3.4.2 Hanging on the wall

Instructions and restrictions for wall-mounting the display.

3.4.7 Place product upright and flush into wall (embedding in the wall)

Instructions for installing the unit upright and flush within a wall.

Standard Mounting Components

4.1 Standard Mounting Components Features and Characteristics

Describes the features and benefits of standard mounting hardware.

Handling Mounting Components

4.2 Handling the Standard Mounting Components

Provides guidelines for handling and installing mounting hardware.

4.2.2 Precautions for installation contractors

Specific advice and responsibilities for installation professionals.

Video Card: PDA-5003/PDA-5004

4.3 Video Card: PDA-5003/PDA-5004

Details specifications and information for the video cards.

4.3.1 Specifications

Lists the technical specifications for the video cards.

4.3.3 Installing procedures

Step-by-step guide for installing the video cards.

Table Top Stand: PDK-TS26

4.4 Table Top Stand: PDK-TS26

Information about the table top stand accessory.

4.4.4 Stand assembling

Step-by-step guide for assembling the table top stand.

4.4.5 Attaching the Stand to the Plasma Display

Instructions for mounting the display onto the assembled stand.

Wall Mount Unit: PDK-WM03

4.5 Wall Mount Unit: PDK-WM03

Information about the wall mount unit accessory.

4.5.3 Hardware assembly and Plasma Display attachment

Details the assembly and attachment process for the wall mount.

Speaker System: PDP-S55-LR

4.6 Speaker System: PDP-S55-LR

Information about the speaker system accessory.

4.6.3 Installation on the Plasma Display

Step-by-step guide for installing the speaker system onto the display.

Before Beginning Adjustment/Setting

5.1 Before Beginning Adjustment

Prepares the user for adjustments by outlining methods and modes.

5.1.1 Operation Mode

Explains the four operating modes of the display.

5.1.3 List of Input Correspondence Signals

Maps input signals to screen sizes and formats.

5.1.4 List of Adjustable and Settable Items

Lists all adjustable settings available in Menu and Integrator modes.

Normal Operating Mode

5.2 Normal Operation Mode

Details basic operations possible in the normal display mode.

5.2.1 About normal operation mode

Explains controls like input switching and screen size adjustment.

Menu Mode

5.3 Menu Mode

Introduces the on-screen menu system for adjustments.

5.3.3 Example of a Menu Mode Operation

Provides a step-by-step walkthrough of a typical menu adjustment.

5.3.4 Adjustment and setting in the Menu Mode

Details various settings like Color Temperature, DNR, and MPEG NR.

18) Screen Position, Clock Frequency and Clock Phase Adjustment

Manual adjustment of screen position, clock, and phase for optimal display.

Integrator Mode

5.4 Integrator Mode

Introduces the advanced adjustment mode for professional settings.

5.4.1 About the Integrator Mode

Explains how to enter, exit, and use the Integrator Mode.

5.4.3 Adjustment and Setting in the Integrator Mode

Details the adjustment items available in the Integrator Mode.

1) PICTURE Adjustment

Adjusts picture settings like contrast, brightness, and color in Integrator Mode.

11) VIDEO WALL Setting

Configures multi-panel video walls, including divider and position settings.

13) Assigning an ID

Assigns unique IDs to displays for video wall or RS-232C control.

Memory Area Tables

5.4.4 PICTURE, White Balance and SCREEN Position Adjustment Values Memory Area Tables

Details memory areas for PICTURE, White Balance, and SCREEN adjustments.

RS-232C Adjustment

5.5 RS-232C Adjustment

Details how to control and adjust the display via PC using RS-232C.

5.5.2 Interface

Describes the connector pin layout and data format for RS-232C communication.

5.5.5 List of RS-232C Commands

A comprehensive list of RS-232C commands and their functions.

Screen Burning

5.6 Screen Burning

Explains the phenomenon of screen burn-in and how to prevent it.

Precautions on Connecting Camera Images

5.7 Precautions on Connecting Camera Images

Warns about potential panel damage from static images like surveillance cameras.

5.8 Concerning frame delay (lip sync)

Provides information on video signal input delay and lip sync considerations.

Precautions

6.1 Precautions

General precautions for operation, potential issues, and error messages.

7 Self-diagnosis Function

Explains how to interpret and resolve error messages shown on the screen.

Maintenance

1) Be sure to unplug the power cord from the power outlet before performing maintenance.

Essential safety step before any maintenance or disconnection.

3) Screen (front protection panel)

Specific instructions for cleaning the delicate screen surface.

Related product manuals