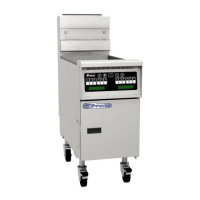
PitcoSolsticeandSolsticeSupremeHighEfficiencyGasFryers
SG/SSHSeriesServiceManual 39
6. Remove the two (2) screws, which hold the
drain lock switch, using a flathead screwdriver.
7. Remove the burner rack by pulling it toward the
front of the unit.
8. If necessary, replace the insulation on the back
of the burner rack.
9. Reinstall a new burner assembly by following
steps 1 through 7 in reverse.
 Loading...