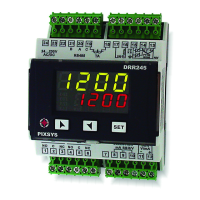
User manual - DRR245 21
9 Latch on functions
For use with input
P o t .1
(potentiometer 6 KΩ) and
Po t.2
(potentiometer 150
KΩ) and with linear input (0..10 V, 0..40 mV, 0/4..20 mA), it is possible to associate
start value of the scale (parameter 6
Lo L.i
) to the minimum position of the
sensor and value of end scale (parameter 7
u P.L.i
) to the maximum position of
the sensor (parameter 8
La tc.
configured as
Std .
).
It is also possible to fix the point in which the controller will display 0 (however
keeping the scale range between
Lo L.i
and
u P.L.i
) using the “virtual zero”
option by setting
u .OSt.
or
u.Oin.
in parameter 8
La tc
.
If you set
u.Oin.
the virtual zero will reset after each activation of the tool; if you
set
u .OSt.
the virtual zero remains fixed once tuned.
To enable the LATCH ON function select chosen configuration for parameter
LA t c
2
.
For the calibration procedure refer to the following table:
Press Display Do
1
c
d
simultaneaously
Exit parameters
configuration. Display 2
shows the writing
LA t c
.
Place the sensor on
minimum operating
value (associated with
Lo L.i .
).
2
d
Set the value on
minimum. Display shows
Lo w
.
Place the sensor on
maximum operating
value (associated with
u p L.i .
).
3
c
Set the value to
maximum.
The display shows
Hi G H
.
To exit standard
procedure press |. For
“virtual zero” settings
place the sensor on the
zero point.
4
|
Set the virtual zero value.
Display shows
ui rt
. NB:
For selection of
u.0in.
the procedure in point
4 should be followed on
each re-activation.
To exit procedure press
|.
2
The tuning procedure starts by exiting the configuration after changing the parameter.