Quick Reference Manual
IMPORTANT !!!
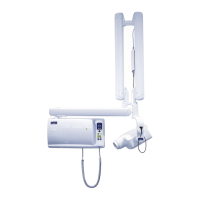
Planmeca Intra is factory pre-programmed for
short cone and F-speed film
(i.e. Kodak Insight film)
To change the preset density settings (film type):
The density setting will determine how dark the image will be. Changing the density setting is a quick way of
adjusting all the pre-set buttons at once for a specific film in use.
1. Turn the x-ray off / on.
2. Turn off the bitewing button (no green light).
3. Press the SEL ECT key for 5 secs until time display flashes.
4. Press the SEL ECT key briefly once. The kV display should now flash.
5. Press the SEL ECT key briefly once. The mA display should now flash.
6. Press the SEL ECT key briefly once. The time display will now show
the density setting.
7. Use UP/ DOWN arrows to adjust density setting (see table below).
8. Press the SEL ECT key for 5 seconds to return back to user mode.
For digital sensor and phosphor plate applications,
change the x-ray to the correct mode before adjusting density settings.
NOTE: Press MODE key for 4 seconds to change to Phosphorus plate (P) and digital (d).
To change individual preset button settings:
1. Activate the button that you want to program.
2. Press the SEL ECT key for 5 secs until time display flashes.
3. Set the time to desired value with UP/DOWN arrows.
4. Press the SEL ECT key briefly once.
5. Set the kV to the desired value with UP/DOWN arrows.
6. Press the SEL ECT key briefly once.
7. Set the desired mA value with UP/DOWN arrows.
8. Press the SEL ECT key for 5 secs to return back to user mode.
NOTE: To program multiple buttons individually, repeat the steps 1-7.
short cone long cone
D -speed film 4 7
E -speed film 1 4
F -speed film 0 3
 Loading...


